Sign In
 Create Account


 View Garage
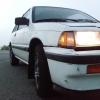
I've searched endlessly for someone who properly retrofitted projectors in some 3g Civic headlights, to no avail. I do lots of night travelling and honestly, the stock light output is far from good. The bonus is we have glass lenses, so they don't fade over time. I purchased Bi-xenon Morimoto Mini H1 projectors from theretrofitsource.com, which were the smallest available. These are especially nice because they require little to know modification of the headlight housing; which I found was true - but I made a boo boo on the way.
- I started by removing the headlights from the car.
- Separate the headlight unit from the base, by pulling the 2 springs off. Then you can pull the headlight off the 2 adjustment screws.

- Remove lenses from headlight assembly. I put them in the oven, 1 at a time. The first one wen't pretty smoothly, at around 200F for a total of almost 30 minutes.
 That's the headlight with the lens removed, with the shroud and projector test fitted inside. The shroud fits pretty snug.
 - Unfortunately the splitting of the second light didn't go so well...
 It was more than likely human error as I was getting antsy to have the lens off. however, there was way more glue, or whatever it was holding it in place.
 - Initially, my intentions were to keep the light factory looking, eventually sanding the inside flutting from the headlight to have that desirable cut-off the projectors give. But after breaking the lens, and not wanting to pay the price, or wait for a used set (since this is my daily), I improvised. At first the projector would have fit behind the lens, and the projector is mounted through the bulb hole and screwed in from the back where it mounts permanently.
- Remove the bulb holders from the back, don't forget the small set screw.

- Now to make replacement lenses I decided I would just mount them flush again the metal headlight, instead of trying to fabricate something that was angled like the original lenses. This was a lot less trouble, and I thought I would turn out looking more like the 84-85 Civics with the recessed headlights.
- Although for the projector to clear the lens that would now be flush I had to push it further back into the headlight, which meant I had to hack at the back to allow for clearance.
 So I did that, and glued a flat square piece of aluminum behind it, in which I also cut out a shape to allow for the projector to sit back. I would eventually drill 4 holes into this plate and mount the projectors with screws.
 - Next, the headlight "bracket" for lack of better term, needed to be altered, since the headlight would now sit back a little bit. So I glued a piece of sheet metal and painted it black, to cover the rusty and uneven bits underneath.

- After having removing some pieces from inside the headlight the chrome scratched up a bit so I painted that all black as well.

- Then I drilled the holes into that previously mentioned aluminum plate, and needed to use spacers (which were 1/4" rivet threaded rivet sleeves, about maybe 3/4" long) to mount the projector evenly. The spacers allowed the #8 screws to fit inside without having too large of an outside diameter that they would't rub again the projector and throw the screw on an angle.

- Used some red lock tite on the nuts, and used the same clear glue (which is made for sealing roofs) to seal the hole between the projector and the headlight.

- Added some glue around the projector lens and mounted the shroud

 Back to top