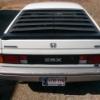
Noir - A Slow And Sleepy Rebuild Of A Gen 1
 anjin
26 Jan 2015
anjin
26 Jan 2015
While I'm updating this project, while doing the torsion bars I found the hubs were showing bearing issues. So I pulled the knuckles off, and fitted new bearings. That went well, but one tie rod end was past code, as was one ball joint on the radius arms. While I have acceptable replacement radius arms, both crx and integra ones, I had to order tie rod ends. Another evening or two coming up on the front suspension.
But it was an opportunity to pull the ball joint apart on the radius arm. Very interesting comparision with the later ones from the gen 2 crx. The later ball joints are a complete unit that drop into a prepared hole and are secured by circlips. The gen 1 has the end of the radius arm as the cartridge for the ball joint. Inside that end there are a series of stepped sections, with a plastic sleeve fitted over the ball joint that fits between the stepped sides and the ball joint. The bottom of the section is filled with grease and a metal plug. I'll post a picture later which explains this structure. The really interesting part of this is that it looks rebuildable. A new sleeve and end plug (welsh plug maybe) and regrease should allow us to rebuild the unit. My guess is that if I pull a gen 2 crx unit apart the sleeve and maybe the ball joint will be the same as the gen 1. I have an old gen 2 unit to destroy. After the engine rebuild I'll explore that.
anjin
19 Apr 2015
Man, three months since an update. Quite a lot has happened. I was installing the pistons, and the third one was an epic fail. The oil ring slipped out and bent, and while tapping down the piston I scored the cylinder wall, enough that I think it needs another bore and set of pistons. Rather than do that, I swapped to another block, rebored that, and went to the 75.5mm P28 pistons and the original rods. That all worked out, and the engine is now assembled with the worked head and mugen cams.
I've gone for an electronic advance and idle control, using the PM7/P28 style components, and a PM7 intake manifold. I want good control of the ignition maps, which isn't possible with vacuum advance dissys unless you lock the base plate and allow an ecu to vary the timing. I had bought a new distributor which bolts up the the head perfectly, but the orientation fouls the second sensor on the other cam. So I have transplanted the interior of a B 16 series distributor which has all the components in the one body into the new distributor body. The whole lot went in perfectly, including the distributor shaft. Only have to repin the plugs now. Confirms a theory I have that the internal components are all the same and only the body is different.
Just started working on the gearboxes. I have two CG boxes, one of which is the ex race box with different ratios to standard and cruchie changes. I'm going to take the synchros and synchro rings out of the normall box and put them into the ex race box, as well as reinstalling the mugen plate lsd back from the S 80 gearbox its currently in. Fortunately the disassembly process in the CG boxes is quite easy.
Also started on the bodywork with replacement fibreglass panels. The front fenders have been in place for a while, and I was fitting the side skirts or side rocker covers. They aren't the standard style, and fit over the top of the front fender up to the point where the top recess is. I plan on doing bodywork when its light and engine work in the evenings.
Hopefully the next post won't be so long. Should have some pics soon.

anjin
30 Apr 2015
Had to redo the drivers side knuckle again. This time I used a new hub from the gen 2 crx D16A8 series - the hub is the same for the d series first gen and second gen crx's. Does not work for the ew series engines as the axles are smaller diameter on that combination.
Pics
New hub; old showa shortened strut

Fiberglass fender and mugen style side skirt. The side skirt fits over the fender, but getting a flush fit will be a mission.

Refreshed engine with electronic dissy. Gone for an antique look on the valve cover.

Did the rear springs this morning - mugen lowered springs with koni red struts. Thy rear is quite low now. Pics later.
Working on brakes and gearboxes as well. Busy time ahead for the next couple of months.
anjin
24 May 2015
CG gearbox is now ready for use. Very interesting week. As mentioned, the gearbox had non standard gear ratios, and some crunching in third and fourth.
I found that the third gear set had damage to the synchro section on the steel gears rather than damaged brass synchro's. The gears from the spare box went in instead. I also found that b-series brass synchro gears are a swap in replacement for the third/fourth and fifth gear sets; but not for first/second. I examined the various gear selectors and chose the best ones. I was also looking to choose the best bearings, but found that the two boxes had different sized bearings in the top of the casing. Should have suspected something right then!
When reassembling the box the first time I noticed that the countershaft bearing didn't want to come fully up to the desired place, and getting the clip into the groove in the bearing was very difficult. I had to upend the box to get it to set. Added the fifth gearset etc. Then found the gear selection wasn't working.
I suspected the problem was in the countershaft being lifted too high and either jamming the gears or misaligning the forks at the selector. So started to disassemble the box, testing the gear selection each step. As soon as I disengaged the clip from the bearing I had gear selection again, except for fifth. Took the casing off, and took the third gear out and compared it to the original. About 2.5mm difference in height. So I found a washer which was hard steel, clearanced it for the shaft above the third gear, and checked that the countershaft and mainshaft bearings now aligned for height. They did. Put the casing on again, and had all gears except for fifth.
After comparing the two sets of gears and forks and finding the differences were not significant, I saw that the fifth gear was not being lifted enough to disengage the gear. I had swapped the fifth gear selector shaft between boxes, and a comparison showed that there was a difference in the height of the hole for the fork pin. So another decasing, swap the shafts, and reassemble. It now works.
So there are significant differences between various years of the CG gearboxes (D16A1 integra and some jdm D16A1 CRX's). And I learned that when swapping parts between boxes you really need to have a significant level of paranoia!
anjin
18 Aug 2015
Not a lot of progress, apart from some wiring in of sensors etc. I have a gen 2 crx needing quite a lot of work to get it back to where I want it after being used by one of my sons.
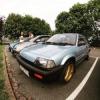
Did pick up a set of these locally. 14, 6JJ, etc. I have desired these for a long time, so it was great to get them, but a surprise they were in Perth. Caps and emblems next.

 sedanman
19 Aug 2015
sedanman
19 Aug 2015
Keep up the good work.
Billy.
 IOW3GCIV
20 Aug 2015
IOW3GCIV
20 Aug 2015
lovely wheels! Along as you enjoy the build, doesn't matter how long it takes.
anjin
25 Aug 2015
Big moment last night, at least in the context of this build. Took the engine off the stand and put it on the floor.
Flywheel now attached - was in good condition so didn't touch it. Looked at the three puck clutchplate, and decided it really did need the friction pads renewed beforre I put it in. I had been kind of hoping up until then that I'd get away with it.
Also looked at the engine bay closely. black paint over red, and not well done. Going to have to clean that properly and repaint it. Last time I did this I went for a white engine bay, which did work in terms of getting visablity and didn't work in terms of keeping it clean. Still like the idea of a white bay, so I'll try again, whith better quality paint and application. Not doing a wire tuck!
anjin
27 May 2020
So 5 years on I return to this project. All that has happened in that time is an attempt to paint the engine bay. Life in the form of kids returning home happened - son and wife and a kid then two kids; and work. Now retired from work and have most of the house to ourselves, so time is not a problem. Only motivation.
Managed to find an original browntop jdm zc motor with ecu. Really nice condition, I know the previous owner who said it had no problems. Have the gearbox as well. So now looking to do a period correct type project. At least the exercise should be a basic plug and play with only a little work to be done to make it work.
Don't expect to have it going that quickly however - other projects and grandkids and ze virsu will see to that.
 strudel
27 May 2020
strudel
27 May 2020
Congrats on the retirement. It's been a while since we met in Perth. Had a great time then. I am also finally getting back to the Mini project with this virus problem keeping us home.
Still trying to get the D16A1 into the Mini. Got a partial engine cradle started and figuring out how to get the CRX suspension mounted in properly. Think time takes up more than the actual work time.
 CSPCRX
27 May 2020
CSPCRX
27 May 2020
Congratulations on retiring and glad to see your back at it with the CRX. Brown tops are pretty rare now.
anjin
28 May 2020
Hi Strudel. That was a while ago now, but still remember the jump for joy from your daughter.
Keep me posted on the D16A1 into the mini. A local mini owner with an EW5 motor is looking to do the same style of thing.
anjin
28 May 2020
Trying something different on the rear suspension. The mugen aftermarket anti roll bar had something like a 23 mm torsion bar in the internal part of the rear cross beam. That works out to a serious upgrade of about doubling the spring rate (130000 to 280000 using the fourth power of the diameter). So I have cut an oem arb at what I think is the right place - about half - and will weld it up and fit it. Going to be interesting.
strudel
28 May 2020
I'm using the CRX front suspension and crossmember in the Mini. Just having the first part of the engine cradle welded up. Will post a picture later just for interest sake.


