Jump to content


'86 Si Addco Swaybar Install


  • You cannot reply to this topic
11 replies to this topic

#1
NurburgRinger

  • Slowpoke
  • PipPip
    • Group: Contributing Member
    • Location:Milwaukee
    • Drives: '86 CRXSi, '85 Ferrari 308GTS, '99 BMW 528i, '06 MadAss scooter
hey all,
After refreshing the front suspension , replacing the rusted sunroof with a Heel-Toe FG jobby, and cleaning up the wheels and engine bay I finally got around to putting in the Addco rear sway bar last weekend.

Fairly easy job, took about 2 hours, made easier with a set of ramps (keeps the axle at close to normal ride height so fitment is accurate. Some weight in the trunk during the install wouldn't hurt either) and angle grinder.
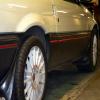
I haven't found any photo-tutorial posts on a rear SB install so here it is.

The non-stock exhaust that came on my car made things tight for the passenger-side frame mount, but after ~200 miles no interference issues.


First install the bar "pillow blocks" - these are very firm and required locking the bar in a vice, spreading the blocks with a screwdriver and slipping over the end. Sounds easier than it is. Then a bunch of whacks with a dead-blow hammer to move them around the corner of the bar and into place. I brushed a thin coat of "Super lube" (clear stuff in a tube from Harbor Freight) on to the bar where the block would end up - about 1" from the 'corner' - before finally positioning them.

Then mark the axle at the center of the blocks, equidistant from each end of the axle.
Press the bushing-bracket completely over the 2 bushes (vise, clamp, hammer).

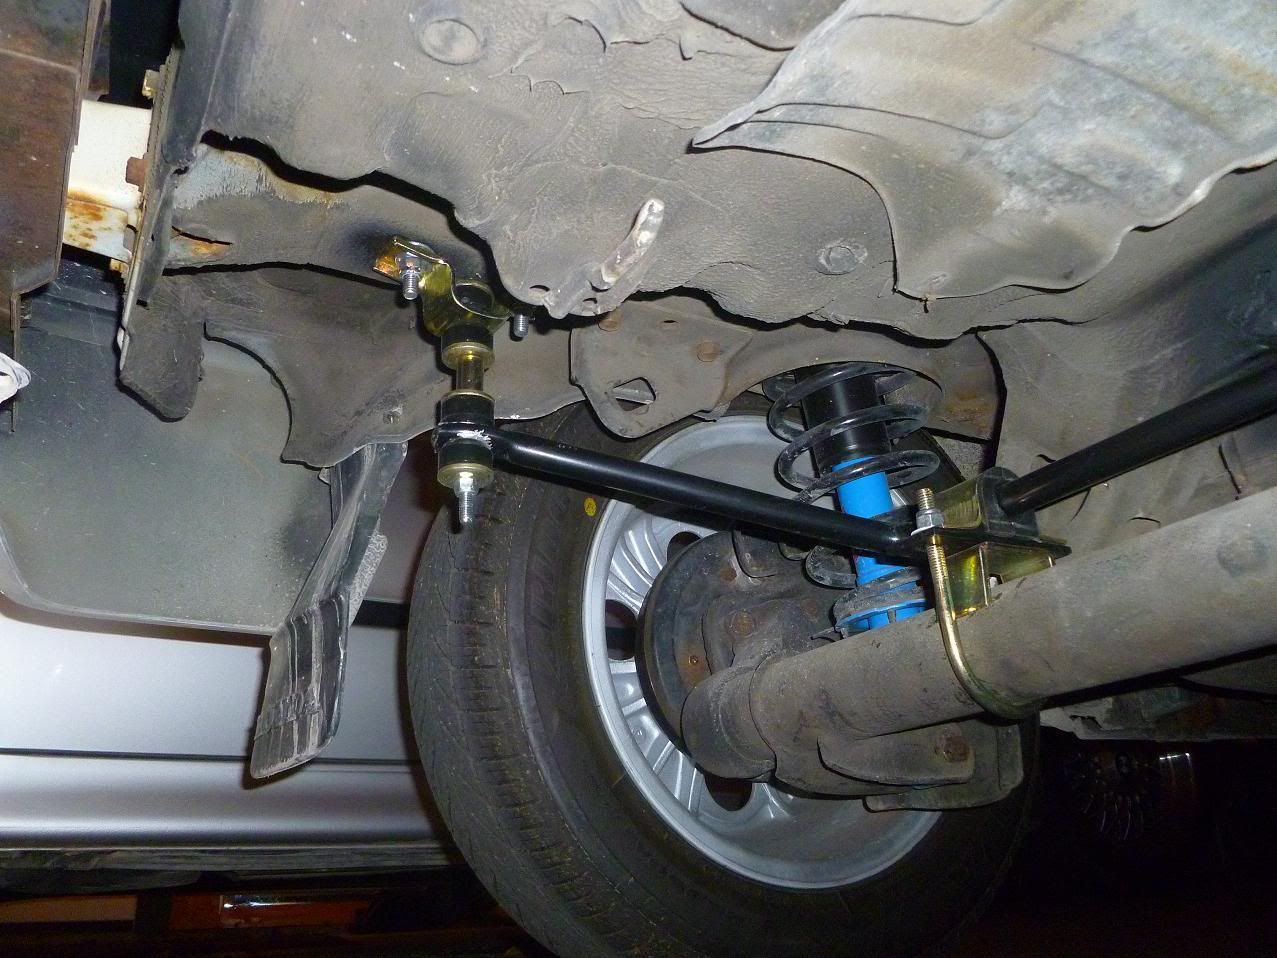
This is where a third hand would be nice: with the bar&bushes laying on top of the axle assemble the U-bolts around the bottom of the axle on the marks made earlier, through the flattened-U channel, flat bar, and finally the bushing bracket. Add washers and loosely screw on nuts.


Now it's time to locate the frame brackets. Due to the non-OEM exhaust hanger the bracket on the passenger side is slightly different than the driver's on mine. Shouldn't be a big deal, but I had to drill 2 holes on the pass side while I could use the existing (slightly oversized with a raised lip I ground flush) hole on the driver's side for one side of the upper U-bolt.
Assemble the vertical bushing-rod inside it's bracket, position the sway bar (will be TIGHT to move), and mark the location of the holes you'll need to drill. I used a spring loaded center punch, and scratched an X. Starting with a smaller bit, drill the 3 (or 4) holes into the frame. Use the upper U-bolt to chose a bit - just slightly larger is necessary to allow snaking the bolt through the frame.
Shoot the exposed metal in the holes with some pain that will surely chip off and allow rust anyway and have dinner.
Come back, snake the upper U-bolts through frame, lube the round bushes (I used never-seize, we'll see how long it takes to start squeaking), install in correct order, and tighten up the bolts while making sure none are pinched/crooked.


Take her down and out for a spin.

The 2 axles bushes WILL be very tight/stiff at first. There's a worrying amount of 'stiction' at first, but after a few days and drives mine have quieted down and greatly smoothed out . After about a week and ~200 miles there still seems to be more 'bounciness', but the lack of roll in curves is dramatic. First 270 degree off-ramp I took made me smile like loon.

Even with my stock-sized, all weather tires and basically stock suspension I can't wait to take her autocrossing in 2 weeks.
Nice thing is the mod is easily reversible back to stock should you ever want to do it.

Now I just have to diagnose a pesky CEL/ECU error (a bit rough until around 3500rpms, then full power) and she'll be just about perfect.
Anyone have a good, cheap '86Si ECU for sale????

cheers!
Kurt

#2
cbstdscott

  • Swap in HF drums, check your cam timing
  • PipPipPipPipPipPip
    • Group: 2015 Contributor
    • Location:CRX Heaven, Los Angeles
    • Drives: '87 CRX Si, '07 Civic Si Sedan, '15 Scion FRS
    • Image Gallery
IMHO this is the single best suspension mode you can make to this platform.
Posted Image

Form Follows Function

#3
NurburgRinger

  • Slowpoke
  • PipPip
    • Group: Contributing Member
    • Location:Milwaukee
    • Drives: '86 CRXSi, '85 Ferrari 308GTS, '99 BMW 528i, '06 MadAss scooter
QUOTE (cbstdscott @ Sep 1 2011, 08:46 PM) <{POST_SNAPBACK}>
IMHO this is the single best suspension mode you can make to this platform.


I'd tend to agree. Hopefully the straight-line ride quality keeps improving as the bushes loosen up, if so then there's no real downside other than an increase in un-sprung weight.
I can understand why Honda didn't set the car up this way from the factory (unless they had been ueber-awesome and sold an SiR version with Mugen flares, 4-wheel discs and a 16V motor) but it is a cheap and easy mod for modest speed freaks like us smile.gif

#4
cbstdscott

  • Swap in HF drums, check your cam timing
  • PipPipPipPipPipPip
    • Group: 2015 Contributor
    • Location:CRX Heaven, Los Angeles
    • Drives: '87 CRX Si, '07 Civic Si Sedan, '15 Scion FRS
    • Image Gallery
QUOTE (NurburgRinger @ Sep 1 2011, 07:41 PM) <{POST_SNAPBACK}>
I'd tend to agree. Hopefully the straight-line ride quality keeps improving as the bushes loosen up, if so then there's no real downside other than an increase in un-sprung weight.
I can understand why Honda didn't set the car up this way from the factory (unless they had been ueber-awesome and sold an SiR version with Mugen flares, 4-wheel discs and a 16V motor) but it is a cheap and easy mod for modest speed freaks like us smile.gif


Honda went the cheap route with the internal torsion bar "sway bar." If you had installed the Addco bar backwards (the main part suspended from the body and only the link ends on the axle) you could have saved the unsprung weight. I believe this is what the race teams did.

Scott
Posted Image

Form Follows Function

#5
NurburgRinger

  • Slowpoke
  • PipPip
    • Group: Contributing Member
    • Location:Milwaukee
    • Drives: '86 CRXSi, '85 Ferrari 308GTS, '99 BMW 528i, '06 MadAss scooter
Cheap, and also plenty good for the vast majority who bought CRXs new.
The rest of us want fully independent rear suspension, more roll stiffness and springs, 4 wheel discs etc smile.gif

Good point on the mounting - I thought of that while laying under the car but the exhaust system on mine would interfere, and new frame brackets would be needed.
Is that how you mounted yours? Any pics?

QUOTE (cbstdscott @ Sep 2 2011, 08:08 AM) <{POST_SNAPBACK}>
Honda went the cheap route with the internal torsion bar "sway bar." If you had installed the Addco bar backwards (the main part suspended from the body and only the link ends on the axle) you could have saved the unsprung weight. I believe this is what the race teams did.

Scott


#6
cbstdscott

  • Swap in HF drums, check your cam timing
  • PipPipPipPipPipPip
    • Group: 2015 Contributor
    • Location:CRX Heaven, Los Angeles
    • Drives: '87 CRX Si, '07 Civic Si Sedan, '15 Scion FRS
    • Image Gallery
I put my LightspeedRacing/Addco (they are the same design) bar in the accepted manner.... But now that I have a side exhaust and no muffler in the way... I should look into doing that!

Scott
Posted Image

Form Follows Function

#7
asianflava

  • Slowpoke
  • PipPip
    • Group: Members
    • Location:Central FL
    • Drives: 07 Tundra CrewMax 89 Si hatch 85 & 91 CRX Si
I thought the Lightspeed bar used the bolt holes from the tow eyes after they were removed? At least that's what I remember.

You can barely make out the bracket under the front swaybar.


#8
Interceptor

  • Check your rearview if I'm not behind !
  • PipPip
    • Group: 2011 Contributing Member
    • Location:France
    • Drives: '84 Honda CRX - '72 Datsun S30Z - '89 Austin Mini
    • Image Gallery
    Garage View Garage
this reminds me of my own installation. Looks exactly just like yours. That's some good stuffn, you won't recognize your car's behavior tongue.gif

WTB Blue CRX interior parts & Dashboard


#9
Lymitliss

  • King Luke
  • PipPipPipPipPip
    • Group: 2012 Contributor
    • Location:Seattle, Wa
    • Drives: 1986 CRX Si B18C1, 1973 240Z V8 Conversion
    Garage View Garage
I love mine!
Build Thread- Here


#10
flashmatrix

  • Leadfoot
  • PipPipPipPipPip
    • Group: 2010 Contributing Member
    • Location:Central FL.
    • Drives: Lexus GS300
Thanks for the write up! Helped me a lot installing mine. My 2" exhaust got in the way, so I cut it and went side exit with a dump on mine to clear the bar. No big deal, as it overall shed some weight.

BTW something I noticed, the Addco bar setup is a whole lot lighter than the Jackson Racing/Suspension Techniques set up (which I previously had).

"Your arms are too short to box with GOD."


#11
Lymitliss

  • King Luke
  • PipPipPipPipPip
    • Group: 2012 Contributor
    • Location:Seattle, Wa
    • Drives: 1986 CRX Si B18C1, 1973 240Z V8 Conversion
    Garage View Garage
QUOTE (flashmatrix @ Nov 8 2011, 10:25 AM) <{POST_SNAPBACK}>
Thanks for the write up! Helped me a lot installing mine. My 2" exhaust got in the way, so I cut it and went side exit with a dump on mine to clear the bar. No big deal, as it overall shed some weight.

BTW something I noticed, the Addco bar setup is a whole lot lighter than the Jackson Racing/Suspension Techniques set up (which I previously had).


I'm surprised, I have 2 1/2" and it cleared just fine!
Build Thread- Here


#12
flashmatrix

  • Leadfoot
  • PipPipPipPipPip
    • Group: 2010 Contributing Member
    • Location:Central FL.
    • Drives: Lexus GS300
QUOTE (Lymitliss @ Nov 8 2011, 03:39 PM) <{POST_SNAPBACK}>
I'm surprised, I have 2 1/2" and it cleared just fine!

Yes but i had mine configured a bit different from factory.....

"Your arms are too short to box with GOD."