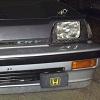
OK...turbo is gonna need some room.
Stock radiator must go.
Search through RPR and you will find that there USED TO BE a dual core HF width radiator available from the aftermarket.
No longer a viable option.
Old posts show people using EG/EK radiators but needing to cut the upper support or install strangely.
This is due to the fact that the radiator cap mounts on the top of the tank, which in turn needs to sit under the support.(=clearance issue)
I thought that this was how my would end up.
Searching through EBAY for aluminum EG radiators showed me a blurred picture of something I might be able to use.
A company called BeCool (
becool.com) produces a EG/EK radiator witjh an interesting location for the radiator cap...3 1/2" inward from the top tank.


Standard EG width and height, this radiator has a core 1 1/2" thick with 1 1/4" hose inlet/outlet.


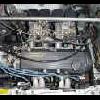
I pulled the stock radiator and test fitted...IT IS GONNA WORK!!!
I needed some radiator mounts. (off to the JY)
Found some...
the one on the left is upper mount for 86-89 Accord
the two on the right are lower mount from 88-91 Civic (model may vary)

Time to drill some holes


the lower mounts were screwed into the lower support area, thick side up.
The upper is screwed down with flat screws and retaining clips


Edited by SEEKERone, 27 August 2007 - 11:36 AM.
 Sign In
 Create Account


 View Garage


 Back to top