 Sign In
 Create Account
Hello Red Pepper crowd.
Picked up a sweet all stock '87 Si, 157k miles, needs a little tlc.
Found a '87 CRX Factory Service Manual, should be here Monday 02-06-12.
Been car wrenchin' for quite awhile, so pretty good mechanicaly.
Was just wondering, since I have a number of questions, think it best
to post them individualy, or do a Project thread and asked them all in that one thread ?
Like on a Gen1 CRX, to get all (4) corners of the car off the ground,
reckon the jackstands go under the stock left & right, front & rear rocker panel jacking points ?
Where in the front do you use a floor jack to lift the car to put jackstands under the front stock jack points ?
In the back, can a floor jack be used on the center of the axle tube,
and then put jackstands under the axle tube near each end ?
Thanks

Newbie & New Owner Of A Sweet '87 Crx Si
Started by PHAT87CRX, Feb 04 2012 05:51 PM
73 replies to this topic
#1
 Posted 04 February 2012 - 05:51 PM
-
- Slowpoke
-

- Group: Members
- Location:Chas WV
-
Drives: 1987 CRX Si NH-94M
 View Garage
 Back to top
#2
Posted 04 February 2012 - 09:36 PM
-

- Slowpoke
-
- Group: Members
- Location:Central FL
-
Drives: 07 Tundra CrewMax 89 Si hatch 85 & 91 CRX Si
Yeah you can do a 84-87 on the rear axle. You can also jack it on the rear tow hook (same for 88-91) and the front bump under the radiator support. I put my jack stands under the jack point on the pinch welds under the rocker panels.
#3
Posted 04 February 2012 - 11:05 PM
-

- Leadfoot
-
- Group: 2011 Contributing Member
If your pinch welds are shot, I have always found the rear subframe bolts to be an excellent stand point.
And that's exactly how I lift the rear of my car when I'm not looking at the suspension. Jack by the center of the axle and put stands under each end of the axle.
As for the questions, I'd do a combined thread. Then, if questions are getting missed, I'd do dedicated threads to those.
And that's exactly how I lift the rear of my car when I'm not looking at the suspension. Jack by the center of the axle and put stands under each end of the axle.
As for the questions, I'd do a combined thread. Then, if questions are getting missed, I'd do dedicated threads to those.
#4
Posted 05 February 2012 - 02:25 AM
-
- Slowpoke
-
- Group: Members
- Location:Chas WV
-
Drives: 1987 CRX Si NH-94M
View Garage
Ok, thanks, saw the "pad" on the front bottom radiator support and wanted to make sure.
Got the Factory Service Manual in the mail late Friday 02-04-12 and it shows that also.
Yeah, jackstands under the rear axle prevent the rear suspension from being dropped down.
Pinch welds are solid and the entire car is very solid as best as I can tell so far.
Now with the Factory Service Manual in-hand, guess I'm on my way on an interesting journey.
Still need to find and acquire the companion ETM.
Bummer that Honda has discontinued such a large percentage of Gen1 Parts in just the past few years.
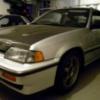
Here's a few pictures:

Got the Factory Service Manual in the mail late Friday 02-04-12 and it shows that also.
Yeah, jackstands under the rear axle prevent the rear suspension from being dropped down.
Pinch welds are solid and the entire car is very solid as best as I can tell so far.
Now with the Factory Service Manual in-hand, guess I'm on my way on an interesting journey.
Still need to find and acquire the companion ETM.
Bummer that Honda has discontinued such a large percentage of Gen1 Parts in just the past few years.
Here's a few pictures:
Edited by PHAT87CRX, 03 March 2012 - 11:52 AM.
If it's got wheels or tatas, it's gonna consume time and money
#5
Posted 05 February 2012 - 11:53 AM
-
- Slowpoke
-
- Group: Members
- Location:Chas WV
-
Drives: 1987 CRX Si NH-94M
View Garage
Question -
? They don't come from the factory with a Trailer Wiring Harness installed do they ?
Was having a few "isues" with the Tail Lights, now all fixed and working.
While investigating I found (5) 3M Splice Connectors on the driver side rear main harness.
They ended up being a Trailer Wiring Harness tucked up into the drivers side quarter panel !
I removed the (5) Splice Connectors and the Trailer Harness, taped up the stock harness wires.
See no evidence under the back of the car where a trailer hitch may have been attached at sometime.
Was really surprised to find it and wondered why it may have been there.
Also in the process of messing around with the Tail Lights, I found
BOTH rear Sunroof rear Drain Hoses shrunk shorter and Disconnected
from the black rubber quarter panel outlet fittings !
The hoses are hard as a rock, got some more hose and plastic fittings
to try and extend the length and re-attach them to the quarter panel outlets.
Still investigating difficulty of just replacing entire length of rear Sunroof Drain hoses.
At this point a little squimish about complete interior removal to replace drain hoses.
Very glad car had been garaged when purchased and I also have a garage.
Spare Tire well was dry when purchased, still is, and want to keep it that way.
? Wondered if the Front Drain Hoses are also shrunk and disconnected from the outlets ?
If the fronts come loose from the outlets where do they leak into ? The Footwells ?
If it's got wheels or tatas, it's gonna consume time and money
#6
Posted 05 February 2012 - 01:17 PM
-
- Slowpoke
-
- Group: Members
- Location:Central FL
-
Drives: 07 Tundra CrewMax 89 Si hatch 85 & 91 CRX Si
QUOTE (PHAT87CRX @ Feb 5 2012, 02:25 AM) <{POST_SNAPBACK}>
Bummer that Honda has discontinued such a large percentage of Gen1 Parts in just the past few years.
A large percentage of Gen 2 parts are discontinued too.
#7
Posted 06 February 2012 - 01:09 AM
-
- Leadfoot
-
- Group: 2011 Contributing Member
QUOTE (PHAT87CRX @ Feb 5 2012, 08:53 AM) <{POST_SNAPBACK}>
Question -
? They don't come from the factory with a Trailer Wiring Harness installed do they ?
*snip*
Also in the process of messing around with the Tail Lights, I found
BOTH rear Sunroof rear Drain Hoses shrunk shorter and Disconnected
*snip*
? Wondered if the Front Drain Hoses are also shrunk and disconnected from the outlets ?
If the fronts come loose from the outlets where do they leak into ? The Footwells ?
No, they don't come wired for a trailer. That's aftermarket. Perhaps it was a small drop hitch attached to the bumper support brackets. There are a couple places under there where a hitch could be attached without leaving evidence once removed.
The drain disconnection thing is a typical problem, the best solution is to replace them, which requires pulling the head liner. Not a hard thing to do on these cars, but also not the easiest if you've never done something like that before. One solution might be the to heat the end of the dried tube, install a coupler, and add a little more hose.
I think the fronts aren't actually plugged into anything like the rears are. I think they just drain directly into the front drain channels on the firewall that service the pan under the windshield. But I have heard of them disconnecting at the sunroof pan itself. And/or getting plugged. So pulling the headliner/replacing/and cleaning isn't the worst plan.
Another very common leak area is from the tail light foam seals. I replaced mine with butyl cord.
This kind of product:
http://www.poolparts...-tape-bt15.aspx
It is a foam core with a sticky butyl outer layer. It conforms to surface imperfections and compresses well. You stick it to the tail light mounting surface and it bonds to both the tail light and rear panel when installed. No more leaks, until the butyl degrades... which is a very long time.
#8
Posted 06 February 2012 - 02:39 AM
-
- Slowpoke
-
- Group: Members
- Location:Chas WV
-
Drives: 1987 CRX Si NH-94M
View Garage
Ok, thanks, thought it most likely that it was aftermarket Trailer Wiring.
Was fotuante to get a Factory Service Manual on Friday ! Ya! A "must have" imho.
Does it tell in there somehwhere how to do a Compression Check on a PG-MFI engine ?
Skimmed through looking for it, will look some more.
With the FSM just might take on replacing entire rear drain hoses at a later time.
Will first make an attempt to heat and extend the existing rear drain hoses.
Saw what looks like the Front Sunroof Drain Hose Outlets when I removed the
front inner fender liners to check for and clean out any errant cowl drain debris.
So far the car is solid, just has 157k miles of built up road dust, dirt, grit, and leaves.
It looks like maybe the rear tail light foam gaskets have already been repalced sometime in the past.
Around the edges visible from inside the rear panel they look pretty fresh and are soft and pliable
Saved the the butyl cord info for future use though, thanks.
The Center Reflector is just a little loose though, but man those (4) nuts are froze or stuck.
Gave up trying to tighten it up, didn't want to twist to hard on'em.
Was afaid of spinning or busting the studs which I guess are molded into the center reflector...
Failed to try and take them loose though, is there a shoulder on the center reflector studs ?
Does it being a little loose an uable to tighten any further suggest the gasket for it is wasted ?
Maybe I'll be getting some butyl cord sooner than I thought.....
Removed the Rear Bumper today to replace a couple left out / missing 6mm Bolts.
And both lower inboard little "L" Brackets were broken in half right at the bend.
Rejoined both of the broken small "L" brackets with screws and a small "overlap"
right angle bracket since I'm unable to weld unfortunately.
Kinda neat how the bumper slides on and off and is held on with only (2) bolts.
The FSM fails to mention to remove (1) inner fender liner screw on each side.
Hope is to better align and firm up the Rear Bumper.
Oh, I thought the paint color was "Blade Silver", the 1987 FSM calls it out as "Quartz Silver" ?
Edited by PHAT87CRX, 06 February 2012 - 02:59 AM.
If it's got wheels or tatas, it's gonna consume time and money
#9
Posted 06 February 2012 - 03:14 AM
-
- Leadfoot
-
- Group: 2011 Contributing Member
Compression check is the same on all vehicles.
Disable injectors (for SI) by unplugging distributor harness so the ECU gets no signal.
Remove all spark plugs.
Install compression tester.
Hold full throttle and crank the engine for a minimum of 4 rotations. (With all plugs out it'll be easy to count the load cycles of the 1 cylinder compressing)
Read tester reading and write down.
Rinse and repeat for the remaining 3 cylinders.
Center reflector, do you mean the panel between the tail lights? (Just looked at your pictures more closely, those panels are somewhat rare.)
I don't know about the reflector ones, but I assume the hardware is the same as the standard ones. Yes, the stud is shouldered. There is a foam o ring installed on the outside edge to isolate the panel from the body and to seal the opening. Those foam seals are useless after so many years. Butyl cord is probably not the best choice to replace these. I'd probably try to find some rubber O-rings.
I don't recall for sure, but I think you'll find the FSM doesn't cover the interior in any real detail. I can be completely wrong of course. I'm simply going off the memory of the FSM we had here on RPR. It went down with the server change and hasn't been restored yet.
#10
Posted 06 February 2012 - 03:39 AM
-

- Slowpoke
-
- Group: Members
- Location:Ellijay, GA.
-
Drives: 87 honda CRX SI
Hi, and welcome to RPR,
You wouldn't happen to be from Ohio? and the car from Atlanta? Just curious
You wouldn't happen to be from Ohio? and the car from Atlanta? Just curious
#11
Posted 06 February 2012 - 11:46 AM
-
- Slowpoke
-
- Group: Members
- Location:Chas WV
-
Drives: 1987 CRX Si NH-94M
View Garage
Ah, ok, disable Injectors by unplugging Distributor. Ok, thanks, that was the part I was unsure about.
Aware the throttle must be held wide open, was unsure about how to disable fuel delivery.
EuphoricBlue - Yeah, the Rear Center Panel, thanks.
maddog - Sent ya a pm.
Aware the throttle must be held wide open, was unsure about how to disable fuel delivery.
EuphoricBlue - Yeah, the Rear Center Panel, thanks.
maddog - Sent ya a pm.
Edited by PHAT87CRX, 06 February 2012 - 11:51 AM.
If it's got wheels or tatas, it's gonna consume time and money
#12
Posted 09 February 2012 - 01:09 PM
-
- Slowpoke
-
- Group: Members
- Location:Chas WV
-
Drives: 1987 CRX Si NH-94M
View Garage
Rear Window Washer Squirter - How to remove it without damage ?
Gasket is long gone, Squiter lifts up aways out of roof hole.
FSM syas to just lift the squirter out and rotate ??
Thinking I may just remove it, plug the hole to prevent leaks,
and disable the rear squirter motor,
if the FSM is correct in showing that the rear has a seperate motor.
Got the Rear Center Panel removed without damage to the (4) Studs.
Sure enough, had shoulders on the studs and (4) worn out foam or fiber washers.
Used some 6mm ID x 10mm OD O-rings on the Studs, re-installed, now snug.
Got the Rear Bumper removed, everything cleaned up from just a bunch of road grit.
Had the (2) lower "L" brackets welded back together that were both broken in half.
Installed the (2) missing bolts that attach the 1st (2) clips to the interior flange of the Bumper Cover.
Re-installed the Bumper Beam back into the Bumper Cover now with all fasteners attached.
Re-installed Rear Bumper onto car, put Side Slider Clips in Bumper End Brkt Slots first.
Rear Bumper if noticeably more sturdy or secure now.
?-> Do large OD Fender Washers go on the (2) Main Bumper Mounting Bolts that go in from the bottom ?
?-> Large OD washers would allow those (2) Main Bolts to also clamp on the bumper cover.
?-> Would guess maybe not, none were there before, guess they would just pinch the bumper cover.
Get side tracked on each little "task" by taking the time to clean things up.
Everything is in good shape, just 157k of road dust, dirt, and grime everywhere.
Think I got about a pound of road grit, dirt, and sand out of the rear bumper parts.....
Wiping out Rear Fender Wells, nice silver paint under all the dirt.
Removed the "Rock Chip" strips from quarter panel fender lip on both sides.
Rear Fender lips look really good, wiped out all the dirt.
Deciding on what if anything preventative to do to this common rust issue area.
Thinking next will work on fixing potential Leak Spots,
Rear Washer Squirter, removed and plug maybe, and Rear Sunroof Drain Tubes, extend or replace.
If it's got wheels or tatas, it's gonna consume time and money
#13
Posted 12 February 2012 - 10:50 AM
-
- Slowpoke
-
- Group: Members
- Location:Chas WV
-
Drives: 1987 CRX Si NH-94M
View Garage
Rear Window Squirter
It just lifts out of the roof, appears to have no retaining tabs.
FSM shows to just lift and rotate it out of the roof.
Reckon there was some kind of gasket originally ?
Have yet to take it all the way out, hose has shrunk and is a little short.
For now, might try putting a little Plumbers Putty beneath it ?
Do folks usually just remove it and plug the hole, disconnect the rear pump motor ?
Rear Sunroof Drains
Found a website where this is mentioned, and it says something about
there being 2 Sections to the Rear SR Drain Tubes ?
Is this the case, or are they each one continuous run of 3/4" OD x 1/2" ID clear pvc hose ?
Reckon they're actually metric size 18mm OD x 14mm ID clear pvc hose ?
Exhaust
Has a pretty good overall condition oem Honda replacement exhaust system on it.
Right along the axial weld seam where the tube was made,
right in the 90 deg bend where it turns up in front of the rear axle to go over it,
it had rusted through right along the weld seam in a narrow slit about 3-4 inches long.
Since it was on-hand and no cost, mixed up and applied some JB Weld over the slit.
Reckon that location is far enough back to not get all that terrible awful hot.
Started it up after a few days of drying time, now sounds normal.
Amazed how much difference in sound just a narrow slit in the exhaust can make.
That musta been the only bad spot in the exhaust, for now anyways.
If it's got wheels or tatas, it's gonna consume time and money
#14
Posted 12 February 2012 - 02:11 PM
-

- In the left lane
-
- Group: 2016 Contributor
- Location:Enterprise AL
-
Drives: 1987 CRX SI ,2004 CRV EX, 1968 VW BUG, 1955 Porsche Speedster replica
View Garage
#15
Posted 12 February 2012 - 05:01 PM
-
- Slowpoke
-
- Group: 2012 Contributor
- Location:SLC UT
-
Drives: 87 CRX Si 86 Si Straman #108 92 NSX sold:( 13 ILX 06 Honda Ridgeline
-
Image Gallery
good lookin rex reminds me when I got my 87' lol...
where in sw ohio are you from? I lived in Dayton for 12 years. miss my old stomping grounds..
where in sw ohio are you from? I lived in Dayton for 12 years. miss my old stomping grounds..

I pitty the fool...


Community Forum Software by IP.Board
Licensed to: Red Pepper Racing