 Sign In
 Create Account
Rear Integra Brake Swap how-to
So after many many searches, and many topics reviewed. I would say there is no "complete" thread on how to do the Integra disc swap into the rear.
First of all you need the following parts from a 1986-1989 Acura Integra.
Rear Hubs or just the extended lug nuts
Rear Brake Shields
Rear Calipers
Rear E-Brake Cables
Rear Rotors
Rear Pads
Proportioning Valve
Rear Brake Lines
Obviously the easiest way to do this swap would be to remove the entire axle from an Integra and swap it in minus the trailing arms. But because these cars are so hard to find, alteast around here, this is the alternative. All the parts listed above can be baught bran new, either from Rock-Auto or from your honda dealership. For my swap, Im going to use a combination between used and new parts. I will be using used hubs, shields, and cables. The Rotors and Pads are new from Brake Labs.
You will also need the following tools
Flat screwdriver
Metric Socket Set
Metric Wrench Set
Line Wrench (10mm)
1 1/4" socket/wrench
Floor Jack
Jack Stand
Penetrating Lube
Wheel Wrench
Note: this thread also shows how to fully rebuild the Calipers, including part numbers and a step by step.
Links for parts needed:
Stainless Brake Lines
Part Numbers for Caliper Rebuilds
2 x Dorman D351783
1 x Dorman HW16011
Wheel Studs
1 x 610-408
Brake Mount Adapter Studs M11 to 7/16 (note you need to use two longer studs when doing swap, not sourced yet other than on stock integra)
6 x 610-157
7/16" Socket Head Allen bolts, measure length, order from Hardware Store. 2pcs.
Continued on the next post.

Rear Disc Brake Swap And Caliper Rebuild
Started by chedda_j, Jan 22 2012 04:22 AM
52 replies to this topic
#1
 Posted 22 January 2012 - 04:22 AM
-
- Lives to modify
-

- Group: Vendors
- Location:Cranbrook, B.C, Canada
-
Drives: 1986 Honda Civic 2.2L LSD, Acura TL Aspec
 View Garage
 Back to top
#2
Posted 22 January 2012 - 04:52 AM
-
- Lives to modify
-
- Group: Vendors
- Location:Cranbrook, B.C, Canada
-
Drives: 1986 Honda Civic 2.2L LSD, Acura TL Aspec
View Garage
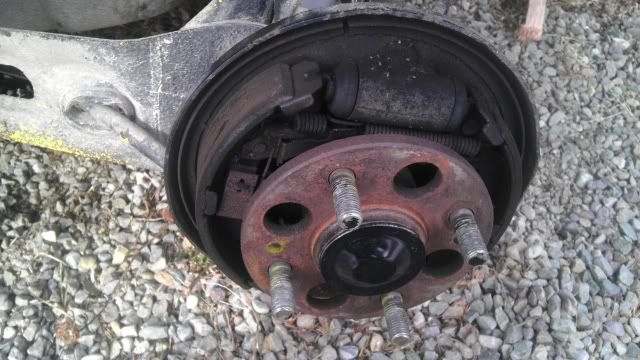
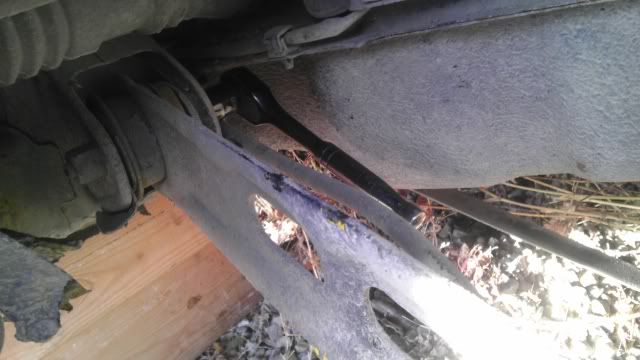
Now that you have all your parts, continue by getting your car onto level ground. Put the shifter into gear to prevent rolling, and remove your negative battery cable (prevents accidental starts). Loosen the rear tire lug nuts slightly. Now position your floor jack under the rear trailing arm mount on one side and lift the car untill the wheel is free. Position the jack stand to support the cars weight and lower the jack. Now remove the wheel to access the brake drum.
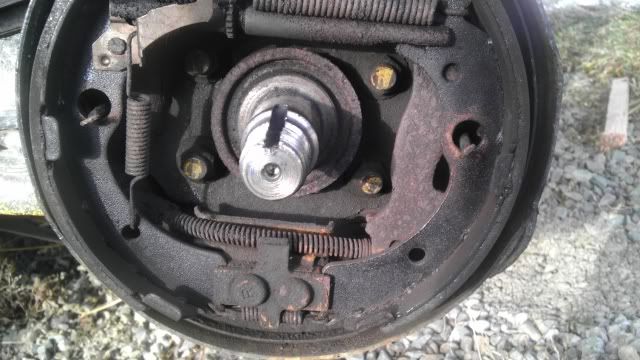
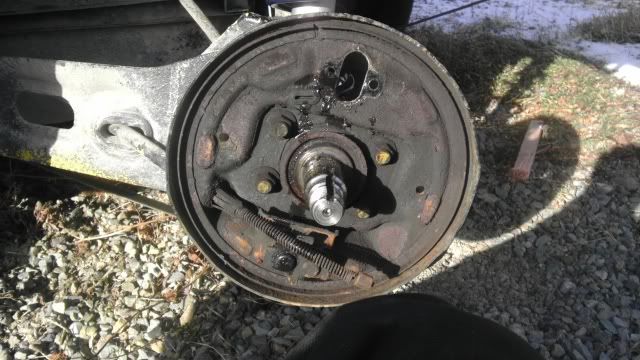
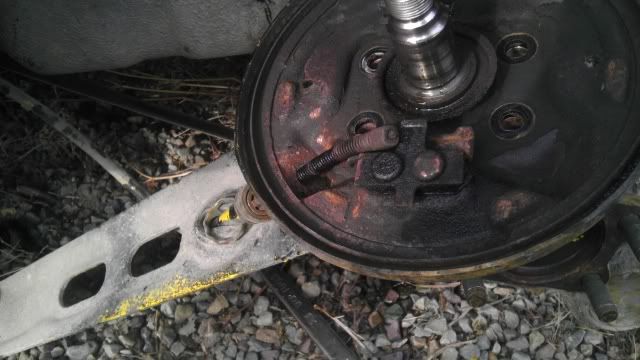
Now slide the brake drum off of the brake assembly. It should come easily, as long as you dont have the e-brake applied. Once removed, it will look like this.
Now you need to remove the hub. Start by removing the hub-cap. Use a flat screw-driver and tap it with a hammer to remove the cap.
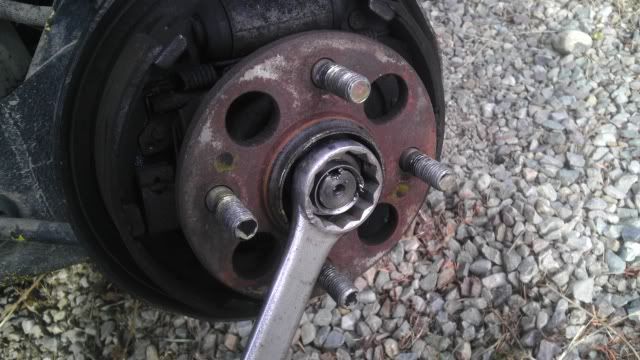
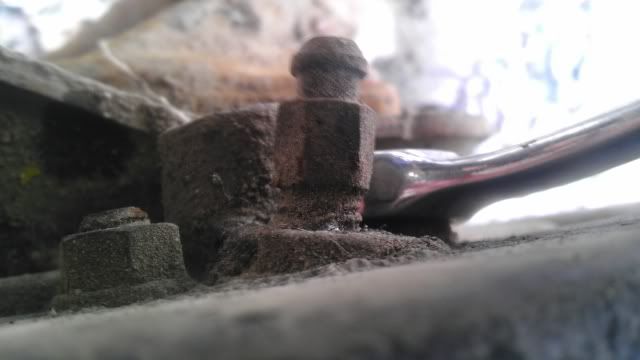
Time to remove the Hub Nut. Use your flat screw driver to remove the indented part of the nut.

Now you can remove the nut. I use a standard socket/wrench because I dont have a large enough metric socket. The standard size is 1 1/4".
Now slide the hub off the stub axle.
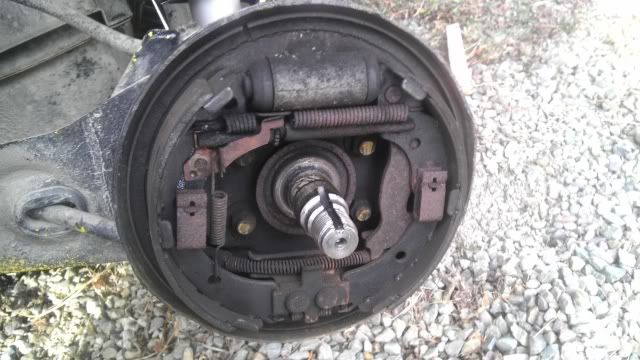
You can remove the spring clips that hold the brake shoe assembly to the brake shield with a pair of needle nose pliers. First compress the spring, then turn the retainer.
It should look like this when done.
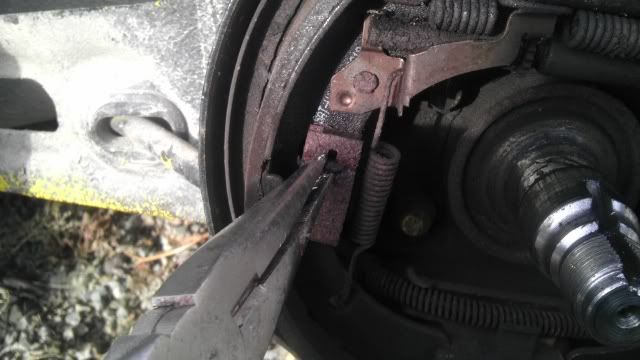
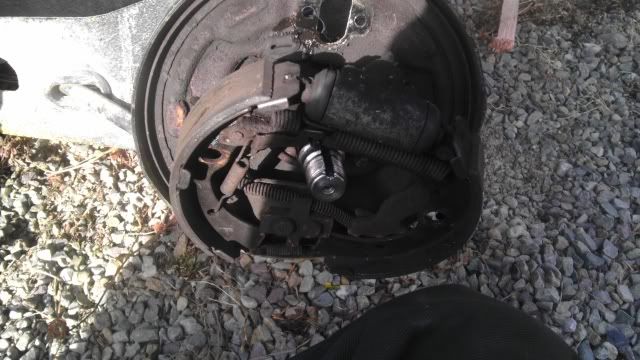
Ok this is where I remove the Wheel Cylinder (the hydraulic two way piston between the brake shoes). Start by removing the Wheel Cylinder brake line. A 10mm line wrench is best, but you can use a 10mm open end wrench, but its likely to strip if your not carefull. Start by removing the rear clip with a flat screw driver.

Now use your wrench to remove the brake line.
Continued on the next post.
Now slide the brake drum off of the brake assembly. It should come easily, as long as you dont have the e-brake applied. Once removed, it will look like this.
Now you need to remove the hub. Start by removing the hub-cap. Use a flat screw-driver and tap it with a hammer to remove the cap.
Time to remove the Hub Nut. Use your flat screw driver to remove the indented part of the nut.
Now you can remove the nut. I use a standard socket/wrench because I dont have a large enough metric socket. The standard size is 1 1/4".
Now slide the hub off the stub axle.
You can remove the spring clips that hold the brake shoe assembly to the brake shield with a pair of needle nose pliers. First compress the spring, then turn the retainer.
It should look like this when done.
Ok this is where I remove the Wheel Cylinder (the hydraulic two way piston between the brake shoes). Start by removing the Wheel Cylinder brake line. A 10mm line wrench is best, but you can use a 10mm open end wrench, but its likely to strip if your not carefull. Start by removing the rear clip with a flat screw driver.
Now use your wrench to remove the brake line.
Continued on the next post.
- staticchmbr likes this

#3
Posted 22 January 2012 - 05:22 AM
-
- Lives to modify
-
- Group: Vendors
- Location:Cranbrook, B.C, Canada
-
Drives: 1986 Honda Civic 2.2L LSD, Acura TL Aspec
View Garage
Now you can remove the rest of the brake line if you feel like it. You dont really need to because you wont be reusing the wheel cylinder, but I removed it so the wheel cylinder can be removed a little easier.
Remove the bolts from the rear of the wheel cylinder with an box ended 10mm
Now you can slide the brake shoes assembly down and out. I like to keep them complete, incase I need to use them again on something else. The e-brake cable is slid out of the brake shoe assembly by rotating the entire assembly.
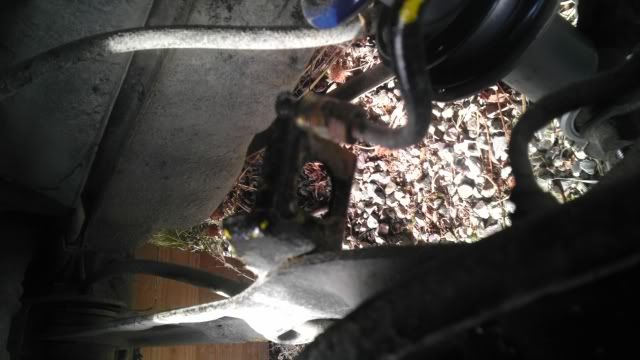
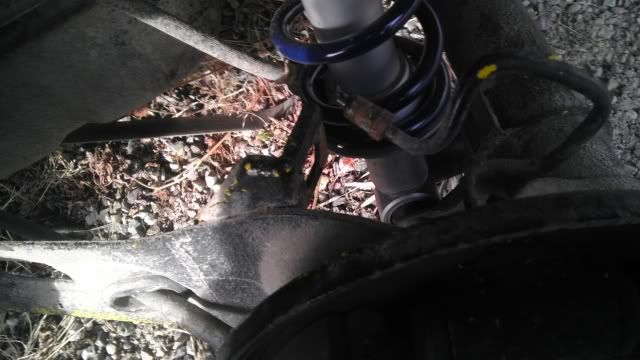
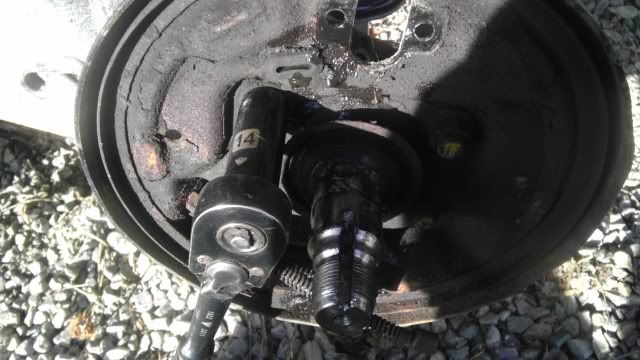
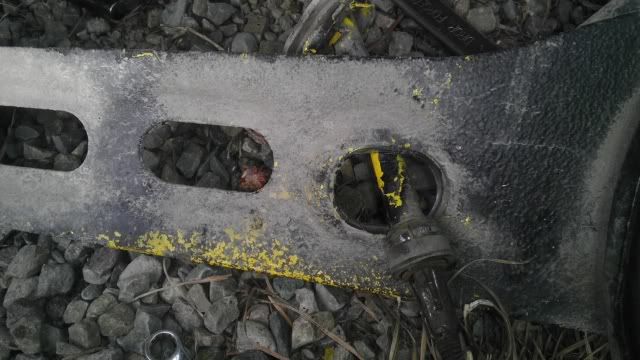
Now on to removing the brake shield. I find it a little easier to remove the entire trailing arm while doing this, its only one more bolt. The hub will look like this before removal.
Remove the stub axle nuts using a 14mm socket.
Remove the trailing arm with a 17mm socket and ratchet.
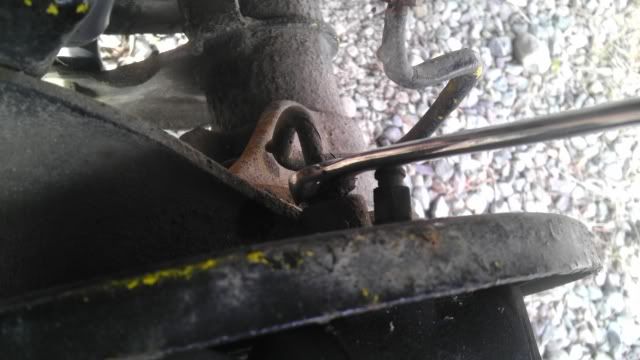
Now remove the rubber bushing that holds the brake cable in.
And remove the E-Brake cable from the brake shield. This is a little tricky. I remove it by using a flat screw driver and a pair of needle nose pliers. First pry behind the ebrake cable, then use the pliers to compress the retainer fingers on the inside of the brake shield.
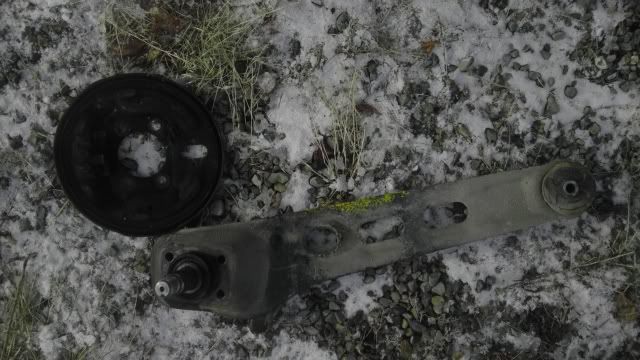
Remove the brake shield with a simple nudge with a hammer.
Remove the bolts from the rear of the wheel cylinder with an box ended 10mm
Now you can slide the brake shoes assembly down and out. I like to keep them complete, incase I need to use them again on something else. The e-brake cable is slid out of the brake shoe assembly by rotating the entire assembly.
Now on to removing the brake shield. I find it a little easier to remove the entire trailing arm while doing this, its only one more bolt. The hub will look like this before removal.
Remove the stub axle nuts using a 14mm socket.
Remove the trailing arm with a 17mm socket and ratchet.
Now remove the rubber bushing that holds the brake cable in.
And remove the E-Brake cable from the brake shield. This is a little tricky. I remove it by using a flat screw driver and a pair of needle nose pliers. First pry behind the ebrake cable, then use the pliers to compress the retainer fingers on the inside of the brake shield.
Remove the brake shield with a simple nudge with a hammer.
#4
Posted 22 January 2012 - 05:30 AM
-
- Lives to modify
-
- Group: Vendors
- Location:Cranbrook, B.C, Canada
-
Drives: 1986 Honda Civic 2.2L LSD, Acura TL Aspec
View Garage
So I chose to buy drilled and slotted rotors. The ones from brake labs are a reasonable alternative to the racing altertnative. The pads are ceramic, not bi-metalic like most after market pads. I will have more photos and instructions as parts arrive.
#5
Posted 22 January 2012 - 10:06 AM
-

- Merlin
-
- Group: Contributing Member
- Location:OOOHIO
-
Drives: '07 Toyota Tundra SR5
#6
Posted 22 January 2012 - 10:42 AM
-

- I AM THE STIG!!!
-
- Group: Awaiting Authorisation
- Location:Ontario Canada
-
Drives: 1987 CRX Si (with big flares and a ZC!) 2004 Civic SiR
-
Image Gallery
QUOTE (Buford @ Jan 22 2012, 03:06 PM) <{POST_SNAPBACK}>
Wait till you get to modifying (shortening) the Teg hand brake cable!!
If you get creative with routing you don't need to shorten them
And Chedda, I did a write-up on rear discs years ago......maybe you should add your stuff to that post
Big Brake Sticky Post
Rob
Must.....go......racing.......

#7
Posted 22 January 2012 - 02:29 PM
-
- Merlin
-
- Group: Contributing Member
- Location:OOOHIO
-
Drives: '07 Toyota Tundra SR5
QUOTE (RETROCRX @ Jan 22 2012, 11:42 AM) <{POST_SNAPBACK}>
If you get creative with routing you don't need to shorten them
And Chedda, I did a write-up on rear discs years ago......maybe you should add your stuff to that post
Big Brake Sticky Post
Rob
And Chedda, I did a write-up on rear discs years ago......maybe you should add your stuff to that post
Big Brake Sticky Post
Rob
I shortend mine, at the hand brake side so everything was neat and tidy.
Buford Out
#8
Posted 22 January 2012 - 03:13 PM
-
- Lives to modify
-
- Group: Vendors
- Location:Cranbrook, B.C, Canada
-
Drives: 1986 Honda Civic 2.2L LSD, Acura TL Aspec
View Garage
QUOTE (RETROCRX @ Jan 22 2012, 08:42 AM) <{POST_SNAPBACK}>
If you get creative with routing you don't need to shorten them
And Chedda, I did a write-up on rear discs years ago......maybe you should add your stuff to that post
Big Brake Sticky Post
Rob
And Chedda, I did a write-up on rear discs years ago......maybe you should add your stuff to that post
Big Brake Sticky Post
Rob
Damn it. Delete this thread...
Or maybe I can salvage this for my spherical how to thread.
Although maybe i will continue because you cannot comment on your old.thread any more so.we can update some of the information from 10 years ago.
#9
Posted 22 January 2012 - 06:58 PM
-

- redlinefever
-
- Group: 2014 Contributor
- Location:Perth, Western Australia
-
Drives: 83 crx - kakaburra,83 gen1 Noir, 87 EF7 Glasstop crx, 83 gen 1 rebuild replica mugen racecar
-
Image Gallery
View Garage
Like Retrocrx posted, on the e-brake cables, you cross them over to the other side which takes a bit of length out, and then play with the routes and tie down points on the underbody. Used his guide a few years ago.
Nice to have an update however, particularly as parts seem to be an issue now, and it's not a swap in of the whole axle.
You going to repack the bearings? That would be a worthwhile addition if you go there (I've done several rear bearing replacements).
Nice to have an update however, particularly as parts seem to be an issue now, and it's not a swap in of the whole axle.
You going to repack the bearings? That would be a worthwhile addition if you go there (I've done several rear bearing replacements).
anjin aka Ian
"I can't believe it - Ive just been passed by a sh!tbox"
"I can't believe it - Ive just been passed by a sh!tbox"
#10
Posted 23 January 2012 - 12:59 AM
-

- In the left lane
-
- Group: 2016 Contributor
- Location:Enterprise AL
-
Drives: 1987 CRX SI ,2004 CRV EX, 1968 VW BUG, 1955 Porsche Speedster replica
View Garage
#11
Posted 23 January 2012 - 04:08 AM
-
- "Leader of the pack"
-
- Group: 2012 Contributor
- Location:Seattle, WA
-
Drives: 85 CRX Si, 87 Civic Si, 88 Integra Special
View Garage
Good write up.
"for all your pre-1988 Honda restoration needs 206-940-8173"
"vouch thread"
http://www.redpepper...l=&fromsearch=1
1g, 2g, 3g Civic
1g CRX
1g Integra
1g, 2g, 3g Accord
1g, 2g, 3g Prelude
cars, parts, collectibles and more!
http://www.nwclassichonda.com
#12
Posted 23 January 2012 - 06:54 PM
-

- Slowpoke
-
- Group: Members
- Location:Buenos aires, Argentina
-
Drives: honda civic 1985 1500 s 3 door
QUOTE (chedda_j @ Jan 22 2012, 05:13 PM) <{POST_SNAPBACK}>
Damn it. Delete this thread...
Or maybe I can salvage this for my spherical how to thread.
Although maybe i will continue because you cannot comment on your old.thread any more so.we can update some of the information from 10 years ago.
Or maybe I can salvage this for my spherical how to thread.
Although maybe i will continue because you cannot comment on your old.thread any more so.we can update some of the information from 10 years ago.
thx for the info chedda, please continue to the post
#13
Posted 24 January 2012 - 12:19 AM
-

- Demon Of All Trades
-
- Group: 2013 Contributor
- Location:Oklahoma
-
Drives: 87 Civic Si, 88 Civic DX, 90 CRX DX, 80 Trans Am, 10 Fit Sport
-
Image Gallery
View Garage
Heres My and Kakabox's thread about Rear-Disc Swap.
http://www.redpepper...e...c=42677&hl=
http://www.redpepper...e...20659&st=75
http://www.redpepper...e...c=42677&hl=
http://www.redpepper...e...20659&st=75

#14
Posted 24 January 2012 - 04:09 AM
-

- Mr.Ididntseeyousittingthereofficer
-
- Group: 2009 Contributing Member
- Location:Hickory, North Carolina
-
Drives: 74'vert Blazer, 84redrexHF (RIP), 87blackrexSI, 91STDhatch(resurrected for beater)(RIP again)
lol there is nothing wrong with too many CORRECT how to's! sometimes someone pictures something differently that helps a novice understand something better than another thread. should have a whole section for howtos not just stickyd
i actually looked at this and thought "damn its been a long time since ive seen those brakes torn down." i did my disc brake swap over 6 years ago to a civic hatch, and then swapped them to one of my crxs later.
i actually looked at this and thought "damn its been a long time since ive seen those brakes torn down." i did my disc brake swap over 6 years ago to a civic hatch, and then swapped them to one of my crxs later.
- staticchmbr likes this
QUOTE (kjeffery @ Apr 17 2009, 06:17 PM) <{POST_SNAPBACK}>
Yet again Scott, you have all the answers
QUOTE (cbstdscott @ Apr 17 2009, 07:31 PM) <{POST_SNAPBACK}>
No. All the answers are in the Kakabox build thread.
QUOTE (Lymitliss @ May 26 2009, 08:06 PM) <{POST_SNAPBACK}>
Ohh yeah I guess that makes sense. King Kaymo has all the answers 
#15
Posted 29 January 2012 - 02:57 PM
-

- Leadfoot
-
- Group: 2011 Contributing Member
- Location:Edmonton, AB
-
Drives: 2009 AUDI TT 3.2L, Project Teg powered Austin Mini Van
-
Image Gallery
QUOTE (Buford @ Jan 22 2012, 12:29 PM) <{POST_SNAPBACK}>
I shortend mine, at the hand brake side so everything was neat and tidy.
Buford,
A "how to" for your solution would be very helpful. I have a couple of ideas but haven't followed through yet. I just used creative routing of the cables for now but the problem I have is equalizing the pull evenly to both sides. JS
If you want one of these Logos send me a PM
Austin Mini Van with DOHC Honda HP
http://www.angelfire.com/droid/strudel
Honda reliability and power combined with Mini cachet and style.


Community Forum Software by IP.Board
Licensed to: Red Pepper Racing