Jump to content


The Kakabox Build


  • You cannot reply to this topic
2000 replies to this topic

#166
kakabox

  • Turd Polisher
  • PipPipPipPipPip
    • Group: 2012 Contributor
    • Location:Seattle, WA 98115
    • Drives: from point 'A' to point 'B' daily.
    • Image Gallery
    Garage View Garage
More weight savings! This time in the rear...

Stock '87 3g rear bumper beam:


...heavy at 12 lbs. (the front beam weighs 20 blink.gif )


A little hack-sawing, a little grinding, toss a little paint on... BAM! Light weight bumper "beam":


...weight saved: 10 lbs. ! biggrin.gif


...oh yeah, make that 11 lbs; 1 lb. of dirt from removing the bumper! laugh.gif


Cheers! cool.gif

Edited by kakabox, 16 April 2006 - 10:43 PM.


#167
85c-rex

  • For the Tenacious, no road is impassable
  • PipPipPipPip
    • Group: Members
    • Location:Kansas
    • Drives: 1996 Nissan 200sx SE-R(DD), 1969 Ford Mustang (Hot Rod), 1985 Crx Dx (Dead)
    • Image Gallery
    Garage View Garage
wow, this build just keeps getting better and better, and thats amazing, that car sat on a jack for years, and there is no rust behind the bumper at all, i'm very jealous
There are 3 goals when modding a car.
Cheap, Reliable, and Fast.
Now the down side. You only get to pick 2...
user posted image
Fact: A recent study shows that 92% of all teenagers have turned Emo.

Put this in your sig if you're one of the 8% who stayed gangster as $h!t.

#168
kakabox

  • Turd Polisher
  • PipPipPipPipPip
    • Group: 2012 Contributor
    • Location:Seattle, WA 98115
    • Drives: from point 'A' to point 'B' daily.
    • Image Gallery
    Garage View Garage
QUOTE (85c-rex @ Mar 19 2006, 10:05 PM)
wow, this build just keeps getting better and better, and thats amazing, that car sat on a jack for years, and there is no rust behind the bumper at all, i'm very jealous

Thanks.
I'm also surprised about the no-rust. The neighbor (who gave this car to me) parked it for a yr in front of his house after it started idling erratically. He finally got a "move it or lose it" ticket on it and moved it to the alley behind his house. It sat there under a huge maple tree for another yr before I got it.

Ironically, he replaced this one w/an identical one ('87 Si), which is currently his dd. That one DOES have visible rust issues! And, just the other week he asked me about a leak issue he had w/it...the entire spare tire well was an inch deep w/water! Told him to pop the body plug under the spare tire and "fahgetaboutit"!

Cheers! cool.gif

#169
Performance Freaks EG

  • Slowpoke
  • PipPip
    • Group: Members
simply amazing

#170
ohjolt2

  • Granny
  • Pip
    • Group: Members
    • Drives: 88 crx si
Sweet man,
I need to learn how to weld and its on. I am sick of buying stuff i could make my self.

#171
kakabox

  • Turd Polisher
  • PipPipPipPipPip
    • Group: 2012 Contributor
    • Location:Seattle, WA 98115
    • Drives: from point 'A' to point 'B' daily.
    • Image Gallery
    Garage View Garage
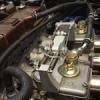
Energy Suspension Urethane Bushing Install, Part One; Rear Control Arms:

I removed the rear axle complete w/phb and control arms. I'll be reinforcing the stock phb mount and swapping in a lighter HF axle beam w/'teg brakes, so, I needed the entire rear axle assembly outta there! While the rear control arms are out, it's the perfect time to install the ES urethane bushings. I bought the 1g/3g "Master Set", P/N 16.18101G (black) from Summit Racing for $76.

To install the ES rear control arm bushings, the factory rubber bushings (w/steel insert) must be removed...some people use gear pullers, some people take them to a machine shop to have them pressed out...some people just knaw them out w/their teeth! ohmy.gif ...kidding. This is what I did:

The starting point:


I decided to drill the rubber out, then "torch" the remaining bushing:


The rubber is dense and really heats the bit...I used penetrating oil to make the drilling easier. Then I thought to "link" the holes using a coping saw:


...the rubber is tough; I snapped the blade after getting 3/4 of the way around. I just used brute force (sharp chisel) to get the rest of the way. Finally, I got the steel insert out:


...and now for the fun part: FIRE! ph34r.gif Yup, had to burn out the remaining rubber. I used a propane torch...FLAME ON!

...once lit, the rubber just burns itself out. After about five minutes of burning, I used a large screwdriver to push the remaining molten rubber out of the housing.

Now, all that drilling and sawing does work in getting the bushings out, but, imo, it's more work then just letting the "mutha burn"! So, for the other control arm, I decided not to drill, but to just burn it out:


...took a longer to burn the entire bushing out, but it was easier. After it burned for a while, I used a screwdriver to push the steel insert out. Then used the torch to burn the remaining bushing for a while then pushed it out...here's the cremated remains of both bushings:


Then I used a wire brush to clean out the housing:


...and knowing struuuuudel and lxndr wouldn't be happy unless the parts were spotless ( wink.gif ), I toothbrushed them and shot 'em w/a little paint!


...there, all ready for the bushing install, but, seems like the ES kit I got didn't come w/replacement steel inserts (the part the ca bolt pivots on), so I've got to wait for those before I install...or maybe the newer kits have you reuse the original inserts? Summit is looking into this for me.

Cheers! cool.gif

Edited by kakabox, 09 December 2009 - 10:18 AM.


#172
lxndr

  • All work and no play makes LXNDR a dull boy. All work and no...
  • PipPipPipPipPip
    • Group: Members
Beavis and Butthead voices...

fire, fire, he, he, fire


Fire is good! That's how I got mine out! Thanks for using the tooth brush.

#173
Maine_Honda_Racer

  • Can't stay off the race track!
  • PipPipPipPipPip
    • Group: 2010 Contributing Member
    • Location:Maine
    • Drives: 1993 Civic EX Track Car, 1987 Crx Si Ice Racer, 1990 CRX Si Track Car, 2004 Dodge Durango
I used fire on mine entirely, burnt them to a crisp and they came right out, cleaned up with the wire brush and away I went.

Build is coming along real nice, I have some build pictures of my own I really ought to get up, but not sure I can...

Ben


QUOTE (cbstdscott @ Feb 28 2010, 10:43 PM) <{POST_SNAPBACK}>
In fact, I rock out an RPR decal!

#174
kakabox

  • Turd Polisher
  • PipPipPipPipPip
    • Group: 2012 Contributor
    • Location:Seattle, WA 98115
    • Drives: from point 'A' to point 'B' daily.
    • Image Gallery
    Garage View Garage
Talked to Summit yesterday...they said ES will be drop shipping the missing steel bushings to me.

Here's a pic of the parts I'm missing (the two gold colored steel tubes, one riding inside the other):


The pic is from strudel's ES bushing install thread: http://www.redpepper...post&p=187058):...

Edited by kakabox, 28 March 2006 - 01:04 PM.


#175
strudel

  • Leadfoot
  • PipPipPipPipPip
    • Group: 2011 Contributing Member
    • Location:Edmonton, AB
    • Drives: 2009 AUDI TT 3.2L, Project Teg powered Austin Mini Van
    • Image Gallery
Just arrived home this afternoon. Good to see you had more fun than my version of removal. I hope you had the marshmellows handy?? I'm sure the burning rubber would have created a new distinct flavour. You should have done that at the minimeet and we could have roasted them there!!

Keep up the good work, I had an enjoyable visit. After I left lxndr's the EACV worked fine most of the way home. I figured out that if it acts up you just let the car crawl away in first and it seems to settle it down, wierd!! I will post up the internal pictures when I have some more time. JS

If you want one of these Logos send me a PM

aan.jpg


Austin Mini Van with DOHC Honda HP
http://www.angelfire.com/droid/strudel
Honda reliability and power combined with Mini cachet and style.


#176
kakabox

  • Turd Polisher
  • PipPipPipPipPip
    • Group: 2012 Contributor
    • Location:Seattle, WA 98115
    • Drives: from point 'A' to point 'B' daily.
    • Image Gallery
    Garage View Garage
QUOTE (strudel @ Mar 29 2006, 10:03 PM)
You should have done that at the minimeet and we could have roasted them there!!

I will post up the internal pictures when I have some more time. JS

laugh.gif ...yes, control arm roasting would of been a great rpr meet activity...and we had all the lighter fluid we needed too! wink.gif ...damn, wish I had thought of it at the time! The EACV dissection was fun though...hope you got some good pics of the surgeon!

Hope to see you again some time!

Cheers! cool.gif

#177
Aren D.

  • Save the pepper, save the world.
  • PipPipPipPipPip
    • Group: 2013 Contributor
    • Location:Tooele UT
    • Drives: 1985 CRX SI/2003 Frontier SC/2006 Jetta TDI/2014 Civic SI
    • Image Gallery
    Garage View Garage
What your too good for red bushings?

I swear I'm not a ricer.

#178
kakabox

  • Turd Polisher
  • PipPipPipPipPip
    • Group: 2012 Contributor
    • Location:Seattle, WA 98115
    • Drives: from point 'A' to point 'B' daily.
    • Image Gallery
    Garage View Garage
QUOTE (Aren D. @ Mar 31 2006, 12:02 AM)
What your too good for red bushings?

I swear I'm not a ricer.

I tried to get red, but it wasn't available from Summit...

...speaking of Summit Racing, kudos to their customer service: yesterday the missing rear control arm steel inserts showed up. Just like they told me, ES dropped shipped the parts to my door. They also gave me twice as many inserts as I needed; I was only missing two, as a bonus, they shipped me four!


...the oem ones are on the right.

I'll install the rear control arms after I finish w/my phb mount stiffener and rear shock tower brace fab and install. FWIW, pics & write ups for those will be posted soon!

Cheers! cool.gif

Edited by kakabox, 15 April 2006 - 03:29 AM.


#179
87CrxType-one

  • Loving the 1g's and 3g's
  • PipPip
    • Group: Members
    • Location:Kennewick, Washington
    • Drives: 87crx si, and my beautiful 76 gas station orange 1980 plymouth arrow pickup, oh yeah baby!!!!!!!
    • Image Gallery
Summit is always a good company to deal with. You are right great customer service and they are fast on shipping.

#180
kakabox

  • Turd Polisher
  • PipPipPipPipPip
    • Group: 2012 Contributor
    • Location:Seattle, WA 98115
    • Drives: from point 'A' to point 'B' daily.
    • Image Gallery
    Garage View Garage
Panhard Bar Mount Brace:

According to some chatter from the Competition guys here, the factory phb mount is a potential weak point. The mount is made up of thin sheet metal channel sections spot welded to the floor pan. Due to it's long offset mount arm, it appears to be a flexible design, prone to a fatigue failure at the arm's bend radius. It also seems to be prone to rust which makes the design even weaker as the car ages. Drive the car aggressively in competition w/sticky tires and even w/o rust, it has been reported (here) that the mount can crack and/or fail.

The phb load flexes the mount arm at the bend. Given enough load cycled thru enough times, the joint can fail where the arm attaches to the horizontal section. Of course, rust just accelerates this failure...like this (not mine):


IMO the factory mount needs triangulation; a brace to reduce the stress at the bend and keep it from flexing. Since I am planning to drive this thing as hard as I can, and will eventually mount 'R' compound (sticky) tires, I designed a brace to help stiffen the factory mount.

The mock-up for sizing. I took the springs/shocks off and jacked the axle all the way up to the floor pan; I could only get a bar ~0.75" wide between the axle tube and the chassis mount w/o rubbing on the axle; that's how the strut size was arrived at:


I used the chassis mount for the lower end attachment of the brace. This attachment is common to the phb, so, the new brace should provide an additional load path, reducing the load & flexing at the mount's bend. In order for the chassis mount plate to clamp up flush, the oem mount's captured nut had to be cut back:


...this nut was drilled out so that a new, longer bolt, can go thru the brace plate and the mount, w/the head on the aft side.

The upper end of the brace ties into the factory mount on the rhs. Since this brace is a bolt on, nutserts were welded in:


The welds were ground down and a 3 x 6 x .125 steel plate was bolted in place:


The phb brace also ties into the floor pan. Holes were drilled for the floor pan plate:


...the floor pan plate (1.25 x 6 x .125 steel) will be welded to the mount plate and thru bolt to the floor..."studs" were welded to the floor plate:


...and the floor plate was then tack welded to the mount plate; the strut was also tacked in place:


The strut was then tacked at the chassis mount:


...continued next post...

Edited by kakabox, 26 February 2010 - 09:58 AM.