Jump to content


Epcivic Buildup Projects


  • You cannot reply to this topic
106 replies to this topic

#1
EPcivic

  • 2008 & 2009 EP National Champion
  • PipPipPipPip
    • Group: 2010 Contributing Member
    • Location:Findlay, Ohio
As I get the time, I'm going to try to go back through all of my pictures and put together a complete buildup of my EP car. For now, it's going to be a little out of order, as I am going to start with the projects I have been working on during this past winter. For those not familiar with my car, it is (mostly) an '86 Civic Si, which I have owned since 1993. It has been my wifes DD for a few years, then a trailered, garage kept race car since about '96. I have autocrossed this car since about a week after purchasing it. It has competed in DS, CSP, EP, EM, SM, and now back to EP. The best finish I have with the car at Nationals was a 7th place in SM a few years ago. This car has always been built with a tight budget, although I have dropped some pretty significant money in it in the last few years, it's all relative. I have done all of the work myself, including a lot of fabrication work. And now. . . on to the projects.

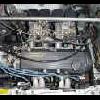
My winter projects started with the goal of lowering the car's weight and fixing a fuel starving problem I was having at anything less than a full tank of gas. The solution was a small 4 gal fuel cell. Installing the cell is a pretty major undertaking, and the first step was to clean the paint off the floor of the car where I was going to cut and weld. Since this car has had no interior for most of the last 10yrs, and the interior has been painted at least 3 times without proper prep work, I decided to go ahead and restore the whole interior at the same time. I blame a lot of this on lil buddy's project - seeing all the work he was putting into restoring his car inspired me. Plus mine is a completely rust free southern car that just needed to be cleaned and painted. After I got the interior prepped, my roll cage welds started to bother me. I built the cage at least 10 yrs ago, and I couldn't weld that good back then, plus all I had was a 110V mig. While I had it all clean I went ahead and TIG'd all of the welds again to make them look better and be stronger.

Now for the picture version of the story:

Start with a pile of overpriced plumbing and a 4gal aluminum fuel cell.


Cut a hole in the floor and weld in a frame to hold it in place.


Go ahead and strip the rest of the interior down since you're in there anyway.


#2
EPcivic

  • 2008 & 2009 EP National Champion
  • PipPipPipPip
    • Group: 2010 Contributing Member
    • Location:Findlay, Ohio
Freshen up the cage welds since the welder is already in place after making the fuel cell frame.


And now for the payoff. After many weeks of sanding, stripping, scraping, cutting, welding, priming and painting, it's finally back together and looking much better than before.


A closeup of the cell from the top:


#3
EPcivic

  • 2008 & 2009 EP National Champion
  • PipPipPipPip
    • Group: 2010 Contributing Member
    • Location:Findlay, Ohio
A shot of the dash area. The firewall and driver's floor were painted with black bedliner paint to reduce glare. The rest of the interior was painted with Rust Oleum with a brush and roller.


A closeup of the cell from the bottom.


A closeup of the dash showing the battery and main power distribution that has been relocated from under the hood:


And a shot of the metal bulkhead required by SCCA. I went a little overboard with this. It's 1/8" aluminum. I wanted to be able to stack things on it if I needed to, so I wanted it to be plenty strong.


So, what did I get for all of my efforts? Well, besides a much cleaner looking interior, I was able to reduce the weight of the car by around 70lbs. Most of the weight is due to less fuel. The small cell, frame and cover was not really that much lighter than the stock tank.

As I mentioned at the top, I'm going to try to add sections on the Drivetrain ( a fully built EW1 AWD wagovan block with Si head mated to an Integra CG tranny with a torsen LSD), Engine management (megasquirt'n EDIS fully programmable fuel and ignition, crank triggered), suspension (custom torsion bars, koni double adjustables, etc.) Steering (custom electric over hydraulic power steering system), and anything else I can think of. I hope everybody enjoys the show.

-Chris

#4
DEIVIONCRX

  • Demon Of All Trades
  • PipPipPipPipPipPip
    • Group: 2013 Contributor
    • Location:Oklahoma
    • Drives: 87 Civic Si, 88 Civic DX, 90 CRX DX, 80 Trans Am, 10 Fit Sport
    • Image Gallery
    Garage View Garage
I like your battery placment, have you had anybody complain that you dont have a external cut off swtich. And do you have a close up picture of how you have it mounted.
Posted Image

#5
hondaman

  • Slowpoke
  • PipPip
    • Group: 2010 Contributing Member
    • Location:Massillon, OH
    • Drives: 1984 CRX
QUOTE (DEIVIONCRX @ May 6 2007, 07:22 PM) <{POST_SNAPBACK}>
I like your battery placment, have you had anybody complain that you dont have a external cut off swtich. And do you have a close up picture of how you have it mounted.


Because it is a dry cell battery it can be mounted within the interior and without a box (the rule on battery mounting was changed a couple of years ago). Solo doesn't require an external cut off switch.

I have a similar type battery in my CRX (still mounted in the rear because the cabling was already there and I'm just lazy!)

Scott
www.rogues-racing.com

#6
DEIVIONCRX

  • Demon Of All Trades
  • PipPipPipPipPipPip
    • Group: 2013 Contributor
    • Location:Oklahoma
    • Drives: 87 Civic Si, 88 Civic DX, 90 CRX DX, 80 Trans Am, 10 Fit Sport
    • Image Gallery
    Garage View Garage
I knew it didnt need to be in the box, but for some reason all the tracks around here are battery nazi's. But none of them are NHRA, or FIA aproved. Ive herd people say that if its in the "Trunk"(Behind the back seats) its gota have a external cut off switch. But for some reason if its in front of the back seats foward, it doesnt need one. Just ondering if hes had any Tech problems with it.
Posted Image

#7
EPcivic

  • 2008 & 2009 EP National Champion
  • PipPipPipPip
    • Group: 2010 Contributing Member
    • Location:Findlay, Ohio
QUOTE (DEIVIONCRX @ May 6 2007, 11:22 PM) <{POST_SNAPBACK}>
I like your battery placment, have you had anybody complain that you dont have a external cut off swtich. And do you have a close up picture of how you have it mounted.


SCCA doesn't have any requirement for cutoff switches for solo (autocross). As Scott said, we are allowed to mount dry cell batteries without a box now. I do have a cutoff switch. You can see it at the bottom of the center console. I like having it so I can disconnect the battery quickly to work on the car. I also prefer to have it where I can reach it, rather than someone outside the car.

I don't have a closeup of the battery mounting, but it is pretty straightforward. There is aluminum angle rivited to the firewall at the top and bottom of the battery. This keeps it from being able to move up or down. There is a really cool polished stainless steel strap going from side to side keeping it from being able to move sideways. This strap was part of some sort of kitchen thing in a previous life that my wife donated to my scrap metal pile. A couple of bends and some holes and it's now a battery hold down.

-Chris

#8
kakabox

  • Turd Polisher
  • PipPipPipPipPip
    • Group: 2012 Contributor
    • Location:Seattle, WA 98115
    • Drives: from point 'A' to point 'B' daily.
    • Image Gallery
    Garage View Garage
Nicely done.
What kind of muffler is that?
Do you have any concerns w/running the dump so close to the fuel cell?

#9
CRXfanatic

  • Dual Mikunis Rule
  • PipPipPipPipPip
    • Group: 2011 Contributing Member
    • Location:Utica, MI
    • Drives: 1987 CRX DX, 2001 Subaru 2.5RS, 2004 Accord EX, 1983 Honda VT500FT
    • Image Gallery
    Garage View Garage
Very nice! I'm looking forward to the writeup, especially the block/head/trans.

I bet that thing really moves!!!!
"If Honda does not race there is no Honda." -Soichiro Honda

Posted Image

#10
EPcivic

  • 2008 & 2009 EP National Champion
  • PipPipPipPip
    • Group: 2010 Contributing Member
    • Location:Findlay, Ohio
QUOTE (kakabox @ May 7 2007, 04:04 PM) <{POST_SNAPBACK}>
Nicely done.
What kind of muffler is that?
Do you have any concerns w/running the dump so close to the fuel cell?


The muffler is a Magnaflow 2 1/4" x 4" x 18" stainless. It's pretty loud. I've had the exhaust exit in that same location for about 7yrs with no issues. It really isn't as close as it looks in the pic, and it was much closer to the stock tank than it is to the new one. I'm actually going to be adding a flange to the Magnaflow muffler so I can make a bolt on 'extra' muffler and tailpipe section for event sites that have tight noise restrictions. I have to get that done in the next week or two, since the Huntsville National Tour has a very tight noise restriction.

-Chris

#11
kakabox

  • Turd Polisher
  • PipPipPipPipPip
    • Group: 2012 Contributor
    • Location:Seattle, WA 98115
    • Drives: from point 'A' to point 'B' daily.
    • Image Gallery
    Garage View Garage
QUOTE (EPcivic @ May 7 2007, 06:07 PM) <{POST_SNAPBACK}>
The muffler is a Magnaflow 2 1/4" x 4" x 18" stainless. It's pretty loud.

I'm actually going to be adding a flange to the Magnaflow muffler so I can make a bolt on 'extra' muffler and tailpipe section for event sites that have tight noise restrictions.
-Chris

It appears to be the same as the Kakabox's: Magnaflow muffler P/N 14445; 14" stainless steel can; 20" overall length; 2" stainless steel core; 2.25" I.D. in/2.25" I.D. out.


I haven't run the car yet, but I'm anticipating it to loud also... dry.gif ...I'm not into loud. I may also have to modify my exhaust to run another muff.

#12
EPcivic

  • 2008 & 2009 EP National Champion
  • PipPipPipPip
    • Group: 2010 Contributing Member
    • Location:Findlay, Ohio
Ok, I've got a little time here to work on the next installment of this project blog. Everything in this section is actually 2yrs old now, and a good bit of it can be found if you search for the right things, but it will be nice to have it all in one place. The next few posts will be related to the drivetrain in this car, which is somewhat unique since it uses a block from an AWD wagovan mated to an Integra transmission. This block was used because it is allowed in EP in the SCCA rules, and it bolts up to the Integra tranny, which you can actually get LSD's for.

The basic specs of the drivetrain are as follows:

AWD Wagovan block
USDM Si head
89 Integra Pistons (approximately 12:1 cr by my calculations)
ARP rod bolts
Colt Stage 3 cam
Significant headwork (porting, de-shrouding valves, 5-angle valve job, etc.
KMS titanium retainers and heavy duty valve springs
Homemade intake manifold with CBR600F4i throttle bodies
Homemade 4-1 merge header
Crank trigger ignition and fuel control via Megasquirt'n EDIS system

89 Integra transmission
12 lb Integra flywheel
6 puck sprung Integra clutch setup (you have to use the Integra clutch/PP/flywheel with this setup - nothing else will fit)
Hybrid axles (2 Civic passenger side axles with Integra inner joints. Integra center shaft and bearing carrier)
3M Window Weld filled mounts
OBX torsen-style LSD


As always, a pic is worth 1000 words, so here are the pics:


Start with a $150 ebay JDM Wagovan motor (which I recovered nearly all the cost from by selling the DX head and carb biggrin.gif )


Build the bottom end with ARP bolts and Integra pistons:


Spend about 40hrs with a die grinder on the head:


#13
EPcivic

  • 2008 & 2009 EP National Champion
  • PipPipPipPip
    • Group: 2010 Contributing Member
    • Location:Findlay, Ohio
More head shots:


Closeup of the big bumpstick:


And the custom valve springs on the left compared to stock Si ones on the right:


#14
EPcivic

  • 2008 & 2009 EP National Champion
  • PipPipPipPip
    • Group: 2010 Contributing Member
    • Location:Findlay, Ohio
Now, a shot of the whole assembly in all it's glory:


Notice the extra mounting bosses for the center axle shaft just below the oil filter. Also notic how tight the Si oil cooler is on this block - it really didn't fit well, but I managed to get everything in place.

A closeup of the ITB setup and my pimpy manifold - gotta love TIG welded aluminum biggrin.gif


The prototype crank trigger setup:


Actually, I have been running this setup the whole time. I have parts to make a nicer lighter version, but haven't found the time to build it yet.

A few shots of the ultra-sexy merge header - this thing took WAY longer to build than I expected, and cost a bunch too, but the Jet-Hot ceramic coating sure looks cool.


#15
EPcivic

  • 2008 & 2009 EP National Champion
  • PipPipPipPip
    • Group: 2010 Contributing Member
    • Location:Findlay, Ohio
It all kinda started here, with a quest for a LSD. This is the OBX unit next to the stock Integra one:


And it all ended up in here. Shown with the neat all aluminum dual core Del-Sol radiator.


Here's a top view. In this one you can see the wasted spark ignition coil pack (from a Dodge SRT4).


So that the drivetrain overview. The projects associated with each one of these pictures could probably fill up a couple of pages of text, but since many of these have been covered before, I'll leave the details for the search engine.

Hope everyone is enjoying the show.


-Chris