Jump to content


H22 Crx Project


  • You cannot reply to this topic
230 replies to this topic

#16
firstgencrx

  • This thing should fit!
  • PipPipPipPipPip
    • Group: 2013 Contributor
    • Location:opɐɹoloƆ 'suılloƆ ʇɹoℲ
Drivers side mount (part three)

Looks like it fits. Time to start welding again:


I weld up this new arm and polish off the outer welds:


And with a grinder and file, I final fit it between the block mount, and the frame mount:


Side view of the fit:


Weld the whole thing up! I know, the most complicated mount ever created tongue.gif :


It fits! Whew:


I'm sure Keith is rolling his eyes now and giggling. laugh.gif

One down, two to go. cool.gif

Take care all!

David
Sharing with others what I do for myself!

My H22 CRX Project

Posted Image

#17
Lymitliss

  • King Luke
  • PipPipPipPipPip
    • Group: 2012 Contributor
    • Location:Seattle, Wa
    • Drives: 1986 CRX Si B18C1, 1973 240Z V8 Conversion
    Garage View Garage
Okay now my car next. wink.gif
Build Thread- Here


#18
JMSBND

  • HONDA MANIAC
  • PipPip
    • Group: 2010 Contributing Member
    • Location:Melbourne, Australia.
    • Drives: 1972 Honda N360, Honda Coupe 9s, Honda 1977 Civic, Honda 1986 JDM CRX ZC, 2003 Honda S2000
I am going to enjoy this!

That chassis rail mod is so common sense - and that rotisserie makes it a snap. I feel guilty just buying mine yours looks NASA spec!!!

Subscribed......
My private collection:1972 Honda N360 Scamp; 1972 Honda Coupe 9s; 1973 Honda EB Civic Hatch; 1987 JDM ZC CRX; 2003 Honda S2000

#19
jweber89

  • 1986年ホンダシビッ
  • PipPip
    • Group: 2009 Contributing Member
    • Location:Clarksville, TN
    • Drives: 1987 Honda Civic CRX DX(sold), 1994 Ford Ranger XLT 4x4, 1986 Honda Civic CRX Si
Just saw this thread and decided to start reading. Wow... I haven't been on here long enough to have read about your previous attempts, but glad you're getting back into it. Looks like a fun project. And those welds are just gorgeous. Keep up the great work!

#20
firstgencrx

  • This thing should fit!
  • PipPipPipPipPip
    • Group: 2013 Contributor
    • Location:opɐɹoloƆ 'suılloƆ ʇɹoℲ
Passenger side mount

The mount on this side of the car is a little more involved. Especially if you include the work I've already done to notch and reinforce the frame rail. I also had to think about it a little to get it the way I wanted it.

The passenger side of the engine/trans combo has three stout bolts on the top of the transmission for mounting. I need to make some kind of mount for the top of the transmission, and one that hangs off the side of the frame rail.

The first thing I did was make some 11 gage wings to fit the top brace I made for the rail:


I make two of them, one for each side of the poly mount housing:


The idea is to simply reach down to where the top of the transmission is:


I start the transmission mount with a simple 1/4" steel plate that picks up the two most outboard mounting bolts:


It bolts to the transmission, leaving the longer inward mounting bolt for me to deal with later. The two outer ones are on the same plane. The inner one is not:


I then literally start to whittle out pits and pieces to mount the poly housing and reach out to the third mounting bolt. Here is what I mean, this funny looking curved and bent thingy:


Is one side of the poly housing mount and holds the third bolt bushing. I'm not 100% sure how to describe this, so I'll just show you. You can see how it fits here:


Here is another view of the multiple parts that make this crazy mount up. Notice the compound angles:


A top view:


Time to weld and brace this thing up!

Continued in next post.....
Sharing with others what I do for myself!

My H22 CRX Project

Posted Image

#21
firstgencrx

  • This thing should fit!
  • PipPipPipPipPip
    • Group: 2013 Contributor
    • Location:opɐɹoloƆ 'suılloƆ ʇɹoℲ
Passenger side mount (part two)

I brace and weld the transmission mount up. It's a one of a kind for sure! laugh.gif

Side view:


Top view:


I can now start to position and weld up the frame rail wings. Top view of where I tacked them in place:


Side view of the same thing:


I go ahead and weld these wings up, and start to reinforce the frame brace a little more. I start to make some thin boxing plates to form a better looking top brace:


I tack them in and start to make more:


I make a few more and tack them in. It's starting to look better:


After making a top, I tack the rest of the reinforcements in using the drivers side mount to keep things from moving. I even make a couple of side gussets for the mount wings. That should be strong enough!:


I weld it all up, and take the sander to it a bit to clean it up even more. Side view:


Top view:


Not perfect, but will look great with some primer and paint later on.

Still just a couple little things to finish up.

Continued in the next post......
Sharing with others what I do for myself!

My H22 CRX Project

Posted Image

#22
firstgencrx

  • This thing should fit!
  • PipPipPipPipPip
    • Group: 2013 Contributor
    • Location:opɐɹoloƆ 'suılloƆ ʇɹoℲ
Passenger side mount (part three)

To finish up, I machine a couple of thick washers for each side of the mounting wings. One is flat for the head of the cross bolt, the other has a built in thread, or nut. They are welded to the wings to make them a little tougher:


I also go ahead and box up the notch I made in the bottom of the frame rail for clearance. A little hard to see in this picture:


Parting shot of the whole thing:


That should do it! The passenger side frame engine mount from hell! But it came out solid and nice. I should have no problems with it. Not ever. wink.gif

I have not finished the final rear sub-frame cross member mount yet. So give me a few days to get to it. That mount is by far the simplest of the three. That will be nice for a change. laugh.gif

What I think is so cool about this project so far is, that in spite of the extra work to make this happen, this engine is being properly installed. What I mean by that is, it should give me no problems when it's finished. I will have great ground clearance, the hood will shut, and the axles should last a long time because of the soft angles. I'll have gobs of hp and torque from a basically stock engine, so reliability is there too. It should be a great fun car when it's finally done!

Take care all!

David
Sharing with others what I do for myself!

My H22 CRX Project

Posted Image

#23
Lymitliss

  • King Luke
  • PipPipPipPipPip
    • Group: 2012 Contributor
    • Location:Seattle, Wa
    • Drives: 1986 CRX Si B18C1, 1973 240Z V8 Conversion
    Garage View Garage
I hate you and your abundance of awesome tools and supplies!

It looks amazing so far, what was that like two days and the engines damn near hanging in the car? That engine should scoot, I hear they're very torquey for Honda engines. Not to mention it's going in a very light car wink.gif my favorite combo.
Build Thread- Here


#24
firstgencrx

  • This thing should fit!
  • PipPipPipPipPip
    • Group: 2013 Contributor
    • Location:opɐɹoloƆ 'suılloƆ ʇɹoℲ
QUOTE (Lymitliss @ Jan 10 2010, 01:43 PM) <{POST_SNAPBACK}>
I hate you and your abundance of awesome tools and supplies!

It looks amazing so far, what was that like two days and the engines damn near hanging in the car? That engine should scoot, I hear they're very torquey for Honda engines. Not to mention it's going in a very light car wink.gif my favorite combo.


Ya, the problem with my build thread, is it doesn't really show how to do anything, hardly fair or relevant to most people.

The thing that is so amazing and great about the kakabox build thread, is he does everything with a tool set that anyone can afford. He keeps it simple, clean, and shows exactly how to do something. I worry that my build thread will just be more of a novelty then anything that actually helps anyone. I know that some of you guys here have the big machine tools.

The plus side of me having the infrastructure that I do, is I can develop and build cool kit for my car, which translates into our cars. tongue.gif

David
Sharing with others what I do for myself!

My H22 CRX Project

Posted Image

#25
Bubba

  • In the left lane
  • PipPipPip
    • Group: 2013 Contributor
    • Location:Western KY
    • Drives: 87 Civic Dx hatch with 1.5 CVCC and auto trans, devaced 87 CRX HF with rebuilt 1.3
Great work!

Those welds are fantastic- what type of welder and rod or wire are you using?

#26
firstgencrx

  • This thing should fit!
  • PipPipPipPipPip
    • Group: 2013 Contributor
    • Location:opɐɹoloƆ 'suılloƆ ʇɹoℲ
QUOTE (Bubba @ Jan 10 2010, 05:45 PM) <{POST_SNAPBACK}>
Great work!

Those welds are fantastic- what type of welder and rod or wire are you using?


Thanks! My Tig welder is an antique. It's an old Lincoln Ideal-Arc 300/300. Plain old sin wave machine, no fancy square wave like they have today. Weighs about 1,200 pounds I think. It's the model of Tig machine I cut my teeth on. The one I own is only a few years younger than me. laugh.gif

For steel Tig rod, I like ER70S2. It's a great all around Tig rod for both mild and some carbon steels. Works great, and is a preferred rod for normalized 4130 as well. Some people prefer the S6 for its extra cleaning power, but I can't tell the difference. So I just keep using the S2.

My wire feed (Mig) is newer, but still about 20 years old! HA! It's a Hobart Beta-Mig 250. I like it, but I rarely use it now. Years ago I used it a lot more, but most of my work these days is small stuff. If I'm trying to make large stuff stick together, I'll fire up the Mig. Much faster than Tig.

That blue Miller box on top of the Tig machine is my torch cooler. The beasts!:


Old School Rocks Baby! cool.gif

David
Sharing with others what I do for myself!

My H22 CRX Project

Posted Image

#27
keithg

  • Slowpoke
  • PipPip
    • Group: 2011 Contributing Member
    • Location:Phoenix, AZ
    • Drives: SCCA FP/GTL 1985 Honda CRX (EW)
QUOTE (firstgencrx @ Jan 10 2010, 03:33 AM) <{POST_SNAPBACK}>
I'm sure Keith is rolling his eyes now and giggling. laugh.gif


The next time someone asks me why we don't make this kit I will point them to this thread.
You Crazy!
Keith Gillespie
Hasport Performance
www.hasport.com

#28
GENONE

  • CRX Obsessed
  • PipPipPipPip
    • Group: 2014 Contributor
    • Location:Perth - Western Australia
    • Drives: 1983 CRX (29th Build), 1991 CRX, 1984 CRX HKS Supercharged
    • Image Gallery
You Sir are a genius smile.gif AWESOME Build - again!

hehe

When Jerry was over here in Perth and met with Anjin and myself, he mentioned about all the wonderful things you had on your mind... and how well you built them. This is another one of those wonderful things!
Posted Image
[GENONE] 1983 CRX Ballade Sports 1.5 SOHC Efi
[BANDIT] 1984 CRX Ballade Sports 1.6 DOHC HKS Supercharged
[SINISTR] 1991 CRX Si 1.6 DOHC Efi

#29
firstgencrx

  • This thing should fit!
  • PipPipPipPipPip
    • Group: 2013 Contributor
    • Location:opɐɹoloƆ 'suılloƆ ʇɹoℲ
Knuckle cleanup

Hello all.

In preparation for finalizing the front suspension on my project, I decided to do something with the clunky front knuckes. I'm preparing to do some final measuring for the traction bar project, and I figured I would use the exact knuckles I'll be running on my project. The clearance issues I'm finding will be the worst with the CRC/CIVIC knuckles, so it's best I do all of my measurements with those.

Most of you know that there are two knuckles that can be run on our 1G/3G cars. The stock knuckle, and the Ingegra knuckle. For those of us who did engine swaps, we are running the Integra Hubs with the larger splines. Some of us also run the longer Integra radius arms to get almost one extra degree of negative camber. But what some of you may not know, is the two knuckles are not the same.

The Integra has a wider track up front. They did this by making a slightly longer radius arm, and then they made a subtle change to the knuckle. What they did is make the arm that clamps to the bottom of the front strut a little longer too. They did this to off-set the extra camber that would have resulted from the longer radius arm. Sort of NULLs it out so to speak. The Integra knuckle is on the left, and a CRX knuckle is on the right:


If you run stock 1G/3G radius arms and knuckles, you have basically zero camber. With Integra radius arms and 1G/3G knuckles, you get almost one degree of extra negative camber due to the longer lower arm. But if you run Integra radius arms and Integra knuckles, you are back to basically zero camber. And finally, if you run stock 1G/3G radius arms and Integra knuckles, you could have a little extra positive camber, which you don't want. Something to think about when choosing your knuckle and radius arm combinations

Anywho, it's important for my project to use the original CRX knuckles. I want to have the option for as much camber if I choose. One advantage of the CRX/CIVIC knuckles compared to the Integra knuckles is they are a tiny bit lighter. Not much, but every little bit of unsprung weight saved is worth something. I can't remember exactly, but I think I read somewhere that for every pound of unsprung weight saved, it's like removing 10 pounds of sprung weight. Not from a acceleration viewpoint, but from a handling one.

An Integra knuckle I have here weighs about 7 pounds, 15.3 ounces:


The stock CRX knuckle I have here weighs 7 pounds, 9.1 ounces. The savings between the two styles is only 6.2 ounces, but it's something:


These knuckles, be it the 1G/3G or the Integra, are crude castings at best. Lots of flash and un-needed stuff. So I spent about 40 minutes this afternoon with my 4.5" hand grinder and whittled down the junk. I mostly whent after outside sharp edges and to blend them a bit and make them look better. After a bit, I got the knuckles to look something like this:


I could have safely removed more, but I didn't want to spend too much time on them. Did I loose any weight? The new weight is 7 pounds, 1.4 ounces:


A savings of 7.7 ounces of pure unsprung weight. I'll take it!

Update: After cleaning up the seconded knuckle, I noticed it was much lighter. Mostly due to the original casting. So I spent a little more time safely removing some more cruft off the first one, and got them both to the same weight. The new weight is now only 6 pounds, 12.2 ounces:


That's a new savings of 12.9 ounces!

Take care,

David
Sharing with others what I do for myself!

My H22 CRX Project

Posted Image

#30
firstgencrx

  • This thing should fit!
  • PipPipPipPipPip
    • Group: 2013 Contributor
    • Location:opɐɹoloƆ 'suılloƆ ʇɹoℲ
How to regain your memory

I have no special secret for this. No magic herbs from the jungles of the Amazon, or the prayers from a monk in Tibet. No, this solution is easier than it looks. This will be the dumbest post in my entire build thread, so I'll get it out of the way now. tongue.gif

When you start to get older like me, you don't have the memory you used to have. After completely taking the car apart, I realized I would never in a million years figure out how to get it back together. I'm not talking about the big stuff like the drive train and suspension, I'm talking about the little stuff. Like the interior bits, or the funny little bolts that hold the fenders or other trim on. My solution?

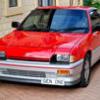
I went out and bought another CRX! I actually bought the car several years ago, but then my project is what, three or more years old? laugh.gif


It's a 1985 CRX Si with just about every available factory option. I will not touch this car until my first project is finished. It's my road map ya know! wink.gif

David
Sharing with others what I do for myself!

My H22 CRX Project

Posted Image