 Sign In
 Create Account
This thread is ROCKIN'!
I really like the hood cut-outs, actually. Function over Form.
Keep it up!!
Crx "smf" Project
Started by Aren D., Jun 06 2010 01:48 AM
234 replies to this topic
#16
 Posted 06 June 2010 - 11:11 PM
-
- Leadfoot
-

- Group: 2009 Contributing Member
- Location:Mooresville, NC
-
Drives: 1986 Crx Si
 Back to top
#17
Posted 06 June 2010 - 11:20 PM
-

- Leadfoot
-
- Group: 2011 Contributing Member
That beater is nicer than some peoples best of 5 vehicles...
Not to mention, thanks to the WIP race car.. it's sporting alot of very nice toys...
Not to mention, thanks to the WIP race car.. it's sporting alot of very nice toys...
#18
Posted 07 June 2010 - 10:09 AM
-
- Save the pepper, save the world.
-
- Group: 2013 Contributor
- Location:Tooele UT
-
Drives: 1985 CRX SI/2003 Frontier SC/2006 Jetta TDI/2014 Civic SI
-
Image Gallery
 View Garage
QUOTE (ChrisF-dude @ Jun 6 2010, 08:42 AM) <{POST_SNAPBACK}>
Even had the black trim stripe, cool.
The trim stripe was red and it seemed to be painted black, the car still dose not have any trim on it but I am thinking it may be cool to do a red stripe...
QUOTE (OG Wagon @ Jun 6 2010, 11:11 PM) <{POST_SNAPBACK}>
I really like the hood cut-outs, actually. Function over Form.
Keep it up!!
Keep it up!!
Thanks, its an idea I have had for awile and I think it looks sweet plus I have not bottomed out yet and the teins still have full bumper stopers for there protection
QUOTE (EuphoricBlue @ Jun 6 2010, 11:20 PM) <{POST_SNAPBACK}>
That beater is nicer than some peoples best of 5 vehicles...
Not to mention, thanks to the WIP race car.. it's sporting alot of very nice toys...
Not to mention, thanks to the WIP race car.. it's sporting alot of very nice toys...
thanks, and yeah its helps alot to have a heep of car parts that I have been collecting of the last 5 years...
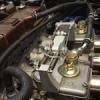
Here are a few more little details I frogot to add.
stock hood latch
then I pretty much went "kaka" on them

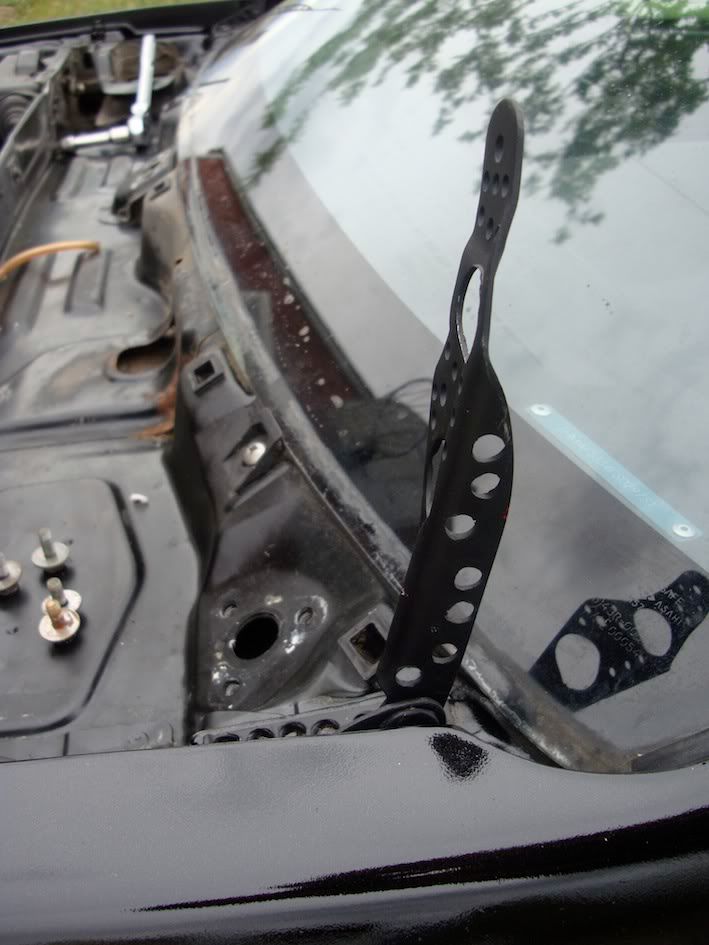
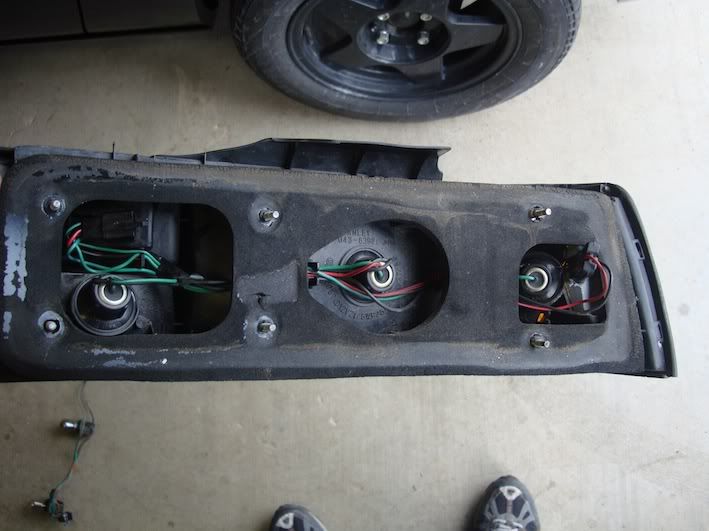
EDM tail install
edm top, usdm botttom notice the extra blinker
If I was a softy I would have just not had the bliker, but I have a dremal.
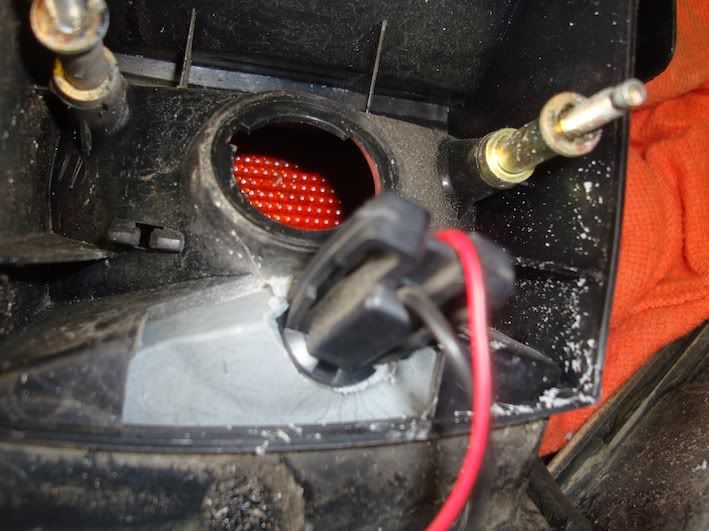
you need to swap the tail light wire harness any way for it to work right w/o any wire mods
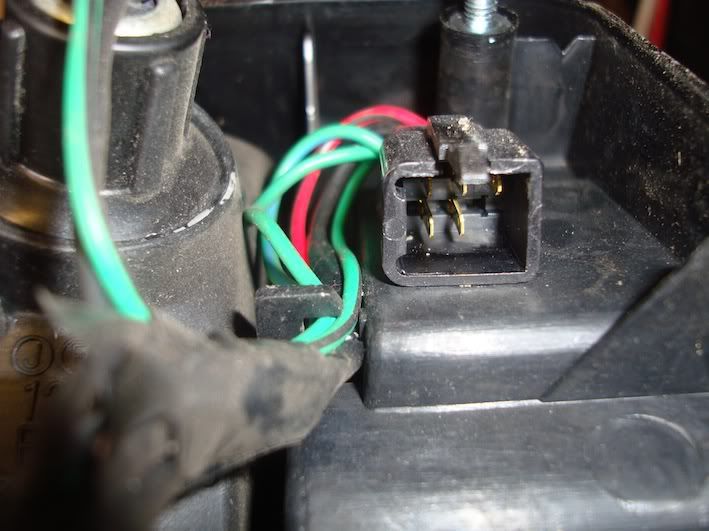
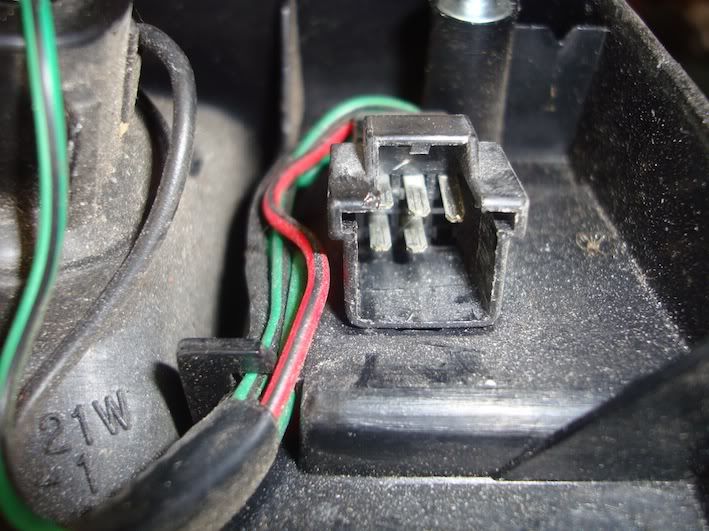
The completed swap in to a edm tail light, you can see the edm's installed in the other pics
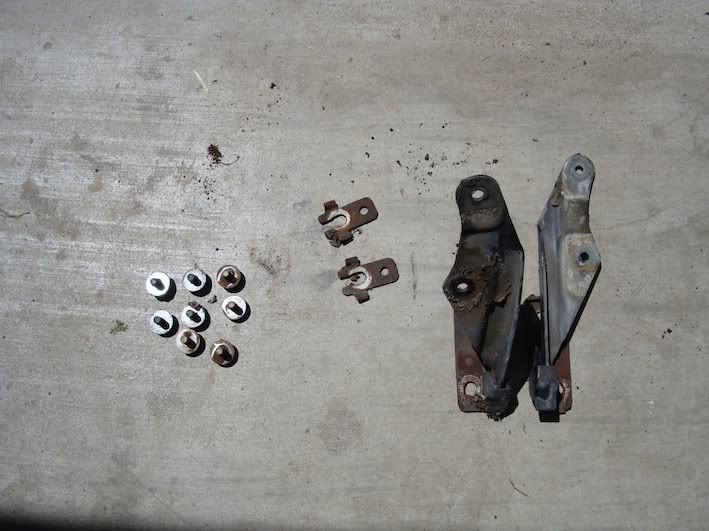
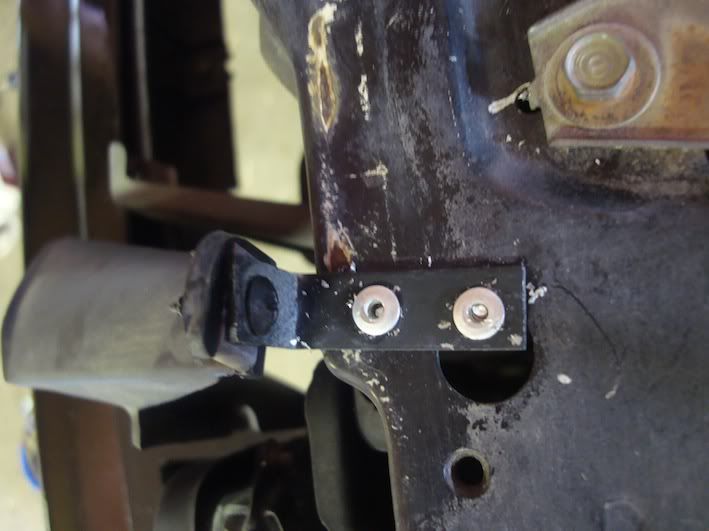
This is the little L mount that I installed to run the 85 head light srouds w/ the cf hood.
#19
Posted 07 June 2010 - 11:18 AM
-

- Slowpoke
-
- Group: 2009 Contributing Member
- Location:SLC
-
Drives: 84 1500 Coupe, 89 Cherokee
#20
Posted 07 June 2010 - 02:08 PM
-
- Leadfoot
-
- Group: 2009 Contributing Member
- Location:Mooresville, NC
-
Drives: 1986 Crx Si
Looks straight up sinister bro!
yeah, a stripe would be cool. How bout a mettalic silver one?
yeah, a stripe would be cool. How bout a mettalic silver one?

WagoCats HOOOOOOOO!!!!!
#21
Posted 07 June 2010 - 04:19 PM
-

- This thing should fit!
-
- Group: 2013 Contributor
- Location:opɐɹoloƆ 'suılloƆ ʇɹoℲ
Make it a ghost stripe. Just a couple shades lighter than the base color.
Nice car dude.
Nice car dude.

#22
Posted 08 June 2010 - 03:26 AM
-

- EDM B16A1 INSIDE
-
- Group: 2013 Contributor
- Location:The Netherlands, Europe.
-
Drives: Honda 1G B16 Turbo
-
Image Gallery
View Garage
nice job aren 
1. EDM 1986 Honda CRX AS - B16A1 engine - OBD1 - Turbo - Stitch welded chassis.
2. EDM 2001 Lexus IS300 3.0 RWD - Daily Drive
#23
Posted 09 June 2010 - 12:39 AM
-
- Save the pepper, save the world.
-
- Group: 2013 Contributor
- Location:Tooele UT
-
Drives: 1985 CRX SI/2003 Frontier SC/2006 Jetta TDI/2014 Civic SI
-
Image Gallery
View Garage
QUOTE (Jaminak @ Jun 7 2010, 11:18 AM) <{POST_SNAPBACK}>
Looks great! What size tires are those?
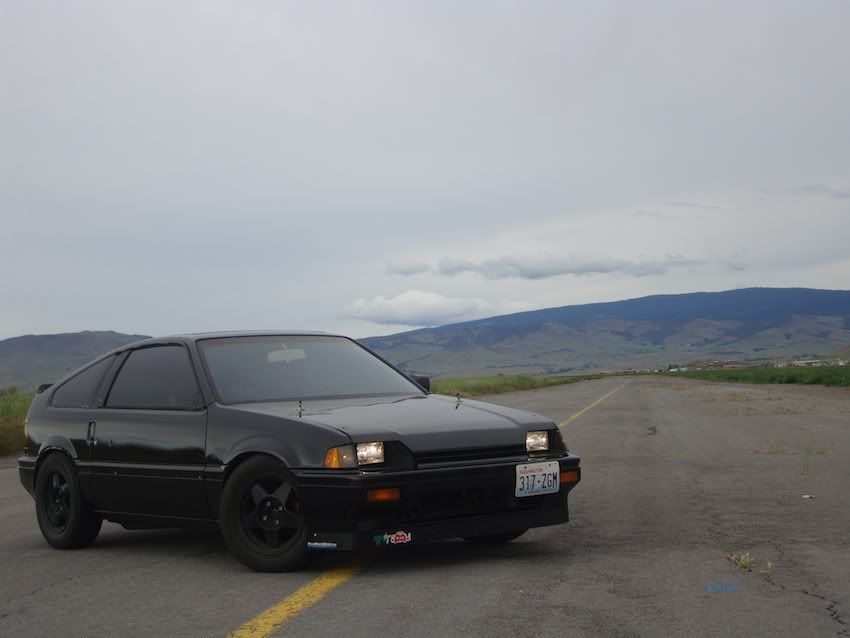
Thanks everyone and the tire size is 195.60.14 the wheels are 14x6
So its been about a week since I painted it time to put some wax on. I was thinking about doing a cut and buff, however f that.
wax on
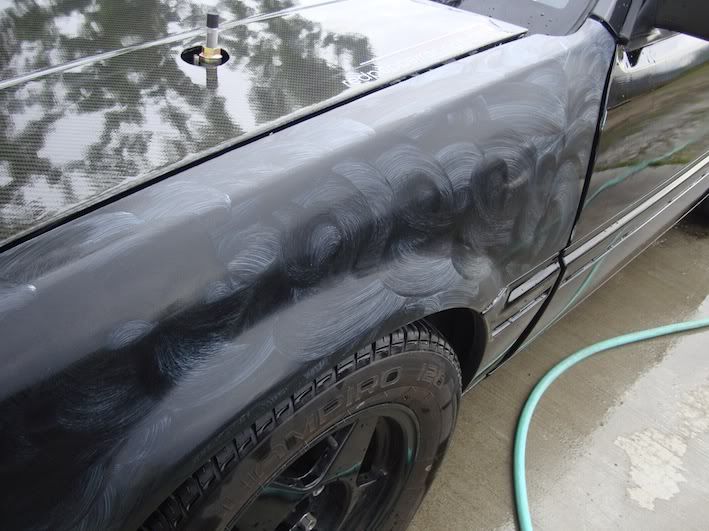
wax off
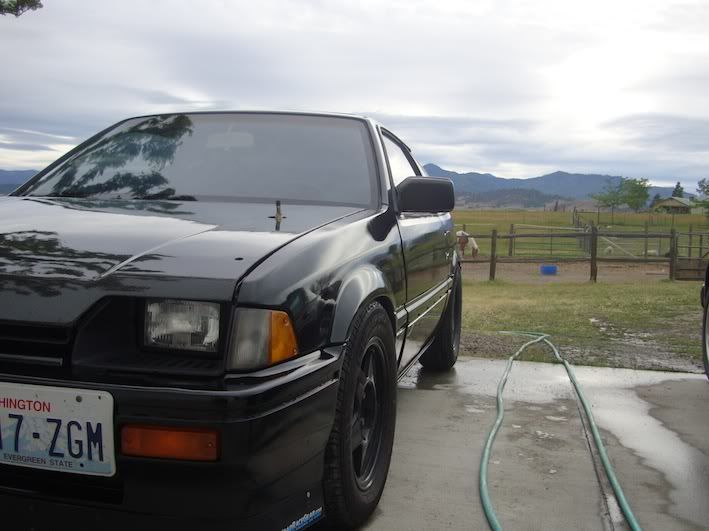
thats it for today
#24
Posted 09 June 2010 - 01:07 AM
-

- Slowpoke
-
- Group: Members
- Location:Cypress TX
-
Drives: 1969 CST10, 1987 CRX HF
#25
Posted 09 June 2010 - 01:21 AM
-
- Save the pepper, save the world.
-
- Group: 2013 Contributor
- Location:Tooele UT
-
Drives: 1985 CRX SI/2003 Frontier SC/2006 Jetta TDI/2014 Civic SI
-
Image Gallery
View Garage
QUOTE (TexanIdiot25 @ Jun 9 2010, 01:07 AM) <{POST_SNAPBACK}>
Very nice! About how much have you spent on this "beater"?
check it out, I have Loved 1g crx's since I got my first one (see crx sb project) when I turned 16 from then on I have been buying parts every now and then and trying to try new stuff out it. So it may look like I have been dumping money into this car but really its just stuff that I bought over a peirod of 8yrs. sooo the car cost 1300, I spent 200 on paint supplys, and I bought new torsion bars ... so 1800.00 including the car but if you wanted to add up all the parts you could do that, but for example I got that hood in 2004, the panhard bar in 2006ish so on and so forth.
#26
Posted 11 June 2010 - 01:53 AM
-
- Save the pepper, save the world.
-
- Group: 2013 Contributor
- Location:Tooele UT
-
Drives: 1985 CRX SI/2003 Frontier SC/2006 Jetta TDI/2014 Civic SI
-
Image Gallery
View Garage
Well sence the crx sb is waiting on money to move forward I took it apart. I figured there was no use on having those parts just sitting there doing nothing.
Ok today I did a bit of work on the rear. Maybe tomarrow I can finish the brakes.
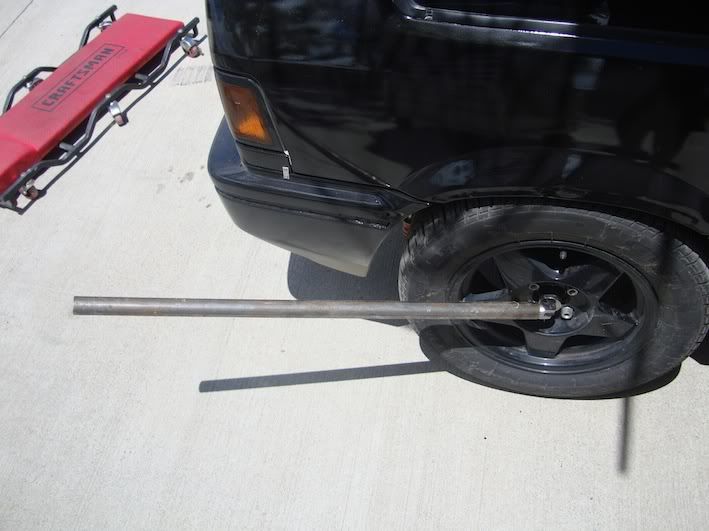
Axle nut removal tool:
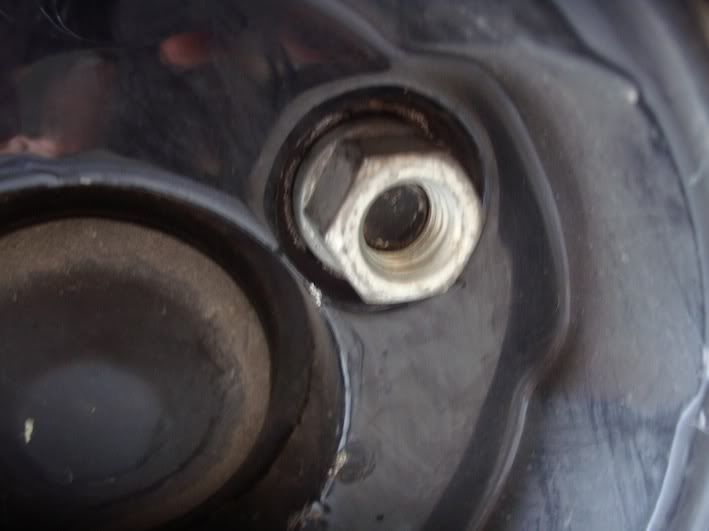
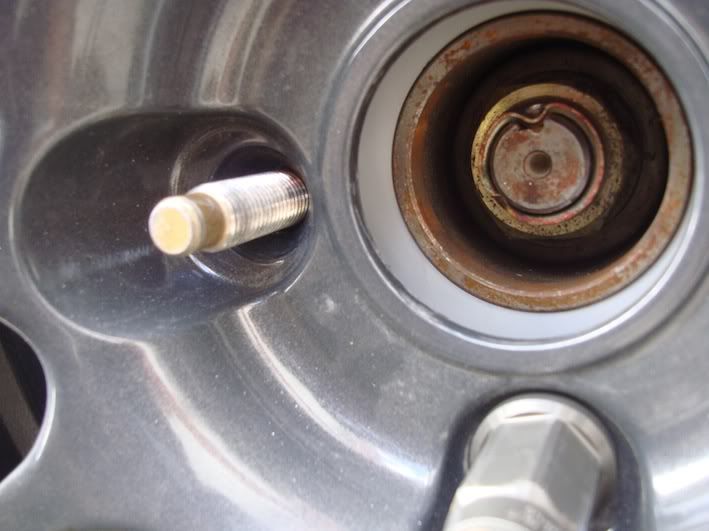
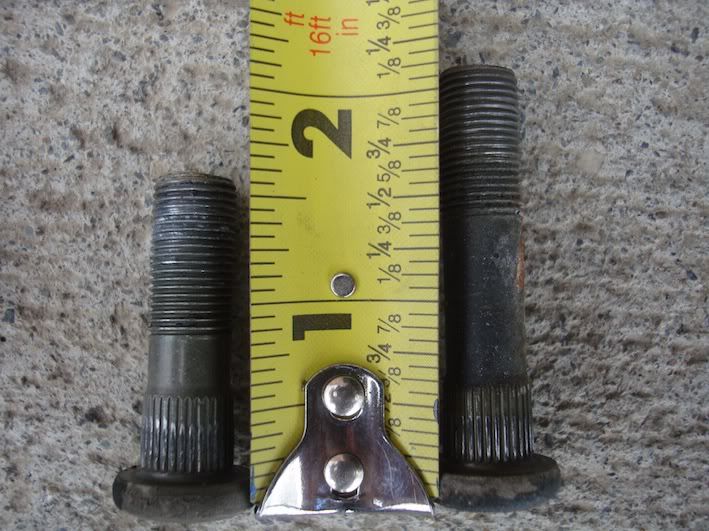
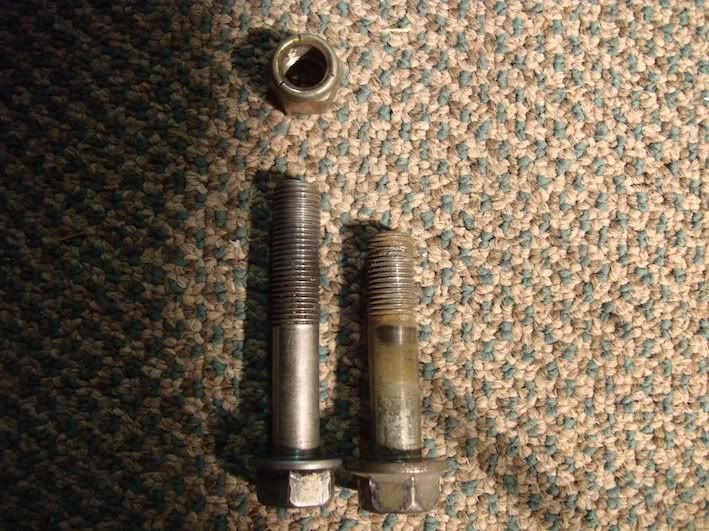
This is how much wheel stud my lugs where using it must be because of the wheels or some thing, its the same on the front. I went ahead and used ARP extended wheel studs to fix that.
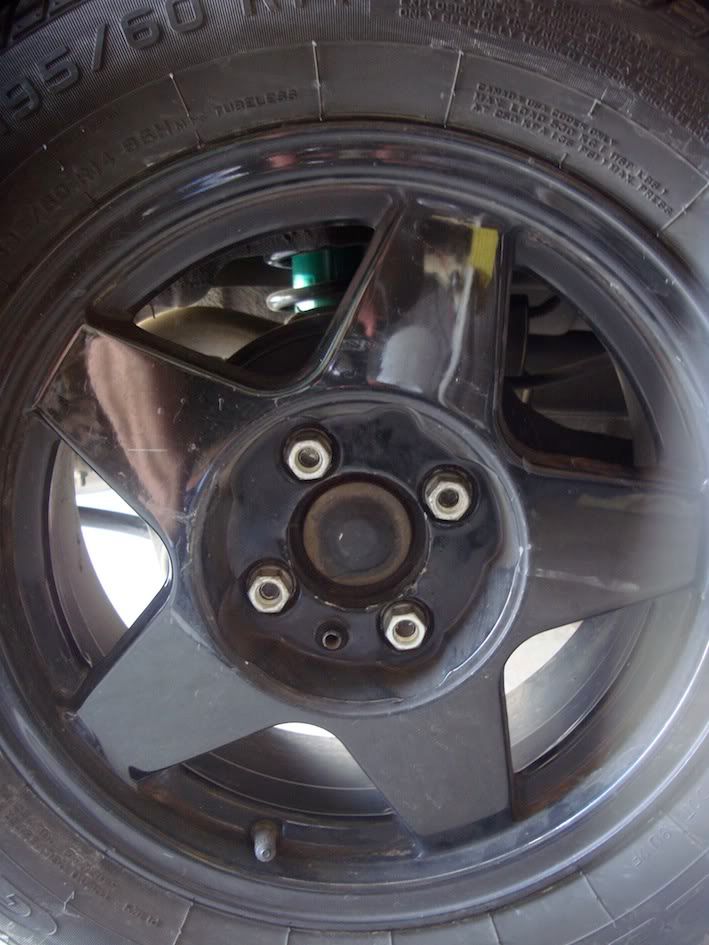
Arp, much safer.
The drum.
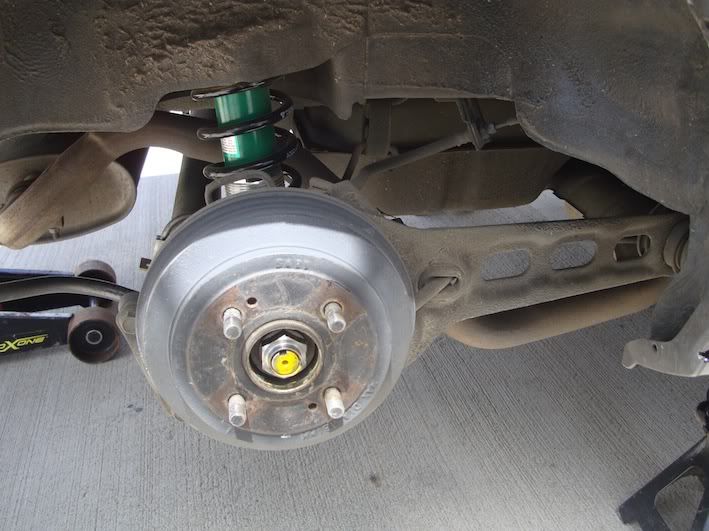
The disc. (waiting on a new brake line to come in), I am also useing 5mm rear spacer for a wider track.

Stock ebrake cable mount vs criss cross integra ebrake cable. Integra cables beening in the dark, I guess I will get a better shot tomarrow. Those rubber dust gromets are the most difficult part to install on the rear disc swap.
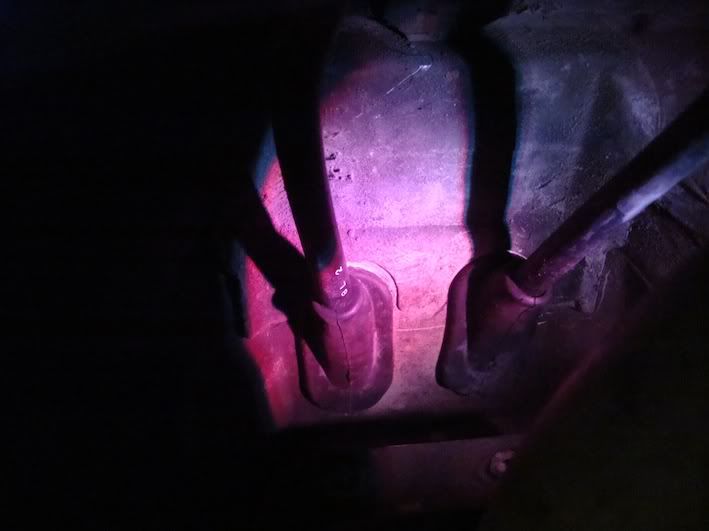
If you do a rear disc swap and decide to use your stock axel or maybe you have a lite weight HF axle, you will need to swap these studs out with longer integra studs.

Ok today I did a bit of work on the rear. Maybe tomarrow I can finish the brakes.
Axle nut removal tool:
This is how much wheel stud my lugs where using it must be because of the wheels or some thing, its the same on the front. I went ahead and used ARP extended wheel studs to fix that.
Arp, much safer.
The drum.
The disc. (waiting on a new brake line to come in), I am also useing 5mm rear spacer for a wider track.
Stock ebrake cable mount vs criss cross integra ebrake cable. Integra cables beening in the dark, I guess I will get a better shot tomarrow. Those rubber dust gromets are the most difficult part to install on the rear disc swap.
If you do a rear disc swap and decide to use your stock axel or maybe you have a lite weight HF axle, you will need to swap these studs out with longer integra studs.
#27
Posted 11 June 2010 - 02:19 PM
-
- Save the pepper, save the world.
-
- Group: 2013 Contributor
- Location:Tooele UT
-
Drives: 1985 CRX SI/2003 Frontier SC/2006 Jetta TDI/2014 Civic SI
-
Image Gallery
View Garage
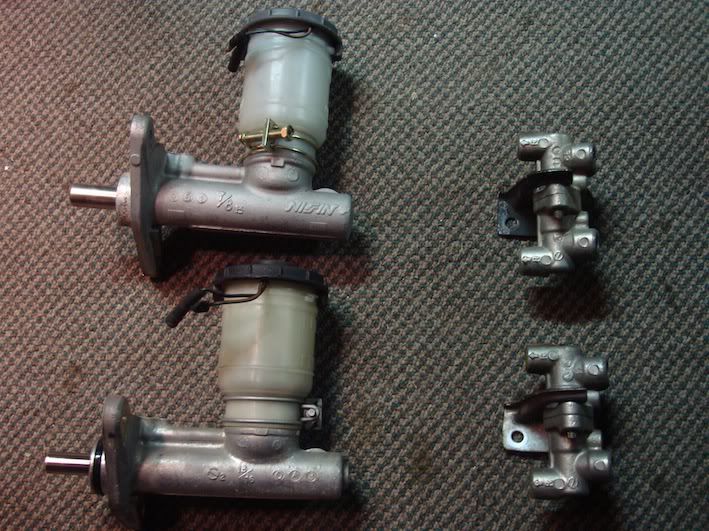
Ok, so 1989 integra proportioning valve and integra 7/8 master cylinder installed.
7/8 top, 13/16 lower. the integra m/c is modified to fit into a stock crx booster by fileing the O.D. of the insert centering shaft.
brb
7/8 top, 13/16 lower. the integra m/c is modified to fit into a stock crx booster by fileing the O.D. of the insert centering shaft.
brb
#28
Posted 11 June 2010 - 05:01 PM
-

- Powered by Natural Gas
-
- Group: 2010 Contributing Member
- Location:Maryland, United States of America, Earth, Terran System, Milky Way 21158
-
Drives: 85 CRX Si (ZC), 2011 Toyota Camry
-
Image Gallery
[/quote]That is one badass looking car. MadMax sorta. That is the route I was gonna take before doing a Ballade Sports build. I was gonna do all black with my blacked out taillights, and black MR5s. I'm starting to think I went the wrong way.
Once a woman is introduced to Colonel Angus, she'll settle for nothing less.![]()

#29
Posted 12 June 2010 - 02:59 AM
-
- Save the pepper, save the world.
-
- Group: 2013 Contributor
- Location:Tooele UT
-
Drives: 1985 CRX SI/2003 Frontier SC/2006 Jetta TDI/2014 Civic SI
-
Image Gallery
View Garage
Thanks dude, I really like it all back makes me feel like a villan or something... I actully had my no-tinted windows in during paint and decied to stick with the tint.
So more goodies.
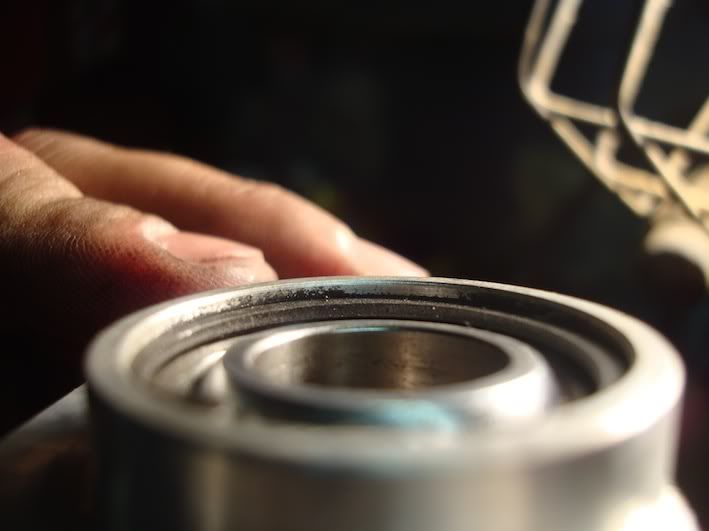
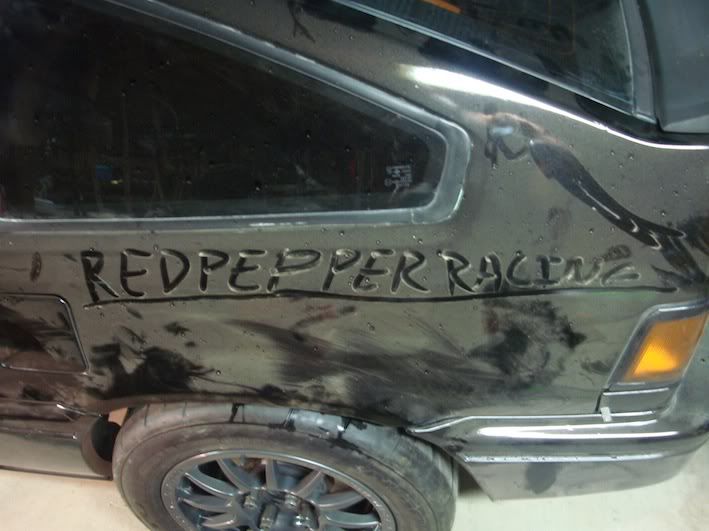
First I noticed that my front upper pillow mount, only on my left side, in my redpepperracing camber plates had some play where the entire bearing would go up and down between the snap ring and its seat. it was moving about .020"
You can kinda see what I speak of in these shots; sitting flush against the snap ring and then moved to its seat.
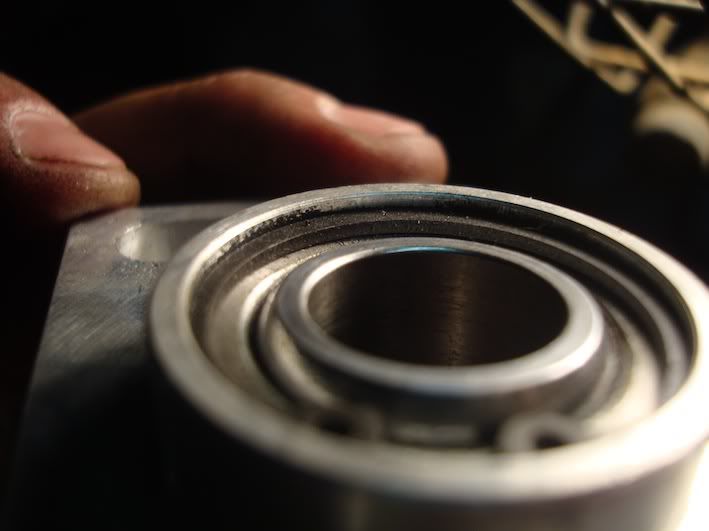
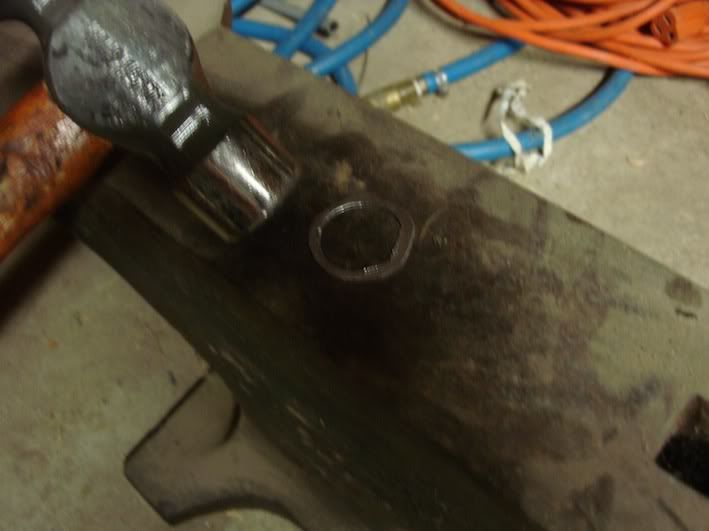
So I set out on an adventure to fix it.
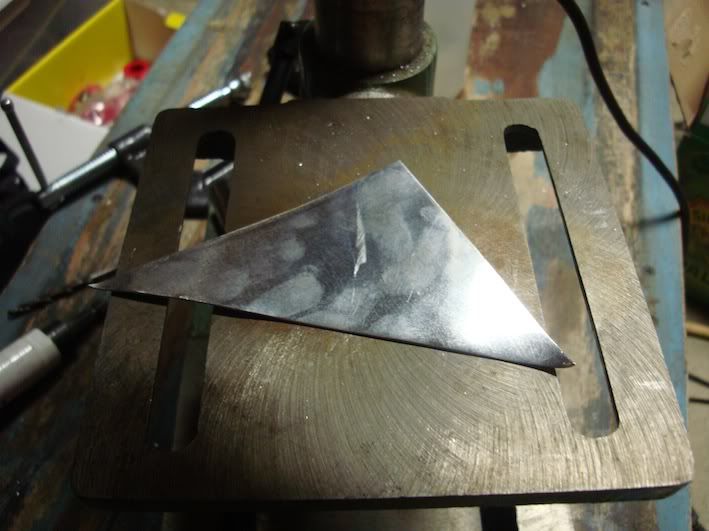
This is my shim in the raw.
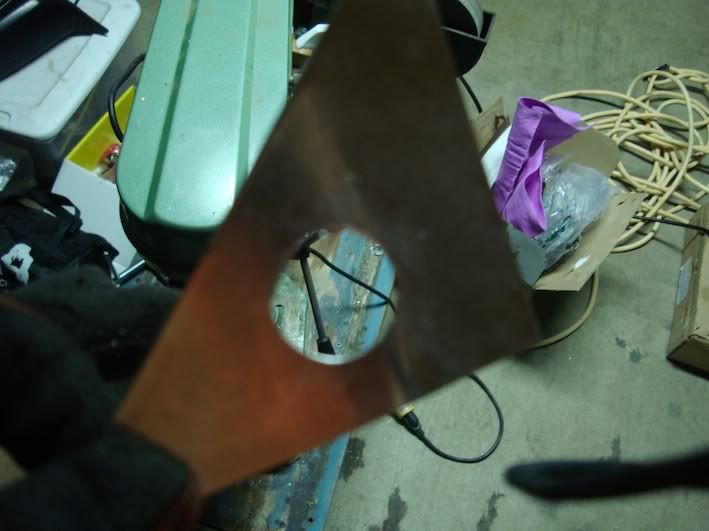
one inch hole drilled
Trusty snips to make a shim.
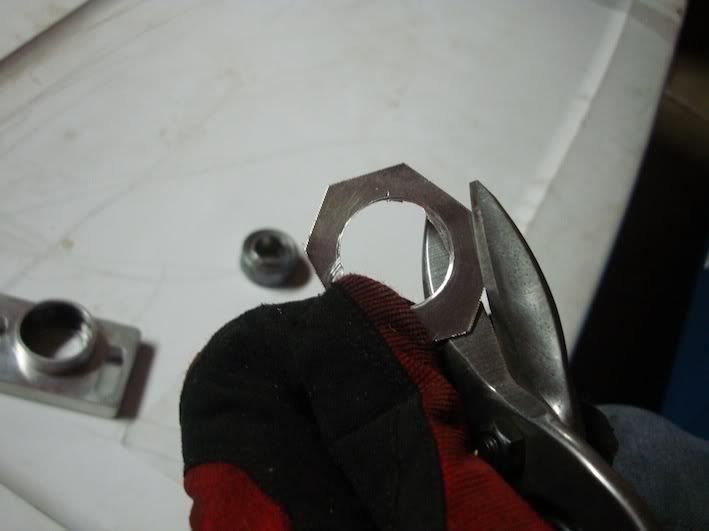
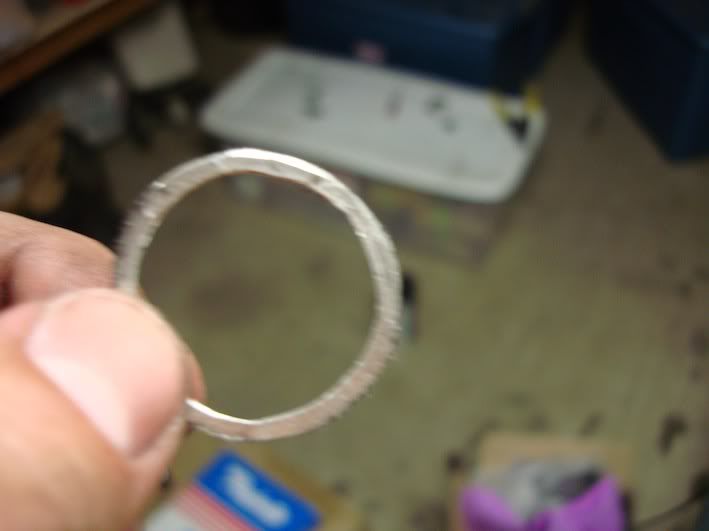
Then flatend out on the a bit.
Cleaned up looking more like a shim
into the camber plate
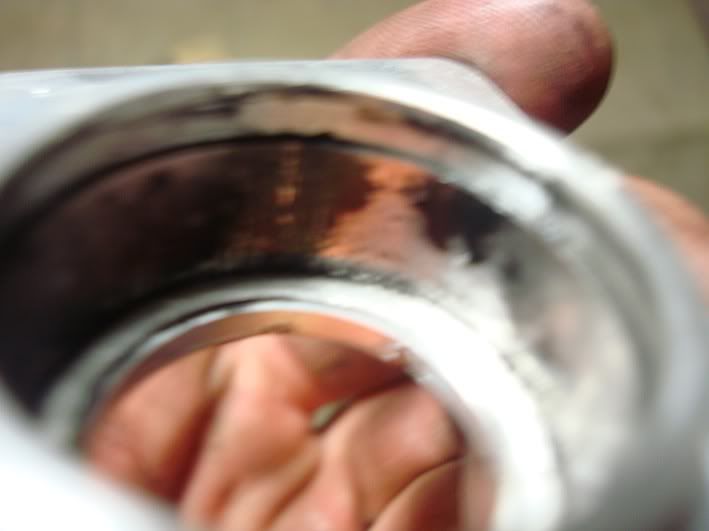
Then the bearing was in stalled I actully had to hammer it a bit to get the snap ring in because the shim made it so tight but now its way better and my shock has no more free room
So more goodies.
First I noticed that my front upper pillow mount, only on my left side, in my redpepperracing camber plates had some play where the entire bearing would go up and down between the snap ring and its seat. it was moving about .020"
You can kinda see what I speak of in these shots; sitting flush against the snap ring and then moved to its seat.
So I set out on an adventure to fix it.
This is my shim in the raw.
one inch hole drilled
Trusty snips to make a shim.
Then flatend out on the a bit.
Cleaned up looking more like a shim
into the camber plate
Then the bearing was in stalled I actully had to hammer it a bit to get the snap ring in because the shim made it so tight but now its way better and my shock has no more free room
#30
Posted 12 June 2010 - 03:18 AM
-
- Save the pepper, save the world.
-
- Group: 2013 Contributor
- Location:Tooele UT
-
Drives: 1985 CRX SI/2003 Frontier SC/2006 Jetta TDI/2014 Civic SI
-
Image Gallery
View Garage
Lets see, yep I just waxed this. I love living on a dirt road.
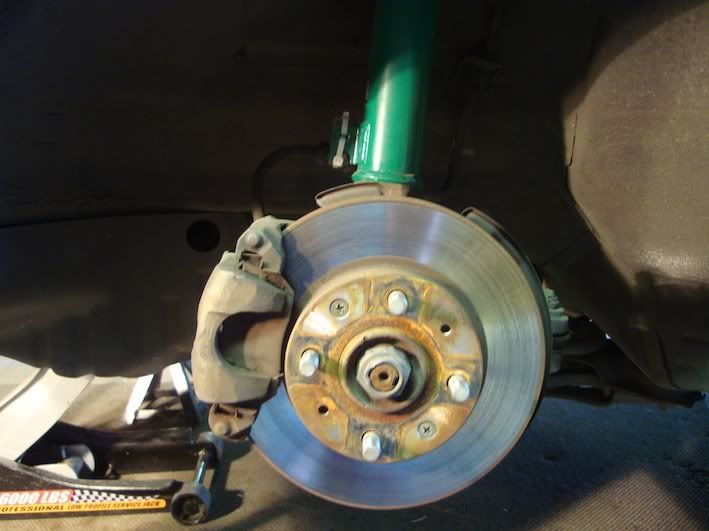
Now I am still working on getting all my brakes installed but I got the drivers side fronts in and just need to put in the rear brake lines, and pass side front's.
So... stock.
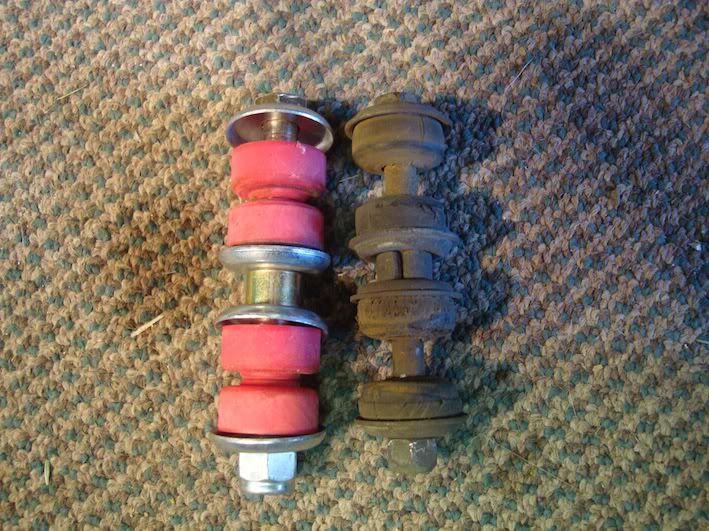
The front sway bars end links were replaced. The sway bar mount bushings maybe I will do some other time they are a pita.
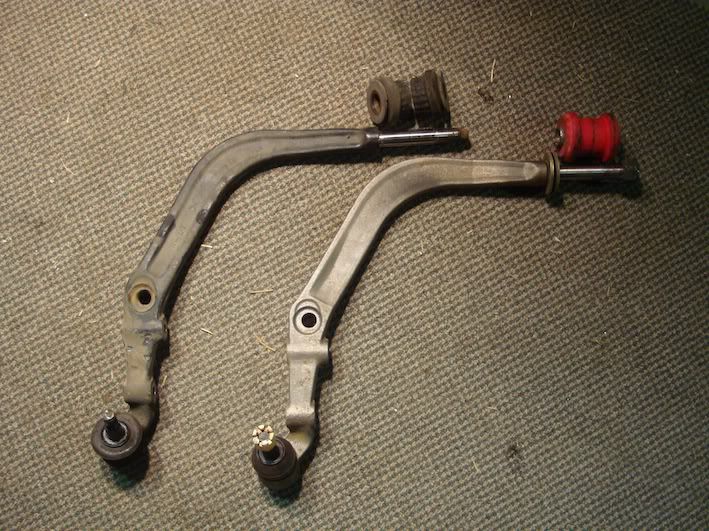
New LCA where installed, I could have sworne I had some integra LCA, that I was going to use but I could not find them anywhere??? oh well I also installed some squeak machine bushings.
These have to be one of my favorite parts on the car, firstgen's bump steer kit. I will email him for the correct settings once my car is all measured out.
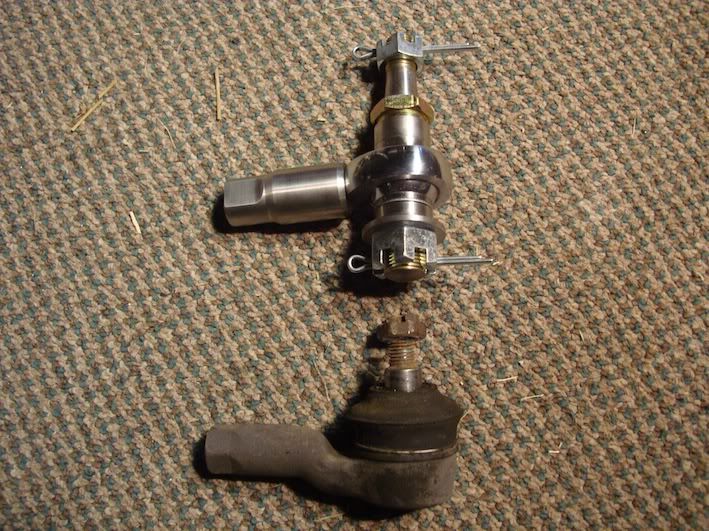
corect way to cotter key:
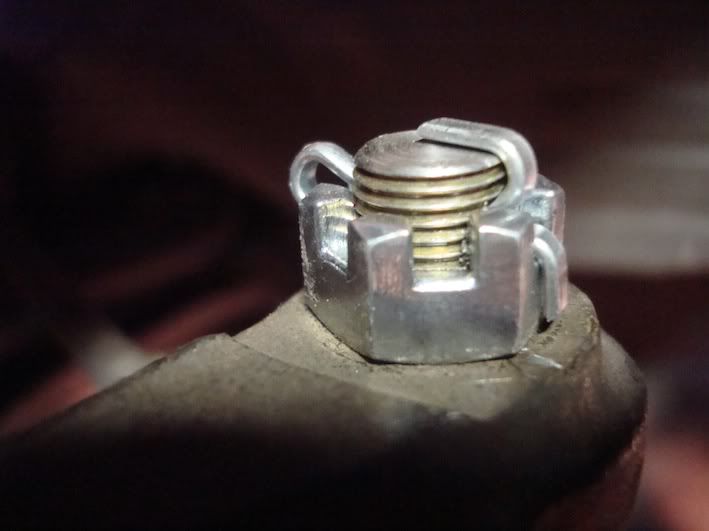
ARP's also need up front.

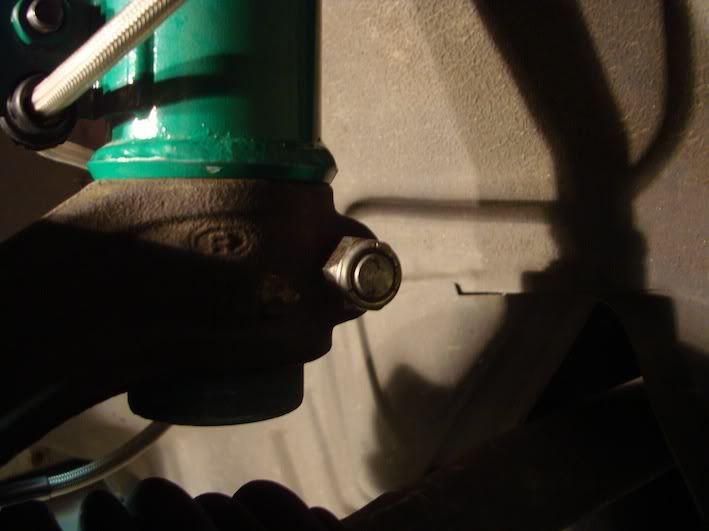
This is also a nice touch, I started doing this after one of my strut bolts came loose after driving 3 weeks strait with tire chains on to and from the ski park every day, any way just install a longer bolt through the upright and then add the saftey nut.
Now I am still working on getting all my brakes installed but I got the drivers side fronts in and just need to put in the rear brake lines, and pass side front's.
So... stock.
The front sway bars end links were replaced. The sway bar mount bushings maybe I will do some other time they are a pita.
New LCA where installed, I could have sworne I had some integra LCA, that I was going to use but I could not find them anywhere??? oh well I also installed some squeak machine bushings.
These have to be one of my favorite parts on the car, firstgen's bump steer kit. I will email him for the correct settings once my car is all measured out.
corect way to cotter key:
ARP's also need up front.
This is also a nice touch, I started doing this after one of my strut bolts came loose after driving 3 weeks strait with tire chains on to and from the ski park every day, any way just install a longer bolt through the upright and then add the saftey nut.


Community Forum Software by IP.Board
Licensed to: Red Pepper Racing