Jump to content


D16a1 Blacktop


  • You cannot reply to this topic
17 replies to this topic

#1
Rampage

  • I bleed motor oil.
  • PipPipPipPipPipPip
    • Group: Moderators
    • Location:Vancouver, British Columbia
    • Drives: The Si (86 Civic Si D16A1 blacktop) The Blackbird (87 CRX Si Bone Stock) Cherry II (86 Civic 1500S Mostly Stock)
    • Image Gallery
    Garage View Garage
Hey people its me, I'm still alive, believe it or not! ph34r.gif

I've got a little bit of a project brewing, and here are some teaser pics:


Interior needs assembly


Engine bay after a fresh spray ready for a new soul


D16A1 Blacktop: Some assembly required


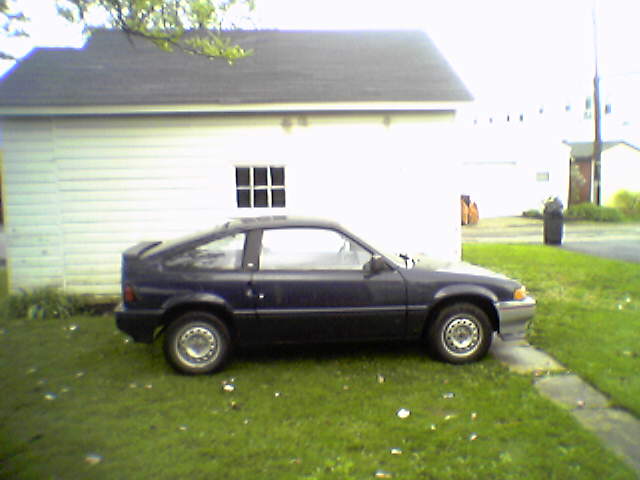
The host: 1986 Civic one-off custom JDM Vtec Mudrod


So i've had this car for six years now and i'm finally swapping in some significant power. I've already swapped in a CRX Si setup, having modified my fuel system to add the CRX pickup to the civic tank, the integra high pressure main line, and the full harness for the injection. My goal is to maintain the original harness and add the necessary wires for twin-cam, including the emissions solenoids, ELD, VSS, cam sensor, and radiator fan relay. There may be more that I have forgotten but thats my incomplete list.

The mechanical of it is simple, integra hubs, mix and match stock mounts, timing cover mod, shift linkage. One thing I noticed when looking at the integra hubs is that they appear to be identical to the civic knuckles with the small exception of the wheel hub inside the wheel bearing having a larger inside diameter to accept the larger integra axles. Aside from that they appear identical. I should be able to retain my EF front brakes, as the brake caliper mount appears the same.

I'm good at wiring but there are a few areas that I am not 100% on, like the VSS wiring at the dashboard harness, and the third engine harness plug. Any of you blacktop swappers that may have some information on those two small bits chime in, I could use some advice, or links to helpful diagrams/pinouts.

Thats it for now, I will post some pictures of my VSS mod and I intend a full write-up at the conclusion of this project!

Cheers,
Mark

SportInjectedClub

I don't frequent the boards much anymore, but i'm a wealth of knowledge. Email or PM me if you're stumped!

#2
crxls

  • corvette contender
  • PipPipPipPipPip
    • Group: Contributing Mod
    • Location:Hanover Pennsylvania
    • Drives: your car if i find the keys
    • Image Gallery
dude, glad to see you back. if there's anyone here that we can count on to keep a car going as long as possible, it is you. remembering the Bulldog haha

i just finished a swap that has been talked about forever but never done on this board. the electronic advance fuel injected blacktop in an 87 AWD wagon. thing runs great and in my opinion this is the setup that honda should have put in this car in the first place since the AWD wagon is so heavy. the old 76 HP D15 was way too underpowered for merging onto highways in a 2300 pound car and was actually a safety hazard in my opinion.

as for helping you with wiring... im probably of no help since i just put a 88 integra chasis harness in the car along with the integra's combo switch and gauge cluster since it fits the wagon perfect with minor fabricating so it's pretty much all integra. only wiring that had to be soldered in was beside the drivers seat to connect to the wagon's rear harness, civic wagon plug's for interior dimmer, rear defroster and dash clock needed to be adapted to the teg harness but all colors matched. also had to splice in the headlight, corner light and bumper light plugs because someone cut them off the integra harness before i got to it so im not sure if they were the same or not before they were cut. as for integra gauge cluster in the hatch... i dont think it can be made to fit as easily as in the wagon but i could be wrong

there's a build thread of this build somewhere around here but it hasnt been updated since i put the engine in and forgot about it last summer. my ex (sindrlla) who is the owner of the car will be updating the thread real soon with the finished results.

good luck on your swap. im sure you wont let us down
When I die, i want to go asleep peaceful.......... not screaming and freaking out like everyone else in the car

"i left the bar a little after you and ended up flipping my car in the arbys drive thru"


QUOTE (cbstdscott @ Dec 10 2008, 03:27 PM) <{POST_SNAPBACK}>
Another loser who can not get traction. I feel sorry for him.

IM A LOSER!!! my car pulls harder when spinning than any "highly modified" EW


Team BUrnOUt founding member

#3
Rampage

  • I bleed motor oil.
  • PipPipPipPipPipPip
    • Group: Moderators
    • Location:Vancouver, British Columbia
    • Drives: The Si (86 Civic Si D16A1 blacktop) The Blackbird (87 CRX Si Bone Stock) Cherry II (86 Civic 1500S Mostly Stock)
    • Image Gallery
    Garage View Garage
Right so today I started mocking up the ECU.

The car never came with any sort of ECU mount so its time to fab something together with the honda parts kicking around.

I used an 88-91 ECU cover and found that when placed correctly, it cradles the ECU perfectly under the passenger seat. I have a feeling I may have seat clearance issues, but its the passenger side, and less cruicial.

Here is the plate tack welded in place, with the ECU sitting on upside down bolts tack welded to the plate


I also saw several examples of the ELD mounted near the ECU, so I copied:


An interesting side note: This ELD set-up is incorrect.
The ELD is like an ammeter and uses an inductive pickup to sense the voltage going through the hole inside the unit. In other words, the bracket that I used to fasten the unit is actually part of the integra fuse box and is a live connection between two terminals of Ignition power. This is explained further here


Here are the wires that I added to the ECU for correct function. I carefully cut the wires from the integra harness to preserve colour and avoid confusion. These wires and colours are stock.


From top to bottom:

Green/Red: ELD input. This wire will end up continuing on to the dash fuse panel as the ELD needs to be revised.
Black/Yellow: Switched Ignition voltage. The branch is for the ELD as well. Again, to be revised.
Yellow/Red: VSS input. Comes from the VSS pulser, more to come on the VSS
Blue: Alternator C terminal. I need more time to figure this one out.
Green/White: Brake switch input
Green/Red: EACV driver.
White: Ignitor
Green: Resonator control solenoid trigger. This must be for the stock Integra air induction.
Red: Charcoal canister purge cut solenoid. I'm beginning to contemplate deleting this
Blue/Silver stripe: Radiator fan relay trigger. I'm wiring this up for sure, more details to follow on radiator fan relays.
Blue: Idle up solenoid trigger. Its on or its off, it may be a cold start or AC thing, so i'll be looking into it further.
Chunky Green wire: Actually three wires, this is the proper wire for the CYL sensor. The outer casing is a shielding, which should be patched into the shielded sensor ground at the other two TDC and CRANK sensors. The shielding is also shared with the O2 sensor.
The two orange and white wires are for the sensor itself, to be wired in at the engine harness.


Here is the final set up:


This is going to be changed a bit as the ELD needs a new solution, but aside a coat of paint this is how it will look. The extra brown wire is for the timing check connector. I substituted my emergency brake switch for this pin, and now to check base timing all you need to do is apply the emergency brake. Sneaky. ph34r.gif

Aside from wasting time mucking around with the ELD I'm happy with a proper ECU mount. Previously the old ecu was suspended in the seat brackets with a few zap straps.... not so good.

Cheers,
Mark

SportInjectedClub

I don't frequent the boards much anymore, but i'm a wealth of knowledge. Email or PM me if you're stumped!

#4
strudel

  • Leadfoot
  • PipPipPipPipPip
    • Group: 2011 Contributing Member
    • Location:Edmonton, AB
    • Drives: 2009 AUDI TT 3.2L, Project Teg powered Austin Mini Van
    • Image Gallery
QUOTE
The extra brown wire is for the timing check connector. I substituted my emergency brake switch for this pin, and now to check base timing all you need to do is apply the emergency brake. Sneaky.


So what happens if you happen to use the E-brake while actually driving the car? I can't remember if there is an issue in this kind of situation of having this switched on while actually driving. May not even be an issue for all I know. You should mount the switch under the dash somewhere or in the the engine bay for easy access.

You can also remove the 3 solenoids that are in the Teg engine fuse box thingy as they are not required and pose no detrimental effect if not there. There is lots of info on the board about the charcoal canister being removed.

QUOTE
Blue/Silver stripe: Radiator fan relay trigger. I'm wiring this up for sure, more details to follow on radiator fan relays.

Either your car has the fan relay or not. If not you don't need to add that either. I didn't think this was an ECU function in any case. What pin had you planned to connect this to? JS

Edited by strudel, 11 April 2009 - 01:54 AM.

If you want one of these Logos send me a PM

aan.jpg


Austin Mini Van with DOHC Honda HP
http://www.angelfire.com/droid/strudel
Honda reliability and power combined with Mini cachet and style.


#5
Rampage

  • I bleed motor oil.
  • PipPipPipPipPipPip
    • Group: Moderators
    • Location:Vancouver, British Columbia
    • Drives: The Si (86 Civic Si D16A1 blacktop) The Blackbird (87 CRX Si Bone Stock) Cherry II (86 Civic 1500S Mostly Stock)
    • Image Gallery
    Garage View Garage
QUOTE (strudel @ Apr 10 2009, 11:48 PM) <{POST_SNAPBACK}>
So what happens if you happen to use the E-brake while actually driving the car? I can't remember if there is an issue in this kind of situation of having this switched on while actually driving. May not even be an issue for all I know. You should mount the switch under the dash somewhere or in the the engine bay for easy access.

You can also remove the 3 solenoids that are in the Teg engine fuse box thingy as they are not required and pose no detrimental effect if not there. There is lots of info on the board about the charcoal canister being removed. JS


I've had my charcoal canister out for some time. In fact years ago it was slowly killing my car's performance and I couldn't figure out why until I deleted it. The thought of putting it back in doesn't sit well with me, so i'll probably opt out of the solenoids.

As far as base timing goes, i'd imagine the fuel economy would go out the window if you were to drive it that way, especially with all the extra drag from the rear brakes! I hope I don't leave the brake on when I go out, not saying I haven't before. I keep the brake adjustment tight after that day so its pretty hard to forget about it. I doubt base timing would allow for enough advance to make the engine ping under load so it probably wouldn't damage anything, more just lose a small amount of power.

For the Rad Fan relay the car did not come with one, nor did the CRX harness have one. The CRX only had power into the fan on IG1 and was grounded by the thermostatic switch in the radiator. That failed a long time ago and nearly cause my car to overheat so I wired it to a manual switch. The rad fan only needed to be switched on if idling for an extended period of time or in stop and go traffic, when I would switch it on. Having pulled apart the integra harness it is similar, but the ground side of the fan is controlled by either the thermostatic switch or the ECU, like the thermostatic switch is another ground to the fan. Theres another ground on that wire as well which was probably controlled by the AC but I don't have that module so I will run that wire to the switch and still have it operational. Hopefully the ECU will trigger the relay when the TW sensor reads too hot, but if it doesn't I will have manual control.

Cheers,
Mark

Edited by Rampage, 11 April 2009 - 02:10 AM.


SportInjectedClub

I don't frequent the boards much anymore, but i'm a wealth of knowledge. Email or PM me if you're stumped!

#6
Bill Davis

  • Slowpoke
  • PipPip
    • Group: Members
    • Location:SF Bay Area, CA
    • Drives: '11 Nissan Leaf, '03 WRX wagon, ['84 Civic hatch (race car) - RIP!]
QUOTE (Rampage @ Apr 10 2009, 11:45 AM) <{POST_SNAPBACK}>
I've already swapped in a CRX Si setup, having modified my fuel system to add the CRX pickup to the civic tank, the integra high pressure main line, and the full harness for the injection.


Mark, you may have already figured this out, but I thought I'd speak up as I just went through this with my swap. Adding the FI pickup to the civic tank worked fine, except for fuel starvation at 3/4 tank or less in left hand turns. We're now adding a low pressure pump and a surge tank as others have documented to fix this. Good luck!

#7
Rampage

  • I bleed motor oil.
  • PipPipPipPipPipPip
    • Group: Moderators
    • Location:Vancouver, British Columbia
    • Drives: The Si (86 Civic Si D16A1 blacktop) The Blackbird (87 CRX Si Bone Stock) Cherry II (86 Civic 1500S Mostly Stock)
    • Image Gallery
    Garage View Garage
QUOTE (Bill Davis @ Apr 15 2009, 01:16 PM) <{POST_SNAPBACK}>
Mark, you may have already figured this out, but I thought I'd speak up as I just went through this with my swap. Adding the FI pickup to the civic tank worked fine, except for fuel starvation at 3/4 tank or less in left hand turns. We're now adding a low pressure pump and a surge tank as others have documented to fix this. Good luck!


I've heard this many times but have never actually experienced the problem myself. Its not super tight around the corners mind you with the rarity for suspension parts, so that may be why, having not pulled enough G.

I had the day off today so I plunked the engine into the bay to keep the project moving along. I used a come-along to snatch the motor from the engine stand and raise it enough to roll the car under and drop it in. I removed the hood to make this possible. I installed the engine making sure to replace the rear main seal before installing a machined flywheel with an extra 0.50mm off the flywheel mount for increased clutch clamping force. I've done this to every flywheel i've machined since hearing about it and it is a fantastic mod.

The most important part I found for the engine install was the order of mounts, and the radiator installation The radiator would be much more difficult if it was not installed before the engine, but the fan should be removed to make for more clearance. Once the engine is roughly in place the front left mount can be loosely installed both pieces at once as the timing cover won't allow the body side to slip over the stud on the engine side. Once the engine was in I installed the radiator fan to the radiator, then the transmission and clutch to the engine. With the etire unit together, I bolted the transmission front mount to the frame, then tilted the engine enough to bolt up the rear mount. My mount combination was all civic/CRX, with the exception of the transmission mount from the integra. The frame side is the same for both, but the transmission end has a different configuration to bolt up to the trans housing.

I found that I only needed to take a very small amount of plastic off of the timing belt cover to allow space for the mount to fit. Mocked up, you can see what little opening there is for debris. Most particles would have to be travelling directly up to hit the back of the mount and into the belt housing, at which point they would have probably lost enough energy to cause any significant damage. I'd much rather chance a damaged belt than remove material from the mount itself:


Here is the driver's side for clearance, it was a tight fit, and I found that I had to put the two pieces of the mount together loosely first, then bolt it to the engine studs and then fit it into the mount holder in the frame.


Even more tight is the timing belt to hood clearance. I see now why these cars had the ZC power bulge... I'm going to try some hinge blocks to raise the back of the hood for a few more millimeters and hopefully that will be enough to be able to install the cover.


Lastly, and I know the legit guys might bawk at this, I did a backyard mod. Working at an automotive shop with a glass section pays off and I convinced the glass guy to pump my stock mounts with window sealing urethane. It was still a bit soft when I put the unit in, but it will dry hard and stiffen the motor up. It will be a nice medium between loose stock mounts and proper tight poly mounts.


Almost all the grunt work is done now, front hubs, axles, and brakes will come after finishing the majority of the wiring changes including the ELD, solenoid block, and radiator fan relay. More to come on that soon!

Cheers,
Mark

SportInjectedClub

I don't frequent the boards much anymore, but i'm a wealth of knowledge. Email or PM me if you're stumped!

#8
strudel

  • Leadfoot
  • PipPipPipPipPip
    • Group: 2011 Contributing Member
    • Location:Edmonton, AB
    • Drives: 2009 AUDI TT 3.2L, Project Teg powered Austin Mini Van
    • Image Gallery
QUOTE
I found that I only needed to take a very small amount of plastic off of the timing belt cover to allow space for the mount to fit. Mocked up, you can see what little opening there is for debris. Most particles would have to be travelling directly up to hit the back of the mount and into the belt housing, at which point they would have probably lost enough energy to cause any significant damage. I'd much rather chance a damaged belt than remove material from the mount itself:


I disagree. I have discussed this issue with Kakabox and since he is an engineer I trust his thoughts. The mount can have quite a bit of the lip that is in the way removed without degrading the strength of the mount. Look in his thread and there should be a section just on this subject. That way you don't destroy the timing cover.

My car had it done by cutting the cover originally and I put on a new cover and cut the mount instead. I am more comfortable with that approach. JS

If you want one of these Logos send me a PM

aan.jpg


Austin Mini Van with DOHC Honda HP
http://www.angelfire.com/droid/strudel
Honda reliability and power combined with Mini cachet and style.


#9
crxls

  • corvette contender
  • PipPipPipPipPip
    • Group: Contributing Mod
    • Location:Hanover Pennsylvania
    • Drives: your car if i find the keys
    • Image Gallery
and the 3rd method which is just smacking it with a hammer to push the lip in. no cutting involved. thats how the mount in the D16A1 wagon is which was originally done by Richter77 when he put this engine in his crx
When I die, i want to go asleep peaceful.......... not screaming and freaking out like everyone else in the car

"i left the bar a little after you and ended up flipping my car in the arbys drive thru"


QUOTE (cbstdscott @ Dec 10 2008, 03:27 PM) <{POST_SNAPBACK}>
Another loser who can not get traction. I feel sorry for him.

IM A LOSER!!! my car pulls harder when spinning than any "highly modified" EW


Team BUrnOUt founding member

#10
Zephyr

  • On the Podium
  • PipPipPipPip
    • Group: Contributing Member
    • Location:New Jersey
Any updates to the ELD modifications needed? I'm getting started with the same project on my CRX racecar. I know a lot of folks don't bother putting it in but most dyno's won't run the car if it's showing a CEL.

Thanks in advance.

Z
1985 CRX Si H2 Racecar
2000 Subaru Impreza 2.5RS with a WRX swap

#11
strudel

  • Leadfoot
  • PipPipPipPipPip
    • Group: 2011 Contributing Member
    • Location:Edmonton, AB
    • Drives: 2009 AUDI TT 3.2L, Project Teg powered Austin Mini Van
    • Image Gallery
QUOTE (Zephyr @ Apr 28 2009, 04:29 PM) <{POST_SNAPBACK}>
Any updates to the ELD modifications needed? I'm getting started with the same project on my CRX racecar. I know a lot of folks don't bother putting it in but most dyno's won't run the car if it's showing a CEL.

Thanks in advance.

Z

Do this and save yourself some headache.


Use some heatshrink. Put it in a little plastic case and tape it all up. Connect the wires to the appropriate pins and "Presto" no more ELD code. JS


If you want one of these Logos send me a PM

aan.jpg


Austin Mini Van with DOHC Honda HP
http://www.angelfire.com/droid/strudel
Honda reliability and power combined with Mini cachet and style.


#12
kakabox

  • Turd Polisher
  • PipPipPipPipPip
    • Group: 2012 Contributor
    • Location:Seattle, WA 98115
    • Drives: from point 'A' to point 'B' daily.
    • Image Gallery
    Garage View Garage
QUOTE (Rampage @ Apr 10 2009, 12:45 PM) <{POST_SNAPBACK}>
Hey people its me, I'm still alive, believe it or not! ph34r.gif

Welcome back!
QUOTE (Rampage @ Apr 10 2009, 12:45 PM) <{POST_SNAPBACK}>
One thing I noticed when looking at the integra hubs is that they appear to be identical to the civic knuckles with the small exception of the wheel hub inside the wheel bearing having a larger inside diameter to accept the larger integra axles. Aside from that they appear identical. I should be able to retain my EF front brakes, as the brake caliper mount appears the same.

Yes.
QUOTE (Rampage @ Apr 10 2009, 12:45 PM) <{POST_SNAPBACK}>
I'm good at wiring but there are a few areas that I am not 100% on, like the VSS wiring at the dashboard harness...

My VSS mods for the Kakabox in a nutshell: I modified a 1g CRX HF VSS speedo head to fit a 3g Si instrument housing (the Kakabox's OE). There are two wires from the VSS unit, one goes to ground, one goes to pin B-16 on the '89 USDM D16A1 ECU. It makes no difference which wire is grounded; the car has been run either way, switching the wires had no effect on the way the engine ran.

Here's the mod post: http://www.redpepper...e...st&p=304143
QUOTE (Rampage @ Apr 10 2009, 12:45 PM) <{POST_SNAPBACK}>
My mount combination was all civic/CRX, with the exception of the transmission mount from the integra. The frame side is the same for both, but the transmission end has a different configuration to bolt up to the trans housing.

Yep!
QUOTE (Rampage @ Apr 10 2009, 12:45 PM) <{POST_SNAPBACK}>
I'd much rather chance a damaged belt than remove material from the mount itself...


It's your choice.
A properly modified mount has more than adequate strength and fatigue life for the operating loads. Here's the Kakabox mod: http://www.redpepper...e...st&p=316364
...the discussion follows.

BTW, I think you may be over analyzing the ELD. I have the ELD in place...with no power wire going through it. I do not run the 'teg Idle Up Valve so, the ELD is doing absolutely nothing. I've just wired it to the ECU to make the ECU happy (no codes).

I just broke the ELD out of the OE 'teg harness and relocated it next to the ECU. The B/Y wire goes to ECU pin A17 (which is actually +12V power from the main relay), the Blk w/Silver Dot wire to ECU pin A2 or A4 (which just goes to ground, G1) and the Gray/Red w/Silver dots wire goes to ECU pin B19. Hence, the ELD is connected and the ECU is happy (no codes are thrown) yet w/o the Idle Up Valve, it does not effect the running of the engine in any way; the Kakabox engine runs beautifully, nary a hic-up (not even any EACV issues!) w/this ELD wiring. Again, since the ECU is getting an ELD signal, no codes are thrown. No resistors are required!

Cheers!

#13
Rampage

  • I bleed motor oil.
  • PipPipPipPipPipPip
    • Group: Moderators
    • Location:Vancouver, British Columbia
    • Drives: The Si (86 Civic Si D16A1 blacktop) The Blackbird (87 CRX Si Bone Stock) Cherry II (86 Civic 1500S Mostly Stock)
    • Image Gallery
    Garage View Garage
Thanks everyone for your help!

I have mounted the ELD in a fashion that will allow it to correctly read the voltage going through the pick up, I will post pictures and an explanation very soon....

I've just figured out where each wire must go for modifying the integra engine harness to fit the CRX main harness, some interesting things of note are that the main engine plug is identical with the exception of adding the additional alternator wire. The Second rectangular plug is similar but the coil power and tach signal must be added and the wires removed re-located to different pins (these two wires are for the temp and oil pressure sensors) The two wires removed so these can be put in the proper location are for the reverse switch, which are moved to the third smaller plug, where diagrams suggest that there is only one wire for the AT lock up solenoid, but being as its an MT, the wire then becomes the reverse switch. All of the engine harness re-wiring is in progress and I will have an update soon.

As for the ELD, it will be handily sorted as I have to run additional wires for the coil main power. I could have extended the wires from the original coil location, but instead I am opting to run an additional fused Ignition wire from battery through another fuse box to a second ignition relay that will be triggered by the ignition switch/kill switch combination. For most people this will seem like overkill but I want it wired 100% to factory spec, you'll see...

I have a seperate question for blacktop swappers... please check the forum for this!

Cheers,
Mark

SportInjectedClub

I don't frequent the boards much anymore, but i'm a wealth of knowledge. Email or PM me if you're stumped!

#14
redsautorehab

  • 3gen enthusiast
  • PipPipPipPip
    • Group: Vendors
    • Location:Cornville, AZ
    • Drives: 00 Dodge Durango, 01 Ford F250, 99 Chevy Tracker, 82 suzuki rm250
    • Image Gallery
    Garage View Garage
when i did my swap, i just used the whole teg fuse box, which allowed me to use the eld, and the timing check connector. it also allowed me to eliminate the fuses on the pass. shock tower.
"You play hard to get, I play hard to get rid of" Fez, That 70's Show

my website if you need parts for your car, and i don't have them at on my website, just pm me. I can get most of the common parts for our cars.

my vouch thread

#15
Rampage

  • I bleed motor oil.
  • PipPipPipPipPipPip
    • Group: Moderators
    • Location:Vancouver, British Columbia
    • Drives: The Si (86 Civic Si D16A1 blacktop) The Blackbird (87 CRX Si Bone Stock) Cherry II (86 Civic 1500S Mostly Stock)
    • Image Gallery
    Garage View Garage
Well I finally fired the engine up after three days of diagnosing it for a no-start.

Turns out the Integra uses the first four pins of the third plug for the CYL and TDC sensor, so the crank sensor has to be relocated to plug 2.... I'll be writing a revised pinout diagram with wire colours to describe this soon...

Unfortunately the intake manifold has a large crack! I wonder if anyone has a spare D16A1 intake manifold or a ZC manifold they can part with... I'll be scouring the wrecker for any possible parts as well..

So far so good, once I get the manifold on I can give it a proper shakedown.

Cheers,
Mark

SportInjectedClub

I don't frequent the boards much anymore, but i'm a wealth of knowledge. Email or PM me if you're stumped!