 Sign In
 Create Account
 Find content
 Male
Male


Any track updates w the new brakes?
greasemonkeyreborne 5x1g's
Member Since 08 Nov 2008Offline Last Active Apr 16 2024 12:43 PM

Posts I've Made
In Topic: Update 2024: 17th Annual Road Trip 1987 Honda Crx - Dallas To Panama
16 April 2024 - 12:25 PM

Desoldered the switch rail (bent out the tabs holding each switch in place). A real PITA
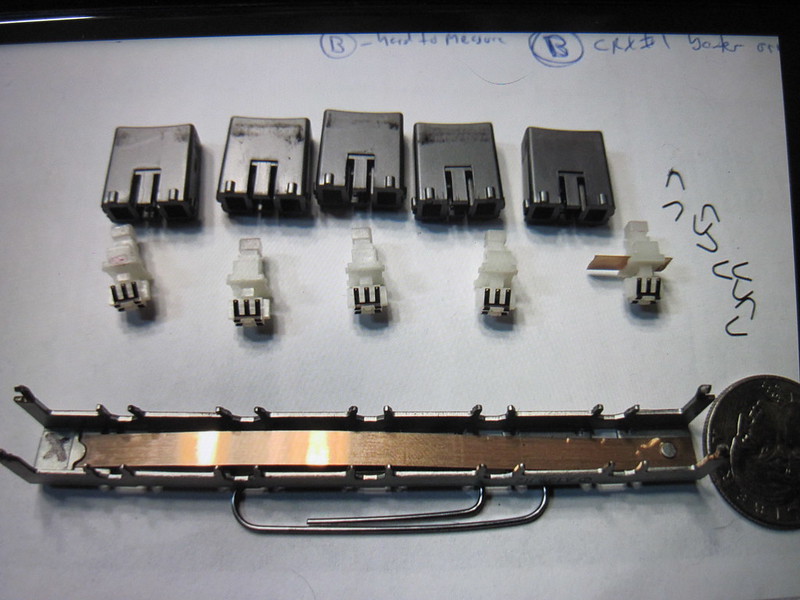
Pulled apart the switch rail to find 10 mini springs and a long ribbon spring (see the tiny 10 springs upper right corner). Do this in something like a sandblasting booth. I made a cubby w white sheets. sheets also dampen the springs if they launch. Acts as a "catch". Glad I did as the little springs (upper right in photo) are very small and will fling if not grabbed firmly w tweezers.
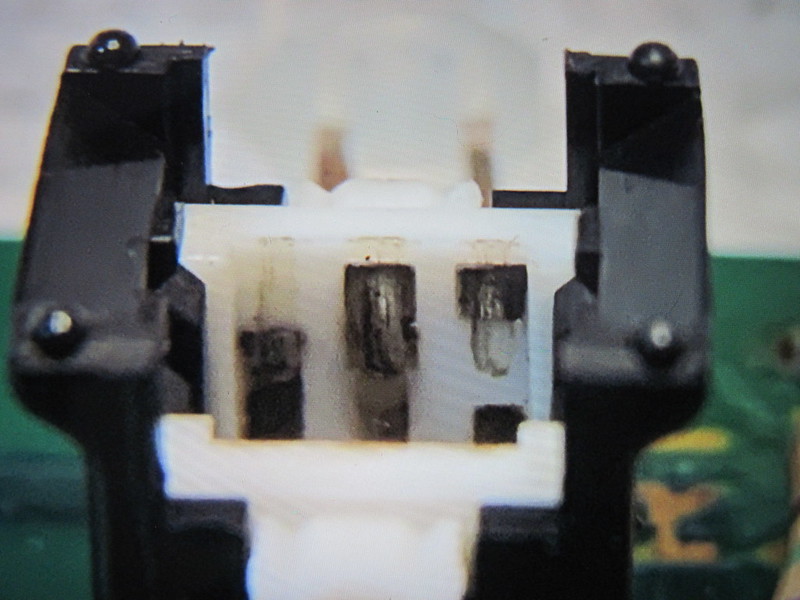
Inside of switch assy. There are 6 contacts total per switch.. Notice the fouling where the slide marks are.
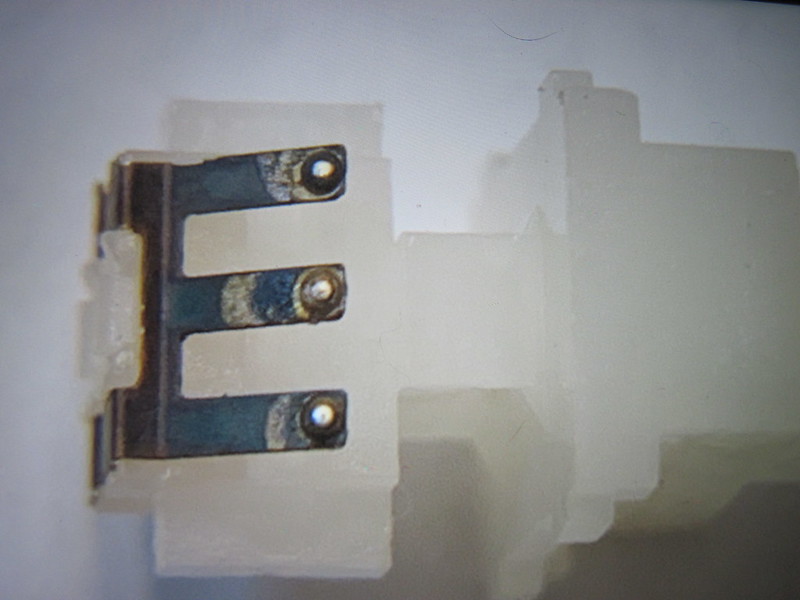
Other part of the switch. This is an indented ball feature. I don't recommend to sand it down. I believe the balls need to be there for best operation.

Used a felt polishing wheel on this part. And 800 grit paper on the black mating part. Since the base switches are made of nylon, I used MEK (old original blend) to clean off the contacts w/o melting the plastic. MEK takes everything off. Picked out the residue left over from using Q-tips.

The buttons pop in and out via a ribbon spring. This was another PITA as it interferes w assembly/disassembly of the switches w the 10 micro springs. Removed the rivet and installed the fastener to the right. Redoing this rivet w the fasteners was another PITA. That detail will be on RPR.

Pix of the micro springs (2x) per white switch. I had to destroy another CC just to figure out best way I could remove/instal them. Made a little hook to carefully slide these out. Huge PITA.

Dry run test. Reinstalled the switch bar w cleaned contact, no springs. spent ten min pressing/wiggling the bottoms and alls good so far. The 'hi-def" switch on this one is a little tight on tolerance. Taking it apart again to reinspect, sand the contacts on the black part of the switch for the "hi-def" position. to see if it can be made better.
More to come. Next step is to reassemble the unit "pre-solder". Since I sanded the contacts and removed the corrosion coating. Will apply silicon dielectric grease. The sanded surface will create abrasion and allow corrosion. Assuming silicon will prevent that. Once this checks out, then I'll do the final assembly and call it a day.
1 of 9 of my used units work properly. Not that this is a show stopper to driveability. Probably only does it while driving so you'll never hear it. I'm sure it'll fail the motor eventually.
Part number for the front portion of the Climate Control unit is 39301-sb2-972. This part was long gone 18 years ago when I was looking for one for a restoration project. I had bought it for the face plate at the time to do a concourse restro. The alternate number I was able to get was 39301-sb2-013. Faceplate and CCA same, but the signage is different. Made a good "golden test unit".
This climate control design is only specific to the 84-87 CRX. Civics, accords and preludes of same era have different design.
In Topic: Update 2024: 17th Annual Road Trip 1987 Honda Crx - Dallas To Panama
16 April 2024 - 12:18 PM
I've had an observation driving this car over the decades on road trips. Every now and then, I'd feel variations of airflow near the pedals against my ankles. Other times it appeared the cabin air diversion mechanism would self adjust from upper vent, lower vent... on its own. I had assumed it was a gust of wind or a semi passing by causing drafts around the car affecting the cabin airflow.
2 years ago when I removed the dash to change out the fuel lines, was lying upside down w my head near the pedals connecting harness and HW.... was moving the speedo bezel around w the climate control attached.. and the actuator motor that adjusts the air direction was sputtering and changing the dampener location on its own (ignition switch was on at the time.)
Last year I removed the climate control (CC) and swapped CRX #9's 129K CC module. Did several road trips and still noticed the variation of airflow directions while driving.
This past week I'd tap on the CC buttons or firmly hit the CC unit and the actuator motor would move and twitch.
Swapped another actuator motor. Same results.

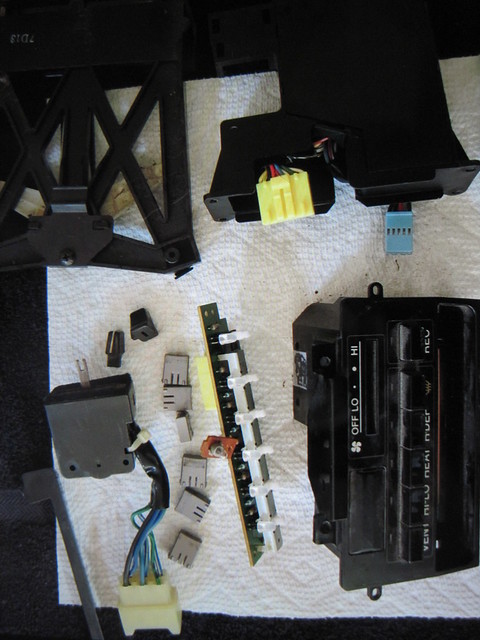
I pulled out all my used CC's and only 1 out of the 9 wouldn't budge when wiggling the button or tapping on the CC. Then I pulled out an NOS unit and tried that one and it worked perfectly.

I left the original actuator motor in place. Installed the spare motor on the black towel to the upper left to prevent any obstruction of the arms and vent-door creating drag. Ruled out wiring, connectors.... The black motor w the golden arms would either twitch/jump back and forth very quickly, or it would move to another position the switch wasn't set to. This explains why I'd feel the air flow changing while driving.... Hitting bumps on the road would shake the CC unit causing motor to readjust.

Root caused issue to the switches. Pressing down on one switch, then wiggling that individual stitch side to side would duplicated the situation. Bad contacts on the switches. Going through all 9 CC's, not all the switches did it. Condition only happens on the switch that is on and lit up. Some of the older, higher mileage CC's did this condition on all five switches. The "Recirculation" switch doesn't do it, Its a different design.
This will be a abbreviated repair version. Need to put together a more detailed post on RPR and attach the thread here later.
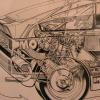
Tore down the CC to get to the switch CCA.
In Topic: Update 2024: 17th Annual Road Trip 1987 Honda Crx - Dallas To Panama
16 April 2024 - 12:12 PM
More house keeping......

Proper seal compression for a static seal is around 20%, dynamic is 10%. At least that's how I use to design using quality Mil-Spec rubbers. Gives enough to seal while reducing compression set. Looking at my oil filler cap, the seal probably has 1-2% compression left. Wasn't leaking but figured replace it anyway.
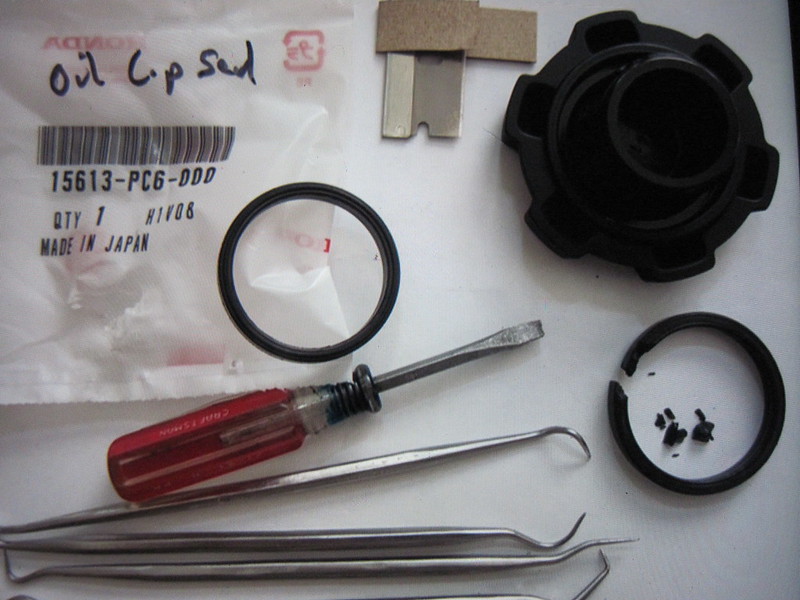
Seal is just under the ball of the pen. square cross section w 2 finger ribs. Had to cut and pick it out. Was careful not to scratch the oil cap sealing groove. 36 yr old rubber was pretty stiff. The NOS seal is good and pliable. I'd assume the new seal in about 25 years old based on when I bought it. So far, the only NOS OE rubber causing me issues due to age are the CV boots. I had changed most of the dynamic seals and coolant hoses on the engine/tranny back in 2004 w Honda OE. And those are still holding. I'm more inclined to continue using old OE Honda rubber. I've had some cheap chinese gas powered tools w failed fuel/oil seals within 5yrs of age. Honda did an incredible job w their design and materials compounding back in the day for these parts to last so long.
Plastic panel repairs....

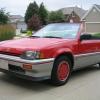
I'm not interested in upgrading my plastic body panels yet. But i have to live w the visible cracks until I repaint the car some day. But each dent and scratch holds a memory from the past. Adds character. There's 2 cracks visible right at the rubber molding guard from my repair a few months ago. One to the left, other to the right (middle crack on top I broke out trying to get the sill off).
I pulled the car our of a nice warm garage 2 years ago to play in the snow when it was 10F. Drove to a gas station. Took about 5 minutes. while I was in the car when the gas was pumping, I heard several faint pops and cracks. I knew exactly what was happening. The plastic shrinks faster than steel. It took those few minutes to shrink enough to crack the plastic as the metal wasn't catching up. And when you get cold enough, the plastic shrinks more than the metal and you get an interference fit = cracked plastic. I try not to drive the car below freezing whenever possible. Cold weakens the plastic, then contraction from cold shrinking.... Not a good thing for 36 year old plastic panels.
The door cap cracked also on that cold trip. There's black electrical tape holding the plastic piece from breaking off the rest of the way. Will pull the door cap off at a later time and bond that back together and file the edges of the door back to give it more clearance in the future.
DOOR HINGES... -- follow up
Prior to shimming my doors back up to align properly, the door would make a thunk as I'd drive off from body torsion or something. Guess the door would reset itself in position. Since I did the shims to the lower hinges. The noise has gone away.
MOLD/MUST ODOR..... --- follow up
Since cleaning the carpets and interior, the car smells great when I open the door after left sitting for a while. The only pieces I didn't clean are the engine firewall deadner and the rubber/felt deadeners over the rear wheel wells.
Planning another trip to Austin in a month or 2. Looking forward to driver again as the weather has been really nice here lately.


Community Forum Software by IP.Board
Licensed to: Red Pepper Racing