Jump to content


greasemonkeyreborne 5x1g's's Content

There have been 65 items by greasemonkeyreborne 5x1g's (Search limited from 26-April 23)


By content type

See this member's


Sort by                Order  

#581550 Radwood Austin April 29th, 2023.

Posted by greasemonkeyreborne 5x1g's on 20 April 2024 - 03:02 PM in Meets

“Better Off Dead”.  Watched the movie last night. Been a few decades.   It’s Charles Dumar.  Wasn’t his skis. But a guy  holding this vintage set of Rossis in the background.  Skiing the K12, not the K 2.


53666768941_04eb03572c_c.jpg


I remembered my skis were in this movie.   I just couldn’t throw them away.   Digging them out for Radwood


51668389002_5eabc0eeae_c.jpg


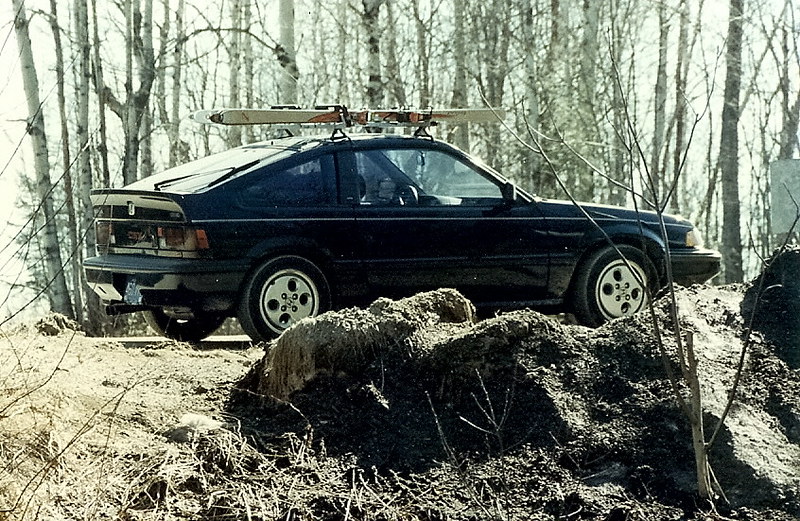
last time these skis were on my roof was back in the 1990’s in Vermont .  The Rossis are behind the Volants.  Can’t see them here


#581549 Update 2024: 17th Annual Road Trip 1987 Honda Crx - Dallas To Panama

Posted by greasemonkeyreborne 5x1g's on 20 April 2024 - 02:51 PM in 1G CRX

53563612090_0bbe73a50a_c.jpg


The other week one of these broke off.  I had searched for these 20yrs ago via the Honda parts systems.  No luck.  I thought they were listed as "discontinued" even back then.  So I gave up and just grabbed them off junkyard cars.  Once Honda places a part as "discontinued" , it drops off the "dealer locate" system.  That prevents dealerships from selling those parts overbought on their shelves back through Honda's dealer locate system.  Dealerships are allow so many "dollars" worth of inventory or "piece parts" returned each year to the main wharehousing system.  These small parts get lost through the system.  Then they get tossed.  This process might have changed today, but its what I dealt w acquiring parts for my projects 15-20 years ago.


53667126919_2389e94d11_c.jpg


Googled the P/N last night for kicks,..  and someone was selling a set.  Got them this week.  Saving for the concours car. 


An RPR member Bobby out of Oklahoma had aquired these a different route several years ago.  He cross referenced these parts to a late 80's acura.  I forget the model.  Probably a Teg.  Acura sold the identical bumper rubber and spring but it was enclosed in a sheet metal assembly that bolts on to the trunk side of the hatch as a unit.  He had shared that w me 10-15 years ago and I my local Acura dealership sourced them from their Japanese based wharehouse.  Took a while to get them.  Another route for those doing restorations.  This was the only time I had ever gone through Acura to obtain CRX parts.  I don't believe their parts systems talk to each other.  At least 20 years ago they didn't


#581548 Update 2024: 17th Annual Road Trip 1987 Honda Crx - Dallas To Panama

Posted by greasemonkeyreborne 5x1g's on 20 April 2024 - 02:42 PM in 1G CRX

The Climate control reassembly has been on the back burner while working other projects.  


Climate Control Phase II:

There's another abnormality with this unit I had fixed back in 1998.  Back then (1995), my A/C worked great.  I swapped a leaking radiator on this car.  I went to run the AC.  It came on for a few seconds and just shut down.  Was in NYC at the time, didn't need AC so didn't bother working on it.  Moved to Dallas in 1998.  Hot as hell, so needed AC working again.


53623036581_c86863cd0c_z.jpg


About 20 hours of testing the electrical components narrowed the issue down to a fried Climate Control.  Issue was caused by swapping connectors  in the picture above.  Unfortunately, Honda didn't color code or make the connectors unique - other than one connector being green, while both mating connectors were white.  By swapping these, it sends full amp current through the sensing ground wire (I believe it was black w a blue strip - wire).  Same wire that goes through the AC relays/diodes, hi/lo pressure shut off, idle booster, relay timer, evap cold/freeze shut-off, fan switch, climate control and finally ending at the ECM.  It was a challenge to ID and fix.  One connector is part of the base engine bay wire harness.  The other connector is the dealership add-on AC specific harness.  Apparently, they can't be crossed


53623216438_f616d2ef76_c.jpg


What gets blow is the Climate controls Amplifier CCA pictured above.  I can't figure out which component gets damaged.  Inspected the solder joints and components w a glass, I just can't tell....  I just know swapping this CCA fixes the problem.  Now finding a CCA that isn't already blow is the tricky part.  When I figured this out on CRX#1 back in 1998. I just drove the car w the assembly connector hanging out.  Kept pulling used CC's from the junkie until I got one to work.  Then, later that summer of 1998, CRX#2's AC didn't work.  I replaced a damaged suction line on that one from a soft front end collision it had before I bought it.  That one had a new hood and header panel.  So i figured the radiator was new as well.  And sure enough the Climate control on CRX2 was blown (PO's repair shop swapped the connectors).   Went to the junkie and played musical parts til one worked.

When the CC gets blown by swapping the connectors, the AC button still lights up "green" when depressed.  So you think its a refrigerant issue.   It affects nothing else other than turning on the AC.  The wiring scheme is the same for same era preludes, civic and accords.  I'd have to assume this issue is common to the era.


Its a common issue.  I've never seen any posts on this topic other than what I've done over the years.  I"m really not sure how others have solve this.  Its a cheap car, so no one probably cared about AC.


#581547 Radwood Austin April 29th, 2023.

Posted by greasemonkeyreborne 5x1g's on 18 April 2024 - 06:30 PM in Meets

Austin Radwood April 27th.   MadMax bought a ‘93 Miata.  We’re both going.   Anyone else, lmk….


im thinking of tossing my 80’s ski rack and pencil skis on the roof.  I have the same Rossi blue skis that Booger skied down the K2 in “Better Off Dead”.  Want my “ 2 dollars….”   Awesome movie.


picked up a vintage metal white/blue Honda dealer plate for the occasion…..


#581546 Update 2024: 17th Annual Road Trip 1987 Honda Crx - Dallas To Panama

Posted by greasemonkeyreborne 5x1g's on 18 April 2024 - 06:20 PM in 1G CRX

It’s very tedious.   I’ll have a separate post w much more pix and info once I reassemble and get it back on line.   Appears the electronics are very solid.   Weak point appears to be the buttons


#581545 Some Brake Upgrades

Posted by greasemonkeyreborne 5x1g's on 18 April 2024 - 06:16 PM in Competition

Curious if anything new!  Sounds like nothing past the video….  That set up is well thought out.  I like it!!


#581544 Any Idea Where To Start With This?

Posted by greasemonkeyreborne 5x1g's on 18 April 2024 - 06:13 PM in 1G CRX

The video reminds me of when I’d fire up my crx’s after sitting at least 4 years


great advice on the IR scan of exhaust manifold!


it sounds like one cylinder isn’t firing right.


id target the filter on the inlet of your pump first.  I’ve had that clogg on me w rust after long term start up….   Similar engine performance as your video.    And CSP had the same filter clog after he went off the track, into the rough and sediment broke free.  He can explain better than I can what happened after


For the most part, I’ve only had injectors stick from varnish from long term storage.  Watch the oring for leakage at the end of the fuel rail.  All my cars seemed to leak at the 20 yr mark.

if ur unsure of ur injectors..   get the correct ones.    My cars still have Honda oe injectors.  Only time I’ve replaced them is when one cracked and leaked gas 25 years ago.


good advice to test fuel pump.  I finally replaced mine at 280k.  It was loud and growley as hell.   But it still worked.  Once I pulled it out of the car.  Ran it dry.  Put my finger on the inlet and I could barely feel any suction.  I pulled 2 nos Honda pumps from stock.  Ran those dry.  They had good suction against my finger.  Not a hicky suck, but very solid.  This is subjective, but gives you a baseline.  Doesn’t sound like you’ve replaced the pump yet…


I replaced my 280k oe pump w a 36 year old Honda oe fuel pump w 129k.  Had good suction when compared to nos.   So I don’t have experience w failing pumps.   And I drive my crx 15k miles a year all over the country.   DD, not performance


another thing is to grab a stethoscope and listen to each injector.  Listen for very faith, but steady “ticking”.


the jumping tac concerns me,  a guy w a red hatch had a jumping tac.  He ended up replacing the ignition coil.  You can get a modern coil off eBay from a Fit for about $130.  I replaced mine around 260-280k just for insurance.


cat is easy to check if system is still OE, jump uncouple the spring loaded ball connection between the cat and down pipe.  Shop air or blow drier and see how it flows.   I’m sure you’ve got the time of day on this car….  I’m sure this details not needed for ya :blink:   Lol


keep us posted.   I’m deathly afraid of that bizzare electrical issue shutting me down 2000 miles from home


oh, if you get a lot of crap in ur fuel pump pre filter,…. You’ll want to replace the intake sock inside ur tank.


#581537 Some Brake Upgrades

Posted by greasemonkeyreborne 5x1g's on 16 April 2024 - 12:43 PM in Competition

Any track updates w the new brakes?


#581536 Armrest Handle Repair

Posted by greasemonkeyreborne 5x1g's on 16 April 2024 - 12:42 PM in 1G CRX

GT, post up when you do it.  Looks like CSP's got a winner


#581535 Update 2024: 17th Annual Road Trip 1987 Honda Crx - Dallas To Panama

Posted by greasemonkeyreborne 5x1g's on 16 April 2024 - 12:25 PM in 1G CRX

53623356069_31da9300be_c.jpg


Desoldered the switch rail (bent out the tabs holding each switch in place).  A real PITA


53623018401_6080cc9940_c.jpg


Pulled apart the switch rail to find 10 mini springs and a long ribbon spring (see the tiny 10 springs upper right corner).  Do this in something like a sandblasting booth.  I made a cubby w white sheets.  sheets also dampen the springs if they launch.  Acts as a "catch".   Glad I did as the little springs (upper right in photo) are very small and will fling if not grabbed firmly w tweezers.


53623021276_eb68383d0b_c.jpg


Inside of switch assy.  There are 6 contacts total per switch..  Notice the fouling where the slide marks are.


53623228813_865bb92304_c.jpg


Other part of the switch.  This is an indented ball feature.  I don't recommend to sand it down.  I believe the balls need to be there for best operation.


53623476710_9154e9c602_z.jpg


Used a felt polishing wheel on this part.  And 800 grit paper on the black mating part.  Since the base switches are made of nylon, I used MEK (old original blend) to clean off the contacts w/o melting the plastic.  MEK takes everything off.  Picked out the residue left over from using Q-tips.


53623470575_09930cf440_c.jpg


The buttons pop in and out via a ribbon spring.  This was another PITA as it interferes w assembly/disassembly of the switches w the 10 micro springs.  Removed the rivet and installed the fastener to the right.  Redoing this rivet w the fasteners was another PITA.  That detail will be on RPR.


53623019841_43b3cf581f_c.jpg


Pix of the micro springs (2x) per white switch.  I had to destroy another CC just to figure out best way I could remove/instal them.  Made a little hook to carefully slide these out.  Huge PITA.


53622152947_977917c9b3_c.jpg


Dry run test.  Reinstalled the switch bar w cleaned contact, no springs.  spent ten min pressing/wiggling the bottoms and alls good so far.  The 'hi-def" switch on this one is a little tight on tolerance.  Taking it apart again to reinspect, sand the contacts on the black part of the switch for the "hi-def" position.  to see if it can be made better.


More to come.  Next step is to reassemble the unit "pre-solder".  Since I sanded the contacts and removed the corrosion coating.  Will apply silicon dielectric grease.  The sanded surface will create abrasion and allow corrosion.  Assuming silicon will prevent that.   Once this checks out, then I'll do the final assembly and call it a day.


1 of 9 of my used units work properly.  Not that this is a show stopper to driveability.  Probably only does it while driving so you'll never hear it.  I'm sure it'll fail the motor eventually.


Part number for the front portion of the Climate Control unit is 39301-sb2-972.   This part was long gone 18 years ago when I was looking for one for a restoration project.  I had bought it for the face plate at the time to do a concourse restro.  The alternate number I was able to get was 39301-sb2-013.  Faceplate and CCA same, but the signage is different.  Made a good "golden test unit".


This climate control design is only specific to the 84-87 CRX.  Civics, accords and preludes of same era have different design.


#581534 Update 2024: 17th Annual Road Trip 1987 Honda Crx - Dallas To Panama

Posted by greasemonkeyreborne 5x1g's on 16 April 2024 - 12:18 PM in 1G CRX

I've had an observation driving this car over the decades on road trips.   Every now and then, I'd feel variations of airflow near the pedals against my ankles.   Other times it appeared the cabin air diversion mechanism would self adjust from upper vent, lower vent...   on its own.   I had assumed it was a gust of wind or a semi passing by causing drafts around the car affecting the cabin airflow. 

2 years ago when I removed the dash to change out the fuel lines, was lying upside down w my head near the pedals connecting harness and HW....  was moving the speedo bezel around w the climate control attached..  and the actuator motor that adjusts the air direction was sputtering and changing the dampener location on its own (ignition switch was on at the time.)

Last year I removed the climate control (CC) and swapped CRX #9's 129K CC module.   Did several road trips and still noticed the variation of airflow directions while driving.

This past week I'd tap on the CC buttons or firmly hit the CC unit and the actuator motor would move and twitch.

Swapped another actuator motor.  Same results.


53623012011_499aa9a6b2_c.jpg


I pulled out all my used CC's and only 1 out of the 9 wouldn't budge when wiggling the button or tapping on the CC.   Then I pulled out  an NOS unit and tried that one and it worked perfectly.


53623216438_f616d2ef76_c.jpg


I left the original actuator motor in place.  Installed the spare motor on the black towel to the upper left to prevent any obstruction of the arms and vent-door creating drag.  Ruled out wiring, connectors....  The black motor w the golden arms would either twitch/jump back and forth very quickly, or it would move to another position the switch wasn't set to.  This explains why I'd feel the air flow changing while driving....  Hitting bumps on the road would shake the CC unit causing motor to readjust.


53623334659_593c8f5691_c.jpg


Root caused issue to the switches.  Pressing down on one switch, then wiggling that individual stitch side to side would duplicated the situation.  Bad contacts on the switches.  Going through all 9 CC's, not all the switches did it.  Condition only happens on the switch that is on and lit up.  Some of the older, higher mileage CC's did this condition on all five switches.  The "Recirculation" switch doesn't do it,  Its a different design.


This will be a abbreviated repair version.  Need to put together a more detailed post on RPR and attach the thread here later.


53623013351_748295e63c_z.jpg


Tore down the CC to get to the switch CCA.


#581533 Update 2024: 17th Annual Road Trip 1987 Honda Crx - Dallas To Panama

Posted by greasemonkeyreborne 5x1g's on 16 April 2024 - 12:12 PM in 1G CRX

More house keeping......


53563370578_1060d7dd8b_c.jpg


Proper seal compression for a static seal is around 20%, dynamic is 10%.  At least that's how I use to design using quality Mil-Spec rubbers.  Gives enough to seal while reducing compression set.  Looking at my oil filler cap, the seal probably has 1-2% compression left.   Wasn't leaking but figured replace it anyway.


53563368993_03b9a713fb_c.jpg


Seal is just under the ball of the pen.   square cross section w 2 finger ribs.  Had to cut and pick it out.  Was careful not to scratch the oil cap sealing groove.  36 yr old rubber was pretty stiff.  The NOS seal is good and pliable.  I'd assume the new seal in about 25 years old based on when I bought it.  So far, the only NOS OE rubber causing me issues due to age are the CV boots.  I had changed most of the dynamic seals and coolant hoses on the engine/tranny back in 2004 w Honda OE.  And those are still holding.  I'm more inclined to continue using old OE Honda rubber.   I've had some cheap chinese gas powered tools w failed fuel/oil seals within 5yrs of age.  Honda did an incredible job w their design and materials compounding back in the day for these parts to last so long.


Plastic panel repairs....


53563610940_129dc13201_c.jpg


I'm not interested in upgrading my plastic body panels yet.   But i have to live w the visible cracks until I repaint the car some day.  But each dent and scratch holds a memory from the past.  Adds character.   There's 2 cracks visible right at the rubber molding guard from my repair a few months ago.  One to the left, other to the right (middle crack on top I broke out trying to get the sill off).  


  I pulled the car our of a nice warm garage 2 years ago to play in the snow when it was 10F.  Drove to a gas station.  Took about 5 minutes.  while I was in the car when the gas was pumping, I heard several faint pops and cracks.  I knew exactly what was happening.  The plastic shrinks faster than steel.  It took those few minutes to shrink enough to crack the plastic as the metal wasn't catching up.   And when you get cold enough, the plastic shrinks more than the metal and you get an interference fit = cracked plastic.   I try not to drive the car below freezing whenever possible.  Cold weakens the plastic, then contraction from cold shrinking....  Not a good thing for 36 year old plastic panels.


The door cap cracked also on that cold trip.  There's black electrical tape holding the plastic piece from breaking off the rest of the way.   Will pull the door cap off at a later time and bond that back together and file the edges of the door back to give it more clearance in the future.


DOOR HINGES... -- follow up

Prior to shimming my doors back up to align properly, the door would make a thunk as I'd drive off from body torsion or something.   Guess the door would reset itself in position.  Since I did the shims to the lower hinges.  The noise has gone away.


MOLD/MUST ODOR.....   --- follow up

Since cleaning the carpets and interior,  the car smells great when I open the door after left sitting for a while.  The only pieces I didn't clean are the engine firewall deadner and the rubber/felt deadeners over the rear wheel wells.


Planning another trip to Austin in a month or 2.  Looking forward to driver again as the weather has been really nice here lately.


#581516 Update 2024: 17th Annual Road Trip 1987 Honda Crx - Dallas To Panama

Posted by greasemonkeyreborne 5x1g's on 02 March 2024 - 10:40 PM in 1G CRX

Misc car work


53563173846_b495940e94_c.jpg


Swapped the drivers seat belt unit I rebuilt a while ago.  Had to pull up the side plastic liner to get to the hardware


53563612090_0bbe73a50a_c.jpg


While I had the hatch open, one of the bumper/aligners was jacked a little.  Pressed it down and it popped out.  Slider tabs broke off from age.  A chunk of the tab is the small piece in my hand.  Pen to the upper right shows where it came from.


53562314572_81eb3cf1cb_c.jpg


I had been grabbing pieces off junked cars for as long as I can remember.  I store the parts in a climate controlled room hopefully slowing the degradation process.  Over the past few years, I've finally been able to consolidate the parts together and create an inventory database.   Now i know what I have and where it is.  The spring launched out as the part popped out.  Luckily was able to find it.


53563365053_5a2c13206d_c.jpg


Grabbed the worst of the parts from storage.  There's a crack across the bottom in the center of the replacement part, but the tabs looked good.  Laying them side by side, can see the years of impression set into the right side of the part to the right, where the pen is pointing.  I'm sure someone is making SLA's of these by now.  


Its a challenge maintaining an old car w OE parts driven/used so much.   Perpetual repairs.  Metal parts..  fine.  Its the plastics and rubber.  Then exposed to the southern sun or heat soaked engine bay.  Not a favorable condition.


#581515 Update 2024: 17th Annual Road Trip 1987 Honda Crx - Dallas To Panama

Posted by greasemonkeyreborne 5x1g's on 02 March 2024 - 10:30 PM in 1G CRX

CV AXLE JOINT DISASSEMBLE AND OBSERVATIONS.......


Brief summary.   More detail on this link 

 https://www.redpeppe...ack#entry580243


INNER SHAFT JOINT


53540044180_0f350317ac_c.jpg


This is the inner joint housing of a remanufactured axle I took apart in 2020  (far contrast to the inner housing that was perfect in the preceding posts from a couple weeks ago).   Can see where the reman company ground the outer race.   I see little wear over the section my pen is pointed to.  I assume it wasn't in service long.  Doesn't look that bad considering  they did the resurfacing by hand as noted by inconsistent grind pattern.


53539948094_b4d24951e5_c.jpg


This particular slot of three was ground the most and had a slightly over sized needle bearing in it (.005" over).  This bearing marked w twistie, (twistie is holding the bearing together as I removed the circlips to disassemble) wouldn't fit in the other 2 slots.  Issue here is the bearing wouldn't slide all the way into the housing slot it was machined to fit and sticks right at the point you see it in the pix.  Their grinding wasn't done in parallel.  Interference would cause excessive grinding of metal, shortening the life of the joint.


This explains to me why reman axles feel gritty and far from smooth as I rotate them new out of the box.  The inner housing is the simple one to grind.  The outer joint is complex geometry you'll see below.   This is why I sure don't want to use a reground outer joint.   Someone in the shop eyeballing w the grinder.


OUTER JOINT.


The outer joints are not supposed to come apart per Honda.  I'm pretty sure reman companies us a hydraulic press to yield the square cross sectioned circlip holding this joint to the shaft. This particular shaft came from an unmolested HONDA OE joint that was smacked hard enough to crack the knuckle.   Assuming the joint was bad from impact, I took a hammer and was able to whack it off the shaft


53539637541_6b6908e9fb_c.jpg


Marked the joint components.  Critical to tap on the joint where the 3/8" extension bar is (between the balls).  then the balls pop up enough on the opposite side to get them out w a small screw driver.  They pop out w moderate force.  Also note where the screw driver is....  the first ball has to come out at this casted-in feature of the cage.


53539971329_ceeca809ac_c.jpg


The balls actually interference fit into the cage.  See the small divet ground into the  cage where the ball rests. You can see where the ball popped out of the divet and left marks side to side while in use.


53539975699_a035251c49_c.jpg


Here's a pix of the inner race.  There are 2 distinct wear lines here where the ball worn into the race.  I'd assume over time as this wears deeper, this causes the clicking in the joints as the balls roll in and out of the wear path as the joint rotates???


I know both of these Joints were Honda OE.  The inner was reground.  The outer was virgin.  I found tool markings from Honda's sub suppliers to identify (stamped into the housings)


AFTERMARKET JOINTS.


Searching the net for aftermarket joints a few years back, there were several options  back in the day.  I go way out of my way to steer clear of cheap chinese crap.  Much rather over pay for parts made by reputable companies.    Making sure even the metal doesn't come from China as best as I can.

 
53538773287_1d6bb073f6_c.jpg

a


Heres a Joint from Germany by a company called Lobro.  Now I have no idea the build quality until I install and see how they wear.  From the image, the heat treating is obvious.  Honda appears to have heat treated the entire joint, not just spot treated the inner inside bearing contact area of the joint.  Note in the pix where the pencil points to the circlip.  This circlip has a rounded cross.  So the Lobro was designed to  pop off the axle easily.  The Honda is square and its not designed for removal.


Someday, I hope to remove good  Honda OE outer joints, reverse them and place on the opposite shaft (drivers to passenger and vis-a-versa).


#581512 Two Car Shows In Two Days!

Posted by greasemonkeyreborne 5x1g's on 02 March 2024 - 02:50 PM in General Posts

Cool to get you car next to Hondas Mugen!,   Watched the video.   Awesome!!!!

Car cleaned up really nice.   It’s in really great shape


#581511 87 Crx Honda Cv Axle Joint Rebuild, Slop/backlash New Vs Used

Posted by greasemonkeyreborne 5x1g's on 02 March 2024 - 02:48 PM in 1G CRX

I was exploring after market cv joints.  Couldn’t find anything on the inner joints.  Found several part numbers for the outers.  Appears mostly from European market.  I bought some Lobroes from Germany.     Made In Germany.  Hoping their reputation for metallurgy and tolerances holds up.    These are shelved for now.   But figure it’s an option to replace my outers.  Other brands were available, but couldn’t the where they were made on the packaging.  So I didn’t get any others.   I’m sure I have plenty of used axles to pull from to remake several sets of quaility axles to support my cars.  As long as the boots get replaced quickly upon failure, should get 200k out of these Honda axles


53538773287_1d6bb073f6_b.jpg

Notice the heat treatment from the inside of the housing.   I’m certain Honda heat treated the entire joint as I could could not metal stamp numbers into the outer housings of Hondas as mentioned before.  Flattened my hardened stamp.


The Lobreo joints came apart very easy.  Just grab the cage, rotate 90 degrees and the balls fall out.  No tools needs.  Feels like the Honda OE joints are more stout 


#581510 87 Crx Honda Cv Axle Joint Rebuild, Slop/backlash New Vs Used

Posted by greasemonkeyreborne 5x1g's on 02 March 2024 - 02:16 PM in 1G CRX

INNER RACE OF OUTER JOINT


53539975699_a035251c49_b.jpg

Pen points to grooves worn into the drive side of the inner race.  I expected the wear area to be uniform over a small area as the bearings slide back and forth in these slots making 360 rotations under load.  Assuming 6 ball bearings yielding uniform load.


OUTER RACE.  / HOUSING OUTER OE JOINT


53538768357_07190786d7_b.jpg

Similar wear marks on opposing sides of the grooves machined into the outer housing.


This outer housing came off my CRX #9 I bought outright from a junkyard before anyone else picked off it a decade ago I’m certain this was the original axle outer joint from a 129k car.  
 

This car was not drivable.  And the inner joint was pulled apart from the heavy impact.  So I have no idea how this axle drove prior.


I’m thinking these grooves worn into the races must cause the “clicking” as the joint wears???


MEASUREMENT / BACKLASH ERRORS


At a later time, I’ll pop this on a shaft wo the circlip and measure it to see if I can quantify


Looking at the inner housing, it feels like the boots help the joint close to the position where the wear of the inner race/grooves would have occurred.  I believe the inner joint mesurement are decent.


The outer joint has specific grooves worn in the races by the bearings.  My measurement set up places the shaft in axial alignment to the shaft.  So the bearing  are most likely no in the grooves shown about into the races.  Best I can do at this time.


#581509 87 Crx Honda Cv Axle Joint Rebuild, Slop/backlash New Vs Used

Posted by greasemonkeyreborne 5x1g's on 02 March 2024 - 01:47 PM in 1G CRX

OUTER JOINT OBSERVATIONS / DISASSEMBLY


53540046400_5ddd3f31c1_b.jpg

Honda CRX 1G OE outer joint.   Honda did not design these for disassembly.  Looking into the splined hole, there’s a groove where a square cross sectioned circlip snaps in.  I’d assume the rebuilders use a hydraulic press to pull this joint out of the shaft.  This joint came from a 129k crx hit so hard the knuckle cracked.  So I was able to whack on it w a hammer and it actually came off.    I think it was luck in this case.  I tried it on another very loose reman joint.  Pounding so hard, it was denting the joint.  That one never came off.


I marked the joint components to keep them clocked


53539637541_6b6908e9fb_b.jpgThe Honda joint is like a rubics cube to take it apart.    The cage has a depression molded into 2 places clocked 180 apart.  Lift the cage as high as it will go.  I used a 3/8” extension to tap the far side down as seen to the right of the pix.  Important to tap gently and between the bearings.  Then used a screw driver to pop out the bearings.  Found out the bearings interference fit to the cage.  So they pop out w moderate force


CAGE


53539971329_ceeca809ac_b.jpg

The bearings interference fit inside the cage slots.  Pix of the thicker side of the cage toward the transmission.  Can see the divot machined for the bearing.  The scrape marks I assume came from me trying to tap the joint too hard to pop it apart.


53539972744_72b6328609_b.jpg


wheel side of cage.  Thinner.  Same concept


53539641921_6a8abc977b_b.jpg

I was hitting the 3/8” extension bar too hard and the joint in several locations til I could figure out how to take it apart.  Pen points to the impact of a bearing  on the housing were I messed up and hit it too hard.


53539821258_979eb6bd8b_b.jpg

All the bearings looked really good. Some had very faint lines probably from the accident impact.  This ball matches the slot where I left a damage mark on the housing.  Hard to get a focused close up of the mirrored bearing.  The pen points to a smudge to the surface of the bearing.  I’m thinking I can reuse this joint, but reinstalled to a passenger side to negate the wear by using the opposite side.  I’d replace this particular bearing though as that smudge is rough to my fingernail rubbing across it


#581508 87 Crx Honda Cv Axle Joint Rebuild, Slop/backlash New Vs Used

Posted by greasemonkeyreborne 5x1g's on 02 March 2024 - 01:01 PM in 1G CRX

Some updates


AXLE CONTACT W FRAME CAUSING AXLES TO BEND


My car was a salvage title back in 1988.  I know the hood and drivers fender for sure was replaced at a minimum.   The drivers fender cracked beyond repair several years ago and I replaced w another used OE fender.  Definite body distortion as I had to bend and shim metal mounting points to get the new fender to remount without bending or distorting the replacement fender.   I’m sure the frame is off a little allowing close proximity to the drivers axle.  Guessing this axle contact might be more of an issue for me due to the 1988 damage.  


53539799418_bd67f19bb7_b.jpg

Out of the 37 used  axles, 23 are drivers.  Have to verify, but there were 6 of these axle w scrape damage like this pix.   It’s about 1 in 4 with axle contact.  These mostly came from junkyards.  The accident causing them to be in the junkyard could be the reason for the bending axle issues?…


Ive been practicing bending my axles back.  Honda Helms manual says not to reuse bent axles and don’t provide straightness specifications.


INNER JOINT OBSERVATIONS


53505518751_511804a88e_b.jpg

This is the inside of a good, near perfect inner joint housing.  Pen points to wear area as mentioned before.  The sharpie arrows point to directions of rotation.  Pen shows drive contact and wear point.


53540044180_0f350317ac_b.jpg


This is a reman axle I opened up back in 2020 when rebuilding my axles back then.  Pen points to the plain the roller bearings contact.   They machined the surface to refresh.  I assume they used some sort of manual CNC w a jig to touch this up.  Doesn’t look bad.  Looking at is closely, you can see inconsistencies in the machining.  I’d assume would cause excess wear of the new joint.  This joint had little wear as the machining marks are not worn smooth yet


53539948094_b4d24951e5_b.jpg

Same housing above w the machine roller bearing in position.  There are 3 slots.  This slot was machined from above.  The roller bearing is oversized OD by .005”.   They didn’t grind the surface all the way down, or did it out of parallel.  It won’t slid down the shaft any further than this.  Another accelerated wear condition from poor craftsmanship.  As I recall, the other 2 slots had OE sized roller bearings w lightly machined slots.  There was a little play.  I’d assume this joint would be ok.  Wouldn’t last as long as an unmolested OE.


twist tie is holding the roller together as the side clips were removed.  Can see the clips at the bottom of the joint.  It’s not suspending the roller in the slot


#581505 Update 2024: 17th Annual Road Trip 1987 Honda Crx - Dallas To Panama

Posted by greasemonkeyreborne 5x1g's on 13 February 2024 - 11:03 PM in 1G CRX

17th ANNUAL ROAD TRIP: DALLAS TO PANAMA CITY.


53505833574_d79d602679_c.jpg


Clocked 2256 miles.  Now at 303,756 miles.   Cheapest gas was 2.79 in TX, most expensive $3.89 right on the beach in Florida.  My daughter and I spent several days on the trip.  Met up w my brother in Florida.  Had a great time.  Glad to get the opportunity to take a trip w her.   


Car drove great.  No issues.  Getting some tire vibration.  I rotated the tires before the trip.  Noticed some excessive wear in some areas.  Had to have come from over loading the car on the last trip to Michigan and NY - distorting the suspension.  I had replaced the rear axle a while back and noticed a little pull from it.  Its time to get the alignment checked.  I'm assuming I'll need shims for the rear spindle.  No rain.  Don't know if the floor boards leak after sealing w urethane.  But not looking to find out.

53505525181_a7fd60386e_c.jpg


53505682238_787fbfb9de_c.jpg


Drove the coast line back as much as we could.  Stayed over in Mississippi on the beach.  Had an awesome dinner on the water during a sunset.


53505694808_aa622767b2_c.jpg


I guess this is a jeep thing...  Hanging around the beach and got "ducked".  Someone left these wrapped on the front wipers.   Has the Martigra flare.


53505951980_54f3c5895f_z.jpg


Then a quick stop in the French Quarter of NO.  Last time this car was here was 1994.   That was a 2 1/2 week cross country trip back in the day.  Nice to come full circle.


I was looking back at the Redpepperracing post I started back in 2009.  Apparently, my first road trip started in 2008 after the car was resurrected from storage to live its second life.   Brings it to the 17th annual trip, not 16th.   Looks like its been on around 27 out of state road trips since 2008.  Spending way too much time on maintenance.  But only had her towed once bc I ran out of gas thinking it was the main relay.


I'm sure they're be another Michigan/NY trip and Denver trip later this year.


#581504 87 Crx Honda Cv Axle Joint Rebuild, Slop/backlash New Vs Used

Posted by greasemonkeyreborne 5x1g's on 09 February 2024 - 10:53 PM in 1G CRX

I didn’t think I would get through these used axles before the Florida trip to sort out a good one for rebuild.  So I worked an alternate route.  I was able to get one of my local  auto supply houses to order 3 drivers axles rebuilt.    I selected the best of he three.  Basis was to rotate the inner/outer joints…. And pay particular attention to the outer joint.  If it rotated rouge, then it was pulled apart and reground..   I selected the joint that felt tight and rotated smoothly


After getting the reman axle home, i removed the boots to inspect the joints…..


53505518751_511804a88e_c.jpg


The inner joint turned out to be near perfect w little wear.  I’m pretty sure this is OE.  The pen shows the contact point of the bearings on the tulip.   Rubbing my finger over this spot, I can’t feel any depression into the metal from wear at all


Then I open the outer boot..   Cleaning the grease out…. Had about 10 drops of clean water drip out.  SOBs at the reman company power washed the joint, didn’t let it dry.   Just slapped grease back I got the joint.  After solvent cleaning the outer joint and blowing w compressed air…. I inspected the balls and races…. All looked good.  No scoring for grinding.


I placed the shaft in my straightening fixture.  This reman shaft had the paint scraped off near the torsion bar housing.  And it was bent.   Apparently the rebuilders dont care about axle straightness either.  Too me 6 hours to straighten this axle to near perfect.   It was worth my time as the joints were in such great shape.


53505668568_6cec2a7fe0_c.jpg


another thing the reman company did was paint the entire shaft head to toe.  I used MEK to wipe off as much of the paint as I could.   They even painted the entire inner shaft part that inserts inside the transmission.  And the sealing surface as well where the pen tip points to.   Cleaned this off as well.   Also note in this image the hub seal was missing.   Non of the 3 reman axles has them.   Instead of using nos, I pulled off a good used seal off a low mileage oe shaft.


53505669998_d27f4b956e_c.jpg

Rebooted and greased the reman shaft w NOS.  Grabbed a set of oe boot bands off one of the used axle sets.  Honda sells inner and outer grease separately.  Their grease tends to be more pliable than the reman grease.  I’d suspect the reman grease comes in 50 gallon generic drums.  Makes me feel better to use OE grease.  My original shafts lasted 259k and could have kept going.  I’m a believer in Hondas design and reliability engineering 


this reman drivers shaft refitted w OE grease and boots is now installed into the Beater at 301k.  A trip to Florida is coming up.  Will test out the humming noise…


#581502 87 Crx Honda Cv Axle Joint Rebuild, Slop/backlash New Vs Used

Posted by greasemonkeyreborne 5x1g's on 09 February 2024 - 09:03 PM in 1G CRX

Did some more axle work.    
 

my NOS drivers axle shaft installed in 2020 bent from impacting the drivers side torsion bar housing when I drove a roller coaster back country road.   I’m guessing when the car came out of the dip, became airborne, the axles and drivetrain flexed downward from the engine mounts.  This interfered w the torsion bar housing, impacted the axle, bending it.   Car was also a rebuilt salvage title back in 1988.  Impact was on front drivers side.   This damage probably help create the interference condition by distorting the frame


53198007906_f74e61b3ed_c.jpgpen top shows where the housing scapes the paint off the axle on impact


53211956290_ee9ce73eb6_c.jpg

I used my hydraulic press to straighten the axle at the point of where the paint was scraped away.   When I bent this back, I still had a little wobble upon rotation on the shaft up close to the outer joint.   I reinstalled the shaft.  And replaced the original front 270k  wheel bearings while I was at it


53211845789_2064652ccb_z.jpg

I ground down the top of the torsion housing as much as I felt comfortable w to give me additional clearance in the future.


53211463666_0aeb3cb4a3_z.jpg


painted the  spot to monitor..   notice the rubber grommet showing the amount of clearance.


then I drove 5400 miles to Michigan and NY and back.  ( also hauled 750# back w me, really over loaded the car).   Got a little hum from the drivers wheel bearing area half way through the trip.   Thinking that shaft wobble might have caused either the outer cv joint, or wheel bearing to begin to fail???


Now I’m really anal about my cars running as they were designed.  Especially the 80’s Japanese cars since they were built so simply, and well….


53505824324_db3da43793_c.jpg


and this is the extremes of my analness….  I’ve collected 37 axles over 30 years.


Since the 2020 rebuild, I believed there to be three paths to replacing axles.   1) Chinese new. 2) rebuilt axles (reman). 3) finding good Honda axles never previously rebuilt, and reboot them.   My gut was best path was to buy as many original Honda axles possible, QC tolerances and select best sets to reboot


53504630057_8d5fb2bcd0_c.jpg


I placed each axle in this set up.   Measured the slope w the red channel wrench….  Converted to rotational slope in degrees.   I’ll publish findings later.  Need to find a way to easily quantify this data.   
 

bottom line, I used the NOS axles as a baseline (.7 degrees slop), compare the against my original 259k axles I removed from service. ( 2.85 degrees slop - and still good working, vibration free, click free joints).  This gives me a range of working axles.


now I remeasured these axle sets this recent go around (NOS & original 259k axle sets)  I’m getting a 20% measurement delta.   So each time I quantify measurements in the future, I’ll start w these 2 sets as a relative starting point.   The obvious variability is how much pressure I apply to the channel wrench varies.   Yielding different measurements 


Out of these 37 axles, I probably have 3-5 really good sets I can reboot yielding 1 to 1.4 degrees over each axle.  This range seems to be consistence w 75-100k used original axles.  This judgement comes from several axles I was able to obtain mileage from the junkyards.


another note, I had 6 of the drivers axles w paint rubbed off the shaft just like mine did from impacting the torsion bar housing.   So this is a common issue.   Maybe 1 in three cars.   But could be due to axles collected from junkyards by rebuilders were from accident cars stressing the engine mounts on impact causing the paint to scrap and bending axles.


I’ve labeled and quantified all these axles.  So I can grab from the stock as I need to for the other cars


#581501 Update 2024: 17th Annual Road Trip 1987 Honda Crx - Dallas To Panama

Posted by greasemonkeyreborne 5x1g's on 09 February 2024 - 08:36 PM in 1G CRX

CSP…..   I looked up ceddasauto.com.    He still has the hinges.   Appear to be brass bushings to replace.  And a new bolt as a replacement pin.   Looks like a good solution


thnx again for tip


#581500 Update 2024: 17th Annual Road Trip 1987 Honda Crx - Dallas To Panama

Posted by greasemonkeyreborne 5x1g's on 09 February 2024 - 08:12 PM in 1G CRX

Plastics repair time! 


I pulled off the drivers plastic sill (rocker) panel to inspection for rust in the rocker area a few weeks ago.  The sill panel cracked 2 years ago near the gas filler when I pulled her out of a 45f garage and drove it in 0F winter freeze storm.  The rapid thermal contraction cracked my door caps and lower rocker sills.  Common problem.  Not to mention 36 year old plastics.


51784214263_66da02c36f_c.jpg

Years ago back woods hunting in Michigan, I drove through a large puddle/bowl down a 2 track.  Placed a patch on the outside to hold it together and prevent further cracking.  fortunately, this never cracked the whole way through.


53305988539_32a72685a1_c.jpg


This last October trip, the drivers door sagged and  punched a hole into the sill via the door corner.  To the lower right of the hole, there's a crack starting at a 45d angle downward.  This same 45d angled crack is on the passenger side as well.  Must be body flex taking its toll on the aging plastics.


53505942845_f3ef4870ef_c.jpg


When I removed the rubber bumper guard trim, the plastics broke more.   Using the 3M 2216, gluing it back together in stages.   Used wire to hold in place while it cured.


53504635357_8c4b991ce9_c.jpg


After refitting the final piece, used modeling clay to fit check clearances between the sill panel and unibody


53505673748_0949f0463d_z.jpg

a


Used Saturn S series front door skins to rebuild the CRX sill from the back side.  Went overkill and really beefed up this area.


53505832274_1bb5ddafcb_z.jpg


Cut long strips to reinforce the length of the interior sill as well.  Parts a bit heavier now w the additional plastic and glue.  But its pretty solid now.  No interference w the body.  Was running out of time for the Florida trip.  So stopped here.  Will pull it off after the trip to reinforce some other areas.


53512142224_d3998c317a_c.jpg


I had collected 4 front door panels off 96-99 Saturn S series cars at a junkyard.  The 3 1/2 panels left over in the pix to the left (silver/white).  I try to buy my plastics up North as less heat and UV damage is assumed.  These I got here in Texas.  Purposely pulled silver and white as those colors reflect UV the best.  Before i pulled these off the cars, I used a pair of pliers to bust a corner out of the panels.  As long as the break was a "tear" and not a "crack", they're good!  As i cut strips off the door w the recipocating saw, I purposely broke sample areas of the material.  The areas tore and turned white as I yielded them.   So these used panels are great repair material to use.   GM still has some of these panels NOS in stock.  I happened to find an NOS panel on ebay and just got it in for 1/3 the price.  Its the grey primered one to the right in the picture.  I'll save this one for when i need the strongest repair.


I mentioned this before Honda made their body panels out of ABS/PC engineered thermoplastic.   I cant find any spec data from past articles for Honda.  Dow Chemical made the Saturn door panels from 1990 to 2005.  Apparently it was Pulse B250 from 1990-1999.  And Pulse b270 from 2000-2005.  Both materials are ABS/PC.  The change in 2000 increased the thermal dimensional stability by about 30F to help correct panel warping in the sun.  And to maintain better dimensional stability.


ABS/PC is pretty tough trying to bend it by hand when its fresh material.   I'm pretty sure the The Honda and Saturn materials are a 99% CTE match.  This car sees ranges of 115F-0F here in Texas.  This point is critical to me so the bond won't also create additional cracks in  another spot or break apart from thermal cycling.   3M 2216 I had tested and used over several military programs.  Good stuff.  Flexes a little w temperature.  Its the best way to repair these panels I can think of.  Correct matching repair material and a super strong aerospace epoxy. 


While i had the 2216 out, I reinforced the fan resistors I bought this past year as well.


53188474010_cceb545daa_c.jpg


The dampening material over the coils was cracked out of the box.  As these age from use, the white material flakes off.  Hoping to keep this together longer.


53505521106_9dee02d214_c.jpg


Corrected the batch.  2216 doesn't conduct electricity.  I did the best i could to keep it off the coils anyway.


Cars ready for the trip.  All back together.


A post I did years ago on RPR about Honda plastics.    http://www.redpepper...ics#entry580541


Another post I did on Hondas panels.    http://www.redpepper...ics#entry580374


These haven't been updated in years and lost their original images.  I'll update them when I can w the new findings.


#581499 Update 2024: 17th Annual Road Trip 1987 Honda Crx - Dallas To Panama

Posted by greasemonkeyreborne 5x1g's on 09 February 2024 - 07:40 PM in 1G CRX

Treating the floor board rust and searching for water leaks..

53464575030_891ec86c58_c.jpg


Drivers side rust hole/seam failure just under clutch pedal.  Chipped away the rust.  Wire brushed the metal down.  Treated w Phosphoric acid.  This is not a 100% fix.  Later on I'll prep properly and weld in sheet metal.  Appears the rocker panel looks good.  I've used this acid treatment for years on body work having great luck w rust not coming back or coming back very slow.  Goal here is to neutralize the rust.  Since I dont drive in the rain much and never see salt, I'm good w this for the time being.


53464289873_2de45c030d_c.jpg


Passenger side after same treatment.  Area is smaller, but a rust bubble up on the rocker wall I don't like.


53464153961_bfc332abf4_c.jpg


Not having the time to weld it up.  I used a Loctite polyurethane roof/flashing sealant for the time being.  I primed and painted the affected areas.  Let is  cure.  Then applied the poly coating the interior rust.  I laid down a .070" sheet of EPDM rubber, then cut 2 layers of roof flashing to dress the top.  Since the floor board flexes a little if pressed in just the right spot, I needed this to give a little.  I'm sure there's a better sealing product.  Reached out to some body working buddies to query better products for semi flexible seams.  If you have a good recommendation, lmk...   This seal  seams to be good enough to prevent water infiltration for my trips if I need to be in the rain temporarily.


Since I needed to know the condition of the body...  I removed the lower drivers sill.  It was cracking from the last trip and needed to be repaired anyway.


53464477069_fc35e5a7a8_c.jpg


Good news is the rocker looks fine.  Car spent a couple years in New Jersey, then Kentucky, then w me in Michigan and back to NYC.  Car was undercoated by a PO before I got it.  I'm happy w the condition considering how many years this car saw salt in the 1980's-90's.


53464158346_56f7619df1_c.jpg


Peeled the front drivers fender well liner back to remove hardware for the sill removal.   Looks clean in side here as well.  This view is the wheel well side behind the clutch pedal.   The pen points to where one of the 4 sunroof drain tubes comes out.  I need to open up the interior at both wheel wells and and confirm the tubes are clamped and tight.  These tubes leaked before and i had fixed them back in the 90's.  Issue might have come back allowing water to sit in the floor pans.  Another issue might be A-pillar leaks around the windshield.  I need to replace the cracked windshield  I'll have my glass guy pull the shield and I'll do the bodywork then if needed.


53464291833_6e24d63cd2_c.jpg

In .attempt deaden the sound a little more, I laid down a thin layer of carpet on the floor before reinstalling the original carpet.  There wasn't factory deadener over the hump where the exhaust runs.  I have some spare fire wall deadeners from parted cars.  Going to see later if I can double layer the fire wall to quiet the motor a little while on the highway.  Difficult to talk on a cell - noisy.  The carpeting and interior smells great.   Will monitor the floor boards if I have to drive in the rain looking  for water infiltration down the road.  I"m sure I've got unresolved issues somewhere


53464292758_bb1d489d1b_c.jpg


Finally installed the dangling fog light switch from 2 years ago.

 
53463243572_3e4d2fb04c_c.jpg
 
Raising the drivers door striker pushed the door back into alignment and worked great.  But the latch drags too much from loose hinges and sage.  Have to really slam the door.   I did some calcs and figured I needed about .045" shimming on the bottom hinge set to lift the door about .250-300".  Cut shims out of roof flashing.
 
53464294448_ccc7806550_c.jpg
 
Works great.  Ball point pen shows shims.   Door closes nice wo drag.  The bottom hinge really was loose while I was doing the job.  At some point, I'll need to pull a good set of hinges off a passenger door of of lower mileage car as they are reversible to rebuilt.  Going to add .010" shimming the passenger door while I"m at it
a