Sign In
 Create Account
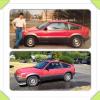


 View Garage
Update - Front Grill Repair. Took the front grill off and had to grind off an older repair job. Someone tried to use Bondo as a "glue" to fix the grill. What I've done is the same as the fenders - JB Weld Epoxy, then fiberglass the inside. Seems to be a strong repair. Pics showing the process. Yup - the Silver Evil Twin is a piece of work for sure.


Cracked Grill on the pavement

Showing the Various Cracked Areas

Grinding the Bondo Off


Mixing the JB Weld

JB Welding the Cracks


Once the JB Welds Sets Up - +24hrs. I'll start the fiberglass work on the interior side of the grill. It's a lot of work, but hopefully the plastic fender panels and grill will be strong and crack free for the future. As mentioned in previous updates - I'm working on the front end of the Evil Twin and working my way to the back - looking at making this a 12 month project - taking my time and looking for good results. For me - part of the fun is the restoration process and making something that is in rough shape - in good shape.
 Back to top