 Sign In
 Create Account
I use a pneumatic impact hammer to drive it out. Then to press it back in I use a BMX rear sprocket tool and a tie rod puller.
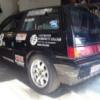
Niccer's '86 1G And '87 3G
Started by niccer, Dec 29 2013 08:39 PM
105 replies to this topic
#16
 Posted 05 April 2014 - 08:14 PM
-
- Project CI2-VIC Team Lead
-

- Group: 2012 Contributor
- Location:Eastern NC
-
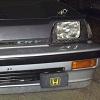
Drives: 16 Ford RS, 84 Civic 2000S (B20Z2), 98 Civic EX
-
Image Gallery
 View Garage
 Back to top
#17
Posted 06 April 2014 - 02:51 AM
-

- Speedy
-
- Group: 2013 Contributor
- Location:Raleigh, NC
-
Drives: 1985 Crx Si with Blacktop D16
No worries man, I'll be back in the country on Wednesday. I'm heading out of state on Thursday and will be back sunday. So it will still be a few weeks before I need it back.
I'll hit you up on Wednesday.
I'll hit you up on Wednesday.
#18
Posted 06 April 2014 - 09:27 PM
-
- Slowpoke
-
- Group: 2014 Contributor
- Location:Atlanta, Ga
-
Drives: '87 Civic Si, '11 F150 Ecoboost
I got the motor and transmission out with no problem at all. This was my first time doing this alone, so disregard the ghetto blue straps I used for added insurance. After this, all I was able to do was separate the transmission from the block and the clutch from the flywheel before realizing I didn't have the right socket to undo the flywheel bolts. I believe the socket I need is a 12 point 17mm, which Autozone didn't have, but I should be able to grab one tomorrow from somewhere else. After I get that off, I can mount the engine on its stand and start tearing into it.

#19
Posted 12 April 2014 - 12:57 PM
-
- Slowpoke
-
- Group: 2014 Contributor
- Location:Atlanta, Ga
-
Drives: '87 Civic Si, '11 F150 Ecoboost
So, Joseph (Stuckey85si) came over Wednesday evening after work to turn some wrenches with me over a few beers and pizza. We got the dash, heater core and blower out of the car and pulled the carpet out of the way in order to get at the fuel lines. He's retrofitting the A/C and carpet from this Si to his '85, so those were things he'd need to do anyway. We stopped there for the night while I was scratching my head as to the best way to remove one of the fuel lines from the firewall.
This brings me to today after Screech said all I have to do is push the grommet through the hole in the fire wall (and subsequently the chassis behind the driver's seat), which gives plenty of room to fit the hose and fitting. I was about to cut the line and then re-flare it, so this saved quite a bit of time and money; I tend to over complicate simple things like this... Thanks Screech.
After pushing the grommets through, the lines came out pretty easily. The large ,what I assume to be 'sender' line (with the large fittings), wouldn't come out as easily with the steering column and pedal assembly in the way, so I unbolted them. It came out nicely after doing that with minimal contorting. I need to bolt the column and misc assemblies back up under the dash, but I'm at a stopping point for the day and am alllllmost finished with the donor car. All I have to do now is remove the engine harness and all the misc. bits I need to use to convert my engine bay to support the fuel injected parts. This will require more reading than labor, so I'll probably start researching what needs to be swapped over tomorrow.


That's all for now! I'm off to do some camping and catfishing at the local lake!
#20
Posted 15 April 2014 - 09:42 AM
-
- Slowpoke
-
- Group: 2014 Contributor
- Location:Atlanta, Ga
-
Drives: '87 Civic Si, '11 F150 Ecoboost
Received the wiring harness from Puddleskipper this morning and laid it out; I didn't realize how expansive it was going to be! I also completely wrapped up scavenging parts from the Si donor car and it's ready to be taken home. This week I'm starting to tear the motor apart to figure out what size bearings I'll need. Once I find that out, I'll start ordering a rebuild kit from Ebay.
I'm having an internal debate on whether to do any internal work while I have the motor apart or to just leave it stock. I've read up on a few things, but still have some questions that need to be answered. I think I can go with the same generation Integra pistons for higher compression. Iirc, it requires the cylinders to be bored, but to what degree, I'm unsure. I assume the pistons fit on the D15A3's con. rods... Also, I know I can shave a few thousandths off the head to increase the compression too, but don't know what amount is recommended. I feel like it's a slippery slope once I start messing with internals because then I feel like I'll need a cam and larger throttle body and head work to maximize the motor's potential.
It's something I'm going to need to figure out in the next week or so.

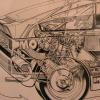
Just some "before" shots to look back on once I've reassembled the engine.


#21
Posted 17 June 2014 - 01:43 PM
-
- Slowpoke
-
- Group: 2014 Contributor
- Location:Atlanta, Ga
-
Drives: '87 Civic Si, '11 F150 Ecoboost
I've been working slowly and kind of steadily on the CRX since the last update. The donor car is no longer in the garage, I've torn the motor apart a little bit, finished removing the original motor from the DX, pretty much completely stripped the whole thing. All I have left to do before re-assembling parts is taking the fuel lines out, cutting/welding the rusted parts in the floor and that's pretty much it.
Rebuilding the motor is another thing, since I've never done it on my own before. I have some questions about how to tell what size bearings I need to use, but I'll tackle that in a week or two. Here are some pics of what what I've been doing lately.
Prior to cleaning the bay.

After.


Just a shot of half of the parts cluttering up my garage. My main motivation to put this thing back together is just to have room to move around in this place!

#22
Posted 17 June 2014 - 01:48 PM
-

- Slowpoke
-
- Group: Members
-
Drives: 1987 CRX Si, 2003 Jaguar S-Type R
#23
Posted 17 June 2014 - 02:51 PM
-
- Slowpoke
-
- Group: 2014 Contributor
- Location:Atlanta, Ga
-
Drives: '87 Civic Si, '11 F150 Ecoboost
I like the valve cover! What did you use?
Thanks, for paint I just used some wrinkle finish valve cover spray paint from Autozone. Used a sandpaper'ish dremel bit to sand down the grooves/lettering and then used a fine grit paper to 'polish' it up. To strip the paint off prior to doing anything, I used airplane stripper (from AZ) and a hose to wash it off. After sanding everything, I taped the grooves and lettering then spent about 2 hours cutting it all out with a razor.
Sorry, ^ that was a bit discombobulated.
#24
Posted 17 June 2014 - 04:45 PM
-

- Speedy
-
- Group: 2014 Contributor
- Location:NW Arkansas
-
Drives: in circles. I did take a right out of turn four once and regreted it.
On the bearings, I tried to go Honda color code (my motor was really tight) but found that they were sorta hard to find a far harder to pay for. IIRC, they are about $10 per half so $20 X 9 = $180 for bearings. I purchased Ebay Kings (rod and mains) for $40!! I bought two sets just cause. They plastigauged under .002 and I shimmed the oil pump to up the pressure. I over shimmed a little but I was told to shoot for 70PSi at 3,000. Mine probably comes down to that when the oil gets really hot. I used .160 shim under the spring but will probably only dow .120 next time. Mine will go to 90 max and idle at 25 hot. It seems to be holding up. I'm hoping i can get my setup to let it run closer to redline so I will know if it really does work.
#25
Posted 18 June 2014 - 07:41 AM
-
- Slowpoke
-
- Group: 2014 Contributor
- Location:Atlanta, Ga
-
Drives: '87 Civic Si, '11 F150 Ecoboost
On the bearings, I tried to go Honda color code (my motor was really tight) but found that they were sorta hard to find a far harder to pay for. IIRC, they are about $10 per half so $20 X 9 = $180 for bearings. I purchased Ebay Kings (rod and mains) for $40!! I bought two sets just cause. They plastigauged under .002 and I shimmed the oil pump to up the pressure. I over shimmed a little but I was told to shoot for 70PSi at 3,000. Mine probably comes down to that when the oil gets really hot. I used .160 shim under the spring but will probably only dow .120 next time. Mine will go to 90 max and idle at 25 hot. It seems to be holding up. I'm hoping i can get my setup to let it run closer to redline so I will know if it really does work.
I was planning on using Ebay bearings too. I'll try to lay my question out as best as possible, so bare with me...
What I don't understand is how to use the information the plastigage gives me to decide what thickness bearings to order.
So, I plastigage the old bearings to see what sort of gap is between them and the crank, right? What do I do with that measurement?
Edit: If anyone has a good link or even a recommended book on engine building they'd like to share, I'd be very grateful. I don't know if I need a Honda specific link/book, but as this is my first time doing this I'm really nervous.
#26
Posted 26 June 2014 - 07:52 AM
-
- Slowpoke
-
- Group: 2014 Contributor
- Location:Atlanta, Ga
-
Drives: '87 Civic Si, '11 F150 Ecoboost
I've still been doing things to prep for rebuilding the engine, like making parts look like they're not almost 30 years old. Started tackling my intake manifold last night and got most of it done. I sanded and repainted the oil pan earlier this week and also the rear mount. The two other mounts are ready for urethane reinforcement, but I need to borrow a friends gun before I can fill/paint them.
Also marked where I need to cut the floors and started on it last night before I realized it was almost 11 and I was making a hell of a lot of noise.
Before:

After:


#27
Posted 26 June 2014 - 09:57 AM
-
- OEM
-
- Group: 2014 Contributor
- Location:Los Angeles, California
-
Drives: 86 Honda CRX Si
View Garage
Nice work! What did you use to clean the intake manifold?
I was using a wire brush wheel and it seemed to polish it up to a sparkle, then I was going to give it a clear coat with some rusteoleum engine paint (heat proof) to keep the polished look aand prevent the manifold from oxidizing.
I was using a wire brush wheel and it seemed to polish it up to a sparkle, then I was going to give it a clear coat with some rusteoleum engine paint (heat proof) to keep the polished look aand prevent the manifold from oxidizing.
#28
Posted 26 June 2014 - 10:27 AM
-
- Slowpoke
-
- Group: 2014 Contributor
- Location:Atlanta, Ga
-
Drives: '87 Civic Si, '11 F150 Ecoboost
I used airplane stripper to get the crusty black paint off the upper part of the manifold. After that, a few rounds of purple power and a scrubbing brush. I thought about painting it, but then thought it looked good enough as-is. If my plan was to keep this motor in the car for years to come, I might of felt inclined to spend more time. I sanded the fuel rail down with a few different grits of sand paper and think it turned out pretty well.
#29
Posted 26 June 2014 - 01:52 PM
-
- Speedy
-
- Group: 2013 Contributor
- Location:Raleigh, NC
-
Drives: 1985 Crx Si with Blacktop D16
#30
Posted 27 June 2014 - 07:10 AM
-
- Slowpoke
-
- Group: 2014 Contributor
- Location:Atlanta, Ga
-
Drives: '87 Civic Si, '11 F150 Ecoboost
No, I don't have a welder, but a friend that's learning offered to do it if I picked his gear up from Smithfield and took it back. He's not too experienced, so I'm a little iffy about whether he'll be able to not botch it or not.
I should be free most of one of the days and maybe both. Have some plans that look like they'll probably fall through. I'll probably shoot you a text one of the days to see what's up.


Community Forum Software by IP.Board
Licensed to: Red Pepper Racing