Jump to content


Niccer's '86 1G And '87 3G


  • You cannot reply to this topic
105 replies to this topic

#1
niccer

  • Slowpoke
  • PipPip
    • Group: 2014 Contributor
    • Location:Atlanta, Ga
    • Drives: '87 Civic Si, '11 F150 Ecoboost

Hi all, my name's Nick.  I'm going to use this thread to keep tabs on the progress (or lack thereof) on my car.  I'm in the beginning stages of sourcing a EW3/4 (D15A3), rebuilding it and swapping out the Carb'd D15.  I'm torn on just rebuilding it to OEM specs with a kit from Ebay or upping the compression and doing some head work.  I've never rebuilt an engine before, so part of me just wants to stick with the basics and make sure it's running right.  But the other part of me wants to try swapping in some integra pistons, mill the head a little bit and add a cam to squeeze some more power out while I'm in there. 


My goal is to end up with something reliable to do a few track days a year and the occasional autox.


I'll use this part to bookmark some useful threads on the site that will help me in the future:

-Post 17- Basic's to modifying an EW3/4 - http://www.redpepper...5a3 ew3&page=2


-Some Carb to FI wiring informationhttp://www.redpepper...+ew3 +ew4 +carb


-Integra Pistons in EW3/4http://www.redpepper...uge#entry354478

          &   http://www.redpepper...ic=50717&page=2


-D15a3 engine building advice - http://www.redpepper...?showtopic=3108


-Integra Disc Brake Swap - http://www.redpepper...e=2#entry534162


-Integra Type R Rear Koni - P/N 8041 1164Sport   http://www.koni-na.c...hyBJWbCwj2ceh6P


Fuel Pump Fitting Adapters for Walbro (post 14) - http://www.redpepper...topic=58285&hl=


Edited by niccer, 26 December 2015 - 01:59 AM.


#2
niccer

  • Slowpoke
  • PipPip
    • Group: 2014 Contributor
    • Location:Atlanta, Ga
    • Drives: '87 Civic Si, '11 F150 Ecoboost

There are a few rusty parts in the chassis that I'll be addressing too while the gas tank and lines are out of the car, so I started removing some of the sound deadening with dry ice. 


photo1_zpsc4fd39ec.jpg


photo3_zps04acfb7a.jpg


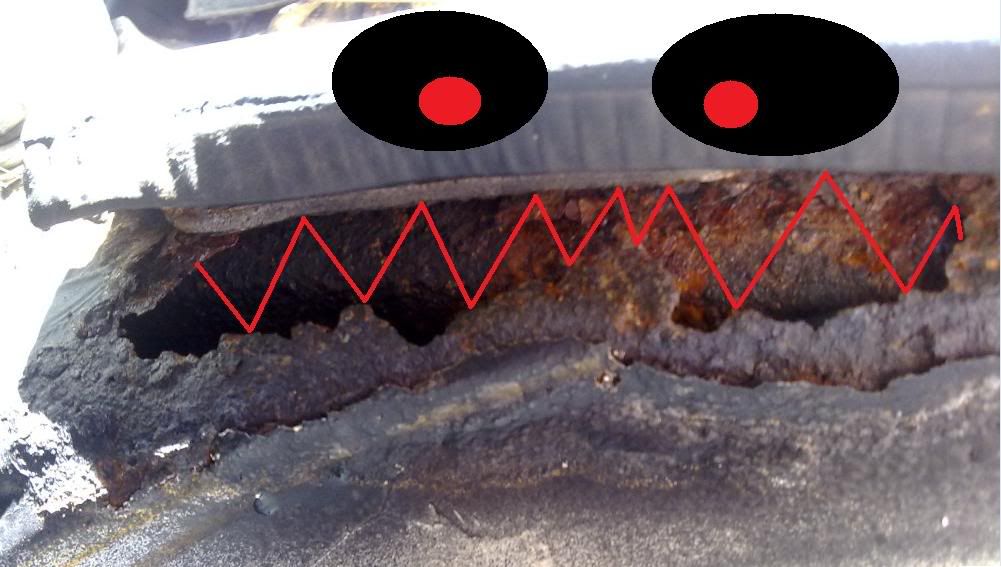
This is my most worrisome rust issue.  Most of you are familiar with this spot; right above/connected to the panhard bar brace.  I'm not too sure on the best (read: "easiest and cheapest") way to correct it, so feel free to give any suggestions.  The other two spots are behind the driver and passenger seats and shouldn't be too hard to cut out and re-weld.


photo2_zpsa59be880.jpg


The following are just some random pictures leading up to how the car sits now.


photo_zps41f97f68.jpg


Oh yeah, something else I've been meaning to ask too...  See how the front sits lower than the rear?  I'm thinking it's just blown front struts (as it bottoms out pulling into my driveway too) but is it possible that the torsion bars have been adjusted?  Would that affect the ride height?


photo_zps01e82f0e.jpg


photo2_zps278c21d9.png


As it sits currently.

photo5_zps77cd1ee3.jpg


#3
CRXer87hf

  • Speedy
  • PipPipPipPip
    • Group: 2013 Contributor
    • Location:Atlanta, GA
    • Drives: 1987 Honda CRX HF, 1985 Honda CRX SI, 2003 Land Rover Disco
    Garage View Garage

Regarding the rust issue in the trunk area, I sanded both sides down to the metal, laid down metal mesh patch and a thick coat of fiber-bondo (the fiberglass reinforced stuff) down from the top, let that dry, then put another layer of fiber-bondo on it from underneath.  All the materials I got for less than $30 at Advance Auto.  Since it's not structural, it doesn't necessarily need to be welded, and if you're planning on putting the interior back in, no one will see it.  


photo%2520%252862%2529.JPG


Good luck.


Regarding the lower front end height, the shocks shouldn't effect the ride height if their shot.  There is a torsion bar adjustment bolt that may have been adjusted by the previous owner.  You can simply back it out a couple turns, and that should level out the car.  Actually, just looking at it from the picture, it almost looks like the rear is too high. 


Build thread: "Skittle 2.0" - http://www.redpepper...l=&fromsearch=1
Build thread 2: "Red Daily"http://www.redpepper...topic=55687&hl=


My Classic Honda Blog - http://genone-blog.blogspot.com/


Road & Track magazine: "When they get around to listing the top good-time inventions of the late 20th century, we're willing to bet that right up there with the hang gliders, ultra lights, sailboards and jet skis you'll find the Honda Civic CRX. And we're willing to bet that the CRX won't be at the bottom of the short list--particularly if the CRX in question is an Si."


#4
niccer

  • Slowpoke
  • PipPip
    • Group: 2014 Contributor
    • Location:Atlanta, Ga
    • Drives: '87 Civic Si, '11 F150 Ecoboost

Regarding the rust issue in the trunk area, I sanded both sides down to the metal, laid down metal mesh patch and a thick coat of fiber-bondo (the fiberglass reinforced stuff) down from the top, let that dry, then put another layer of fiber-bondo on it from underneath.  All the materials I got for less than $30 at Advance Auto.  Since it's not structural, it doesn't necessarily need to be welded, and if you're planning on putting the interior back in, no one will see it.  


photo%2520%252862%2529.JPG


Good luck.


Regarding the lower front end height, the shocks shouldn't effect the ride height if their shot.  There is a torsion bar adjustment bolt that may have been adjusted by the previous owner.  You can simply back it out a couple turns, and that should level out the car.  Actually, just looking at it from the picture, it almost looks like the rear is too high. 


The fiberglass looks like a good remedy for those two holes I have.  I don't plan on running interior in the rear, but I also don't plan on caring about what it looks like either.  I'll probably just spray paint over it.  


See, the thing is that the previous owner was an old lady that owned the car since the mid 90's.  I highly doubt she messed with the ride height or the torsion bars.  What would make the rear sit too high?  Springs right?  Mine are rusted to hell and need to be replaced with something adjustable after I finish with the engine swap. 


#5
phatboycrxhf

  • legend in the making
  • PipPipPipPipPip
    • Group: Members
    • Location:lundar ,Manitoba Canada
    • Drives: 1985 crx ,98 malibu ,90 hatch,87 hatch trailer,87 legend,95 dodge neon,90 civic sedan SE
    • Image Gallery

that method of repair is not going to last. it doesn't matter how well you clean it and attempt to seal it, moister will get behind it and rust worse then before.but this time it will be festering behind the fiberglass,until the fiberglass is all that's left . car looks good tho


My Webpage
(quote by RareCrx)HAVE A MADD TYTE DIGGITY DOGG ,BUBBLES SPRAYIN ON THE INTERCOOLER, poopin ON A 8 SECOND CHEVELLE WITH MY MINI-ME SWAP DAY..

#6
PuddleSkipper

  • Ecomodder/Hypermiler
  • PipPipPipPipPip
    • Group: 2014 Contributor
    • Drives: 87 Civic Si, 89 Civic LX, 00 Jeep Grand Cherokee, 84 Civic 1500S (R.I.P.), 85 Wagovan (R.I.P.), 84 Civic GL (R.I.P.)

Personally I'd weld it myself, phatboy made a good point. Looks like a fun project though :)


#7
SHOGUNOVDDRK

  • Leadfoot
  • PipPipPipPipPip
    • Group: Members
    • Location:Australia
    • Drives: 1986 civic hatchback
I'd have to agree with these guys, I've lurked their work in the community for years.

Rust is an evil being.

Keep the hard work up, I can't wait to see what you did with the crx

(This was an A-pillar on a 3G)

tapatalk_1390639000071_zpsf7x6lclg.jpeg

Edited by SHOGUNOVDDRK, 01 March 2014 - 05:16 AM.

QUOTE(SHOGUNOVDDRK;835304)
the import scene has kinda become like emo's.... its killing itself whilst looking overdressed and in drag


QUOTE(phyregod;835835)
Sig worthy. But mine is full.


#8
niccer

  • Slowpoke
  • PipPip
    • Group: 2014 Contributor
    • Location:Atlanta, Ga
    • Drives: '87 Civic Si, '11 F150 Ecoboost

Thanks guys.  


I didn't realize the spot CRXer87hf posted a picture of was where the panhard mount was.  I thought it was on the rear side of the spare tire area at the back of the car.  I have two holes there where plugs used to be that I'm also considering welding up and figured doing his method would solve the issue too.  


photo3_zps7889f4db.jpg


Regarding fixing the panhard bar mount area, yeah I think I'm (errr, someone is) going to have to weld it up.  I met up with a member (Stuckey85si) earlier this week to take a look at the motor in his parts Si.  He's a super nice guy and we've worked out a deal where he's going to tow the car over to my place and leave it while I take the parts I need, then come back and get when I'm finished.  Anyway, we talked a little about fixing this issue and pretty much came to the conclusion that it needs to be welded.  When he brings his CRX over, I'm sure we'll take a look at the rust and plan the best route to get it patched up, as well as the other parts behind my seats.  


Shogun, that looks wayyyy worse than anything I'm dealing with.  Holy shit!


#9
CRXer87hf

  • Speedy
  • PipPipPipPip
    • Group: 2013 Contributor
    • Location:Atlanta, GA
    • Drives: 1987 Honda CRX HF, 1985 Honda CRX SI, 2003 Land Rover Disco
    Garage View Garage

To rebut... I did forget to mention that I covered the bare metal with POR15 before putting the fiber-bondo on to prevent the continuation of rust.  


Build thread: "Skittle 2.0" - http://www.redpepper...l=&fromsearch=1
Build thread 2: "Red Daily"http://www.redpepper...topic=55687&hl=


My Classic Honda Blog - http://genone-blog.blogspot.com/


Road & Track magazine: "When they get around to listing the top good-time inventions of the late 20th century, we're willing to bet that right up there with the hang gliders, ultra lights, sailboards and jet skis you'll find the Honda Civic CRX. And we're willing to bet that the CRX won't be at the bottom of the short list--particularly if the CRX in question is an Si."


#10
niccer

  • Slowpoke
  • PipPip
    • Group: 2014 Contributor
    • Location:Atlanta, Ga
    • Drives: '87 Civic Si, '11 F150 Ecoboost

So, the donor car was delivered the other week and I really haven't had much time to work on things since.  I originally thought that I was going to be able to get the whole motor w/ intake & exhaust manifold, transmission, wiring harness and the fuel tank and lines but am a little unsure at the moment.  I guess I wasn't too clear with Joseph when I went to check the car out at his place but will be sending him an email to figure it all out.  He's been more than helpful so far, so I hope we can work something out. 


I'm hesitant to start tearing his '85 apart before things are 100% clear as to what I can and can't take. 


I do have a questions for you guys though...


In the case that I'm unable to get the full motor and just come away with the fuel injected head to mate to my carb'd block, what rebuild kit do I buy from ebay?  I've read that the blocks are almost the same, but don't know if all of the gaskets/piston rings/timing belt/water pump/bearings/etc... are the interchangable from block to block.  I'm asking, because I'd prefer to buy the EW3/4 full rebuild kit since it comes with parts to freshen the head up (that the EW1/2 obviously doesn't have) but don't know if all the parts for the block will work. 


photo1_zps83c286b1.jpg


#11
niccer

  • Slowpoke
  • PipPip
    • Group: 2014 Contributor
    • Location:Atlanta, Ga
    • Drives: '87 Civic Si, '11 F150 Ecoboost

I emailed Joseph and got some things cleared up and have begun removing parts.  I think I'll still need to source a full harness from someone, so I'll make a WTB ad in a few.  


No need in helping me with the engine rebuild problem I posted about above, as I'll be using the full EW3/4 motor instead of retrofitting the FI head on my carb'd block.  


#12
niccer

  • Slowpoke
  • PipPip
    • Group: 2014 Contributor
    • Location:Atlanta, Ga
    • Drives: '87 Civic Si, '11 F150 Ecoboost

I need some advice with getting this fitting undone without A: tearing it up and B: without further bending and possibly breaking the mount.  I had it soaked in PB Blaster and started to undo it, or at least thought I was, until I realized I was just bending the U mount that's bolted to the frame.  


Edit: Nevermind... I went back out there after making this post and was able to get it to come loose without too much hassle.  I think the PB Blaster needed more time to penetrate.  Anyway, status update time.  I'm completely done with the rear end of the car now; tank and all misc. lines are out of the way.  I'm now focusing on getting the motor and transmission ready to pull this weekend and will then turn my attention to removing the dash to get to the fuel lines inside the cabin. 


photo_zpsf2d42571.jpg


Edited by niccer, 31 March 2014 - 09:12 PM.


#13
niccer

  • Slowpoke
  • PipPip
    • Group: 2014 Contributor
    • Location:Atlanta, Ga
    • Drives: '87 Civic Si, '11 F150 Ecoboost

I picked up an engine hoist from a friend yesterday and am heading to buy an engine stand here in a few hours, then stopping by VIR to hangout with some friends and hopefully get a ride-along or two in the track day that's going on.  I removed a few things from the Si last night in preparation for yanking the motor/transmission tonight/tomorrow and almost had a "oh shit!" moment all over my garage floor.  I started draining the transmission fluid first and while I was waiting on that to finish up, decided to do the motor oil next, if it had any in it.  So, I place my drain tub underneath the pan, start removing the drain bolt and WOOSH!  Oil starts coming out faster than I've ever seen in my life.  It fills the pan up in less than 15 second and I start scrambling to get the drain bolt back in the pan to stop the geyser I just unleashed before oil is all over the floor.  I stopped the flow in the nick of time and proceeded to drain the remaining few quarts out into another pan with no problems, but it was a close one.  I did manage to get oil all down my arms and over the cardboard I was laying on when trying to 'plug the artery', so to say.  


Anyway, I guess a mixture of water, gas and oil had accumulated in the pan over the years it was sitting in Joseph's back yard.  It wasn't viscous at all and reeked of gasoline; totaling roughly a gallon and a half once it was all drained.  It's a gooood thing I plan on rebuilding this guy.  


Hope to have some pictures up in the next day or so of the powerplant freed from the chassis.  


#14
Stuckey85si

  • Speedy
  • PipPipPipPip
    • Group: 2013 Contributor
    • Location:Raleigh, NC
    • Drives: 1985 Crx Si with Blacktop D16
Glad to hear your making progress. Any luck on a chassis harness yet?

Oh yea, please be careful with the ac stuff!

Thanks,

Joseph

#15
niccer

  • Slowpoke
  • PipPip
    • Group: 2014 Contributor
    • Location:Atlanta, Ga
    • Drives: '87 Civic Si, '11 F150 Ecoboost

So, I guess the 'bitch pin' is still a PITA on these cars too...  I know that's what they're called on new D and B series motors and cannot get the one out on the Si.  If you're not familiar with that term, it what the roll-pin that connects the shift linkage to the transmission is called.  There was a neat trick I used with my old D16 that used a C-clamp, a small torx bit and a socket, but I can't get it to work on this one.  A BFH and a perfectly sized punch won't work either... I'm just going to detach the linkage from the rear at the shifter and pull it out with it still connected to the transmission.  All I have to undo now is a few misc. vacuum lines and wires, then the mounts and she's free!  Should have it out tomorrow after the F1 race.  


Went and picked up an engine stand today, then swung by VIR to watch some of a THSCC track day to get some motivation to get the swap complete.  

One of guys in the instructor group with his DA.

photo_zps14cdcea3.jpg


Glad to hear your making progress. Any luck on a chassis harness yet?

Oh yea, please be careful with the ac stuff!

Thanks,

Joseph


Yep, I just bought a full harness from Puddleskipper.  I unbolted the A/C compressor and ziptied it out of the way and won't need to touch it again; no worries there!  After tomorrow, all I'll have to do is remove the dash to get to the fuel lines from inside the cabin and undo necessary parts from the engine bay for the swap.  When will you be back?  If you need/want to pick the car up before I'm done with that feel free.  For small stuff like that, I can just swing by your place and remove what I need.  


Edited by niccer, 06 April 2014 - 01:49 AM.