 Sign In
 Create Account
The d16 came with one, pretty sweet..

Cheddas H22 Civic - Dec 2014, Rear Camber + Toe Adjusters
Started by chedda_j, Apr 16 2012 03:53 PM
238 replies to this topic
#31
 Posted 04 June 2012 - 11:06 AM
-
- Lives to modify
-

- Group: Vendors
- Location:Cranbrook, B.C, Canada
-
Drives: 1986 Honda Civic 2.2L LSD, Acura TL Aspec
 View Garage
 Back to top
#32
Posted 06 June 2012 - 12:17 AM
-

- ホンダ、夢の力
-
- Group: 2012 Contributor
- Location:Nashville TN.
-
Drives: -------- 1986' CRX Si (X2) -------- 1993' GMC Sanoma SLE
-
Image Gallery
Nice work sir! I'm anxious to see this motor put back together. I love photos of a motor build.
BTW; those rods look beast.
BTW; those rods look beast.

#33
Posted 06 June 2012 - 04:12 PM
-

- Spit pop bang
-
- Group: Contributing Member
- Location:Ottawa,Ontario
-
Drives: 86 CRX,91 CRX SI
View Garage

#34
Posted 07 June 2012 - 01:18 AM
-
- Lives to modify
-
- Group: Vendors
- Location:Cranbrook, B.C, Canada
-
Drives: 1986 Honda Civic 2.2L LSD, Acura TL Aspec
View Garage
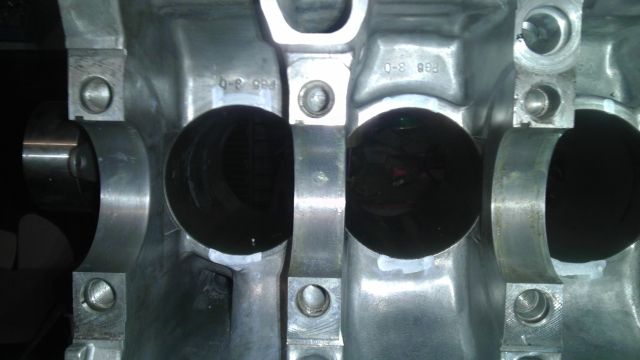
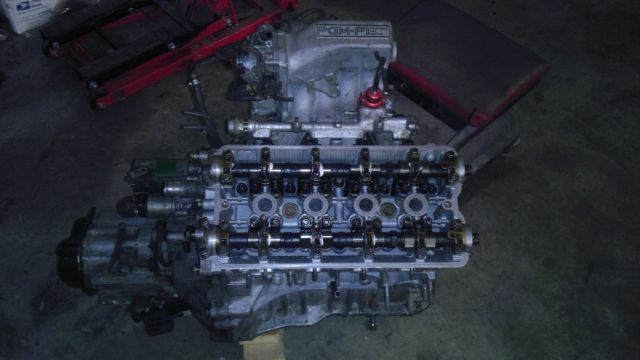
Here is the block prior to notching for the Eagle Rods. I used a carbide tapered cutter and a sanding wheel to clean it all up. I put the rod and piston in each hole and then marked a line on either side of the rod with a paint marker. I then used the die grinder to take the materials out.
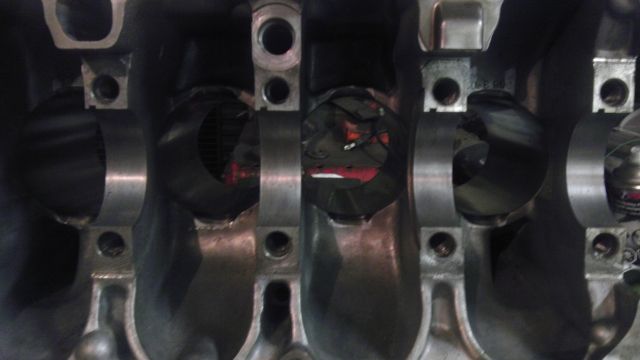
The rod bolts hit the carriage so I had to machine the heads down .040" so that it can clear, all good now.
The rod bolts hit the carriage so I had to machine the heads down .040" so that it can clear, all good now.
- cahitapower likes this

#35
Posted 15 June 2012 - 06:41 PM
-
- Lives to modify
-
- Group: Vendors
- Location:Cranbrook, B.C, Canada
-
Drives: 1986 Honda Civic 2.2L LSD, Acura TL Aspec
View Garage
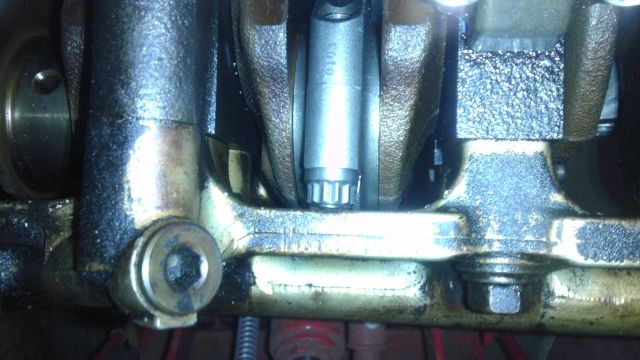
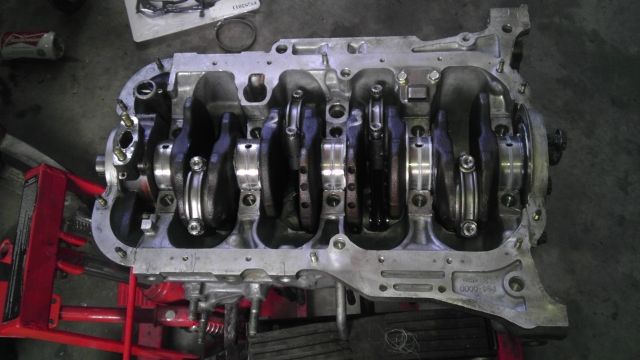
Motor is almost finished, torqued everything to spec. Just need to finish off a couple things. Also fixed the old shitty motor mount with some new bushings, after some burning, sandblasting and paint.

#36
Posted 19 June 2012 - 12:33 PM
-

- In the left lane
-
- Group: 2011 Contributing Member
- Location:Auburn, Kentucky
-
Drives: 1987 Honda CRX Si
Sorry about the rod, cheddaj, but sweet otherwise.
I'm in same boat. A year ago, I had a reputable mechanic install Scott's lighter springs. Didn't know timing was 32 degrees advanced at 800 rpm (guy assed it all up) and engine detonated upon firing a squirt of nitrous. Called him, he denied everything, got it taken apart by another mechanic, head back on, 5 valves replaced, and NOW.....the rings gotta be replaced, one cylinder wall looks slightly scored, a fuel injector tip is missing, gas is pouring through one of the cylinders.....all because a longtime "reputable" mechanic doesn't know ass from elbow. Im in about 1000 bucks so far, and probably another 1000 IF I can get it all fixed.
Its always something. Should have taken my friends advice when I bought it. "WHat should I do to it?" I asked...
"Weld the hood shut." he wisely spoke.
Good luck. Nice looking Honda.
And I absolutely love the pics of the rebuild. Wish I knew how to do that stuff....and that valve cover is TIGHT!
Cannot drive with the window up
#37
Posted 19 June 2012 - 05:09 PM
-
- Lives to modify
-
- Group: Vendors
- Location:Cranbrook, B.C, Canada
-
Drives: 1986 Honda Civic 2.2L LSD, Acura TL Aspec
View Garage
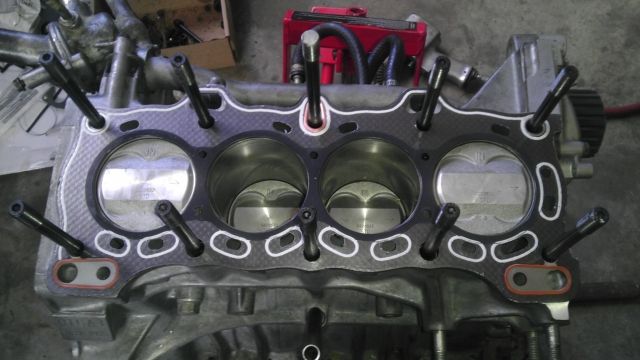
Its only the third of fourth motor I've built myself and the first honda motor. It was pretty simple when you break it down, use the proper tools and follow all the tips form the FSM. Just always check clearances, have some plastic gauge around (typically the green stuff for .001 - .003") and torque every essential part to the recommended spec. That also means getting the correct torque patterns for bolts, and the different torque specs for arp stuff because its quite a bit higher. When assembling rods make sure to use the rod caps that come with the rods, each one is matched, so if you swap them, the bearings will squish too little or too much on the crank and will destroy it when you start it up. Have lots of assembly lube laying around, tonnes of cleaner, and label the parts where they go if you can't remember. For bolts, I had the majestic acura website up so I could just cross reference length of bolt to the pictures to make sure I used the correct bolts in the correct spots. Also a set of metric and standard 12 point sockets are good to have around for the flywheel bolts, clutch bolts, arp studs, and rod bolts. The specific ones you need are 10mm, 17mm, 9/16" and 7/16" if I remember correctly.
The motor is very close to being done, I'm just waiting for a crank pulley and a set of timing gears. The reason for this is because the crank I have in the motor is a 24mm snout and the old one was a 22mm snout. This makes a huge difference and the pulley assemblies are not interchangeable. The only want to use the 22mm pulley would be to take the crank to the machine shop and get 2mm taken off the snout and re-keyed. It would probably cost you around $100, and I would have machined it myself if I would have known prior to re-assembly.
The motor is very close to being done, I'm just waiting for a crank pulley and a set of timing gears. The reason for this is because the crank I have in the motor is a 24mm snout and the old one was a 22mm snout. This makes a huge difference and the pulley assemblies are not interchangeable. The only want to use the 22mm pulley would be to take the crank to the machine shop and get 2mm taken off the snout and re-keyed. It would probably cost you around $100, and I would have machined it myself if I would have known prior to re-assembly.
#38
Posted 22 August 2012 - 02:51 PM
-
- Spit pop bang
-
- Group: Contributing Member
- Location:Ottawa,Ontario
-
Drives: 86 CRX,91 CRX SI
View Garage
#39
Posted 26 August 2012 - 04:35 PM
-

- In the left lane
-
- Group: 2010 Contributing Member
- Location:Queens, NewYork
-
Drives: 1986 civic si
hey chedda...love the work keep it up!!
i was wondering if i was to mail you my rear motor mount would you be able to so the same to the bushing??...very interested
i was wondering if i was to mail you my rear motor mount would you be able to so the same to the bushing??...very interested
#40
Posted 26 August 2012 - 10:29 PM
-
- Lives to modify
-
- Group: Vendors
- Location:Cranbrook, B.C, Canada
-
Drives: 1986 Honda Civic 2.2L LSD, Acura TL Aspec
View Garage
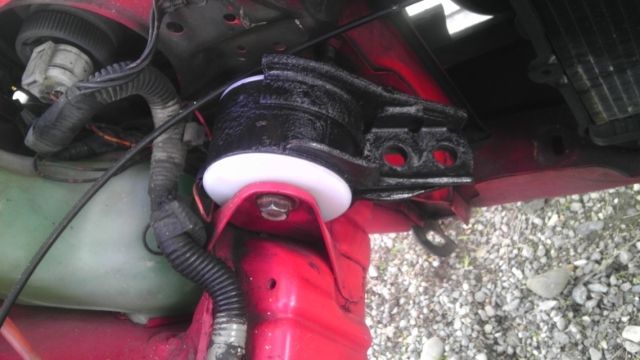
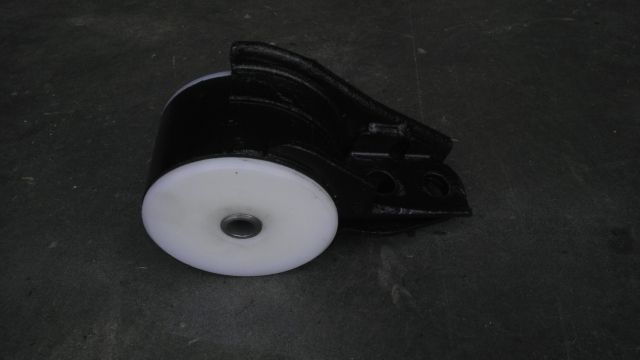
I had some problems with the motor, started to get some weird vibration so I pulled it out and now I am prepping it for a turbo.
Here was a few videos prior to me taking the motor out.

I am trying to come up with something for a rear mount. I don't recommend that we use the same materials that Im using now. I would almost say that we should look into a damper like many of the honda motors have. If we make that one too tight, it will vibrate the crap out of the car.
Here was a few videos prior to me taking the motor out.
I am trying to come up with something for a rear mount. I don't recommend that we use the same materials that Im using now. I would almost say that we should look into a damper like many of the honda motors have. If we make that one too tight, it will vibrate the crap out of the car.
#41
Posted 27 August 2012 - 12:06 PM
-

- Slowpoke
-
- Group: 2013 Contributor
- Location:Spokane, Washington
-
Drives: 86 Civic Si (project), 99 4Runner Limited, 2005 AstroVan
I am trying to come up with something for a rear mount. I don't recommend that we use the same materials that Im using now. I would almost say that we should look into a damper like many of the honda motors have. If we make that one too tight, it will vibrate the crap out of the car.
Yeah looking at your drivers side mount The material used seems way too stiff. The kakabox build used pourable urethane of an appropriate hardness after hollowing out the mounts.
The easy way IMO is to take your stock mount and squirt in some 3M Windo-Weld (this pic is from my project thread)

#42
Posted 27 August 2012 - 12:49 PM
-
- Lives to modify
-
- Group: Vendors
- Location:Cranbrook, B.C, Canada
-
Drives: 1986 Honda Civic 2.2L LSD, Acura TL Aspec
View Garage
Were all quite aware of the pourable stuff, that's what mine had prior to the uhmw. It was all falling out and looked like Shit after two years. The uhmw is a good substitute, it's a little rough, but so is the heavy duro hasport mounts. Mine were set up for racing . I have ran many cars with solid steel or aluminum mounts and these are a dream compared to those.
#43
Posted 27 August 2012 - 01:58 PM
-
- Slowpoke
-
- Group: 2013 Contributor
- Location:Spokane, Washington
-
Drives: 86 Civic Si (project), 99 4Runner Limited, 2005 AstroVan
Were all quite aware of the pourable stuff, that's what mine had prior to the uhmw. It was all falling out and looked like Shit after two years. The uhmw is a good substitute, it's a little rough, but so is the heavy duro hasport mounts. Mine were set up for racing . I have ran many cars with solid steel or aluminum mounts and these are a dream compared to those.
I thought it would be helpful to be reminded of the windo-weld option since you have (I assume) two harder side mounts and a loose rear mount currently, and have vibration issues. It's fast and cheap at least.
Never heard of engine mount dampers before so I looked them up and it doesn't seem like it would be too difficult for someone like yourself to fab the mounts. Cheers if you go that route!
#44
Posted 27 August 2012 - 04:21 PM
-
- Lives to modify
-
- Group: Vendors
- Location:Cranbrook, B.C, Canada
-
Drives: 1986 Honda Civic 2.2L LSD, Acura TL Aspec
View Garage
Yeah its exactly how it sounds, just a oil filled shock that mounts the subframe to the motor . Thanks for reminding me, I may do that for the rear. I was thinking a custom mount with pourable poly, mainly for cosmetics.
#45
Posted 15 December 2012 - 01:19 AM
-
- Lives to modify
-
- Group: Vendors
- Location:Cranbrook, B.C, Canada
-
Drives: 1986 Honda Civic 2.2L LSD, Acura TL Aspec
View Garage
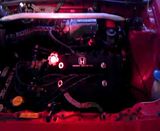
Woah I haven't updated this for a long time. I guess I will start with an explanation of what happened with the last motor. The motor essentially ran it self dry for one reason, a dipstick. Once I finished rebuilding my new motor, I put in the dipstick from the old motor, thinking that everything would be just fine. Well I was wrong. I blew the oil pan gasket, and lost a little oil. Well at least I thought it was a little oil, in reality I had lost about 2 quarts. The dummy light never came on, of course. I checked the dipstick and it still read oil in between the lines, so I drove it up to the shop while leaking a little oil and took the oil pan off to check everything out. While under there I took off the main bearing caps because something didn't look right about my oil, well they had all been terribly worn down, to the point that it totalled the crank. Because the motor went without oil for a while, it also caused my cylinders to go dry, causing one of the rings to prematurely fail. Now this all comes back to the dip stick. I just recently found the other dipstick that came with the motor I built. I measured it next to the other dipstick I had and it was 1.5" shorter. This would have been fine if it would have been in the other dipstick tube, which was shorter as well. So when I checked the oil level, even the initial oil fill when the motor was rebuilt, it was quite a bit lower than what I thought. This all resulting in the motor to run dry and for me to one pissed off Nancy. I will have some photos up of my recent work when I get the chance.


Community Forum Software by IP.Board
Licensed to: Red Pepper Racing