Jump to content


87 Civic Si D Series Swap


  • You cannot reply to this topic
314 replies to this topic

#301
PuddleSkipper

  • Ecomodder/Hypermiler
  • PipPipPipPipPip
    • Group: 2014 Contributor
    • Drives: 87 Civic Si, 89 Civic LX, 00 Jeep Grand Cherokee, 84 Civic 1500S (R.I.P.), 85 Wagovan (R.I.P.), 84 Civic GL (R.I.P.)

Thought I would share some tips. When removing gaskets you can use paint remover. It's the same as gasket remover, just minus a different can and brush. Once you've carefully scraped off what you can you can wipe off the remaining paint remover and remove the larger areas with abrasive discs. I picked up this tip from a mobile mechanic at Harbor Freight. For the smaller areas I use Dremel brushes, it is best to use brass because it is softer and removes less material. You want to constantly be moving so that you don't remove too much material in one area creating room for gasket failure. Basically just don't sit in one spot.


DSC05261_zpso478en60.jpg


DSC05260_zpsdbuompa4.jpg


DSC05264_zpsbpwrezyv.jpg


Got some info off these two websites:

http://ls1tech.com/f...rface-need.html


Decided to use scotch brite pads and laquer thinner and it cleaned up fairly well (this is for a different project BTW)

DSC05254_zpswduh2kut.jpg


When I was cleaning the head surface I notice one of the valves was leaking so I had to do reseat the valves. Cleaned up the valves on a wire wheel on the bench grinder just like here:


Cylinder Head 105 - Valve Job Basics

Did the suction cup method which was not the best way of doing it. It was horrible method for these valves because of the divot on the bottom face of the valve. I tried using that Dap Poster stuff you can buy at Lowes to prevent the suction cup from spinning. It kinda worked, took forever though. Next time I will try a drill and a vacuum hose like it this method here:

EASY, HOW I LAPP & GRIND VALVES. THEY DONT TEACH THIS TRICK IN SCHOOL, ONLY OLDSKOOL.

https://www.youtube.com/watch?v=o_a-qowOnHo


Also worth mentioning is that I scratched the top side of the cylinder block, not sure how I did that because I don't believe that surface ever made contact with the floor I broke it down on. So now I use the wide blue tape on both the top of the block and the bottom of the cylinder head.


Tape%20Up%20Machine%20Surfaces_zpswyuvnq


After seating the valves I cleaned the cylinder head up for reassembly. I took it to the car wash and slathered it with Tide. It's not hot tanking but I am honestly impressed with the results! Sprayed a hot pressure wash a couple of feet away. Make sure you remove the bottom valve spring washers!


Also when I was working on the head I notice that one of the valves is always sticking out so you can't ever really lay the head flat without it resting on a valve. So I could have used a few sheets of cardboard but decided to go with an all rubber car mat. I happened to be at Goodwill when I found this

DSC05257_zpsgmzlewuk.jpg


It's a mat for cat litter made by Boots and Barkley and here's a link for it at Target

http://www.target.co...cB&gclsrc=aw.ds


#302
PuddleSkipper

  • Ecomodder/Hypermiler
  • PipPipPipPipPip
    • Group: 2014 Contributor
    • Drives: 87 Civic Si, 89 Civic LX, 00 Jeep Grand Cherokee, 84 Civic 1500S (R.I.P.), 85 Wagovan (R.I.P.), 84 Civic GL (R.I.P.)

Here is my favorite funnel! Got it from Kitchen Collections, what I love about it besides the fact that it is stainless steel is the fact that is has a narrow tube with a wide and flat funnel part. I means the funnel will sit in those spray bottles when you go to refill it with simple green or whatever you need to refill it with and you don't have to worry about spilling!


DSC05255_zpsnr7od9fe.jpg


http://www.kitchenco...el-funnel-01548


Here's another tip, when I pull off the pulley I used to put the key in a plastic bag but sometimes it would be difficult to find when I needed it so now I use a magnet to hold it to the inside of the pulley.

DSC05259_zps5hlclycu.jpg


Here's some stuff on interchangeability

The main relays are all pretty much the same, the only thing that is really different is the cover. If your main relay is acting up you can resolder the points on the circuit board, typically they just have a cracked solder joint due to expanding and contracting of heating and cooling as electricity is running through it. They get very warm. If you try that and it doesn't work, don't throw away the cover! You can just grab another relay from an EF or any main relay that has the same shape, usually they are brown on the bottom, pull the guts out of the EF case or whatever car you grabbed it from, pop it and plug it in and your good to go! Pictured below is an EF relay (L) and an 85-87 CRX/Civic Si or 1G Integra relay ®

DSC05330_zpskljkmkab.jpg

DSC05331_zpsokhvtljd.jpg


Also worth mentioning was that my Blacktop car recently died and I figured out it was the distributor. I had an 89 civic with a blown motor (DPFI D15B2) in it and was surprised that when I cross referenced the parts like the ignitor (some call it the ignition control module), ignition coil, the cap, rotor, the distributor cap gasket, it was the same part #'s! Even the distributor plugs were the same! The housings are different which is why I had to swap the parts. I am surprised this worked since one is DPFI and the other one is MPFI. Anyway, swapped the parts over and was back on the road next day! I think this might hold true for OBD0 Integras and Civics. Accords and preludes had different ignitors in them. This might hold true for newer OBD's but you have to do your research.


#303
PuddleSkipper

  • Ecomodder/Hypermiler
  • PipPipPipPipPip
    • Group: 2014 Contributor
    • Drives: 87 Civic Si, 89 Civic LX, 00 Jeep Grand Cherokee, 84 Civic 1500S (R.I.P.), 85 Wagovan (R.I.P.), 84 Civic GL (R.I.P.)

All right, still working on the EF, Started the swap on Dec 30 so a little disapointed I'm not done yet. Hoping to get it done and switch back to the 87 or maybe the 2G CRX. 

So this is my first swap, when I first tried to start it it wouldn't start. I sprayed ether in the air intake tube and it still wouldn't start, so not a fuel problem. Checked for spark, no spark, Checked power wire at coil, no power. Check for power on the rectangular plug on the fenderwell with the clear Yellow boot on it, it had power. I jumped a wire on the rectangular plug for the engine wire harness part and still didn't have power but then I touched the probe to the tach wire and I had power! I had made part of it into a piece that could be swapped out back to OBD0. The idea was that this harness could switch back and forth between OBD0 and OBD1. I think it was a waste of my time now and won't ever do it again.

Coil%20Extention_zpsf8skonem.jpg

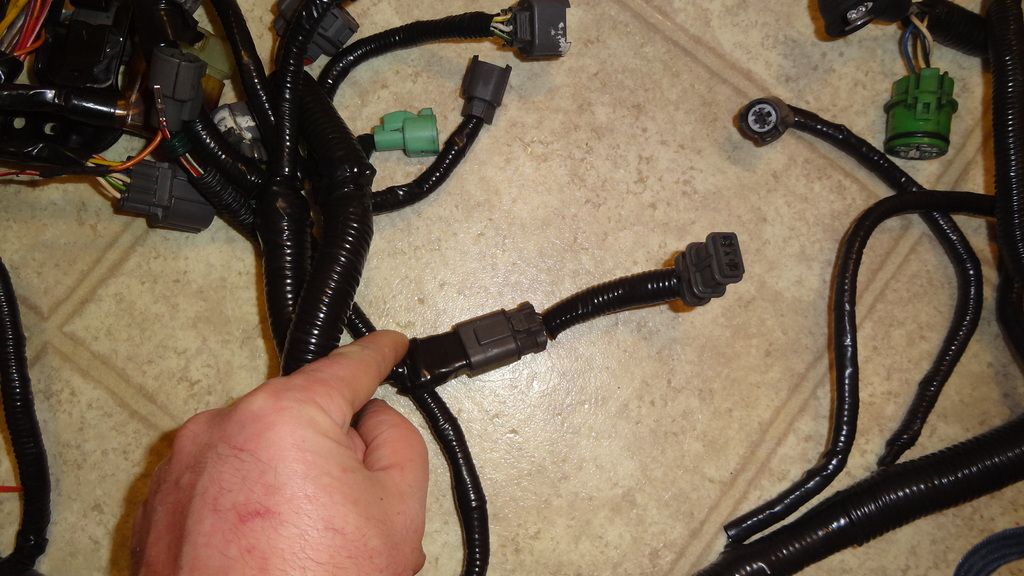
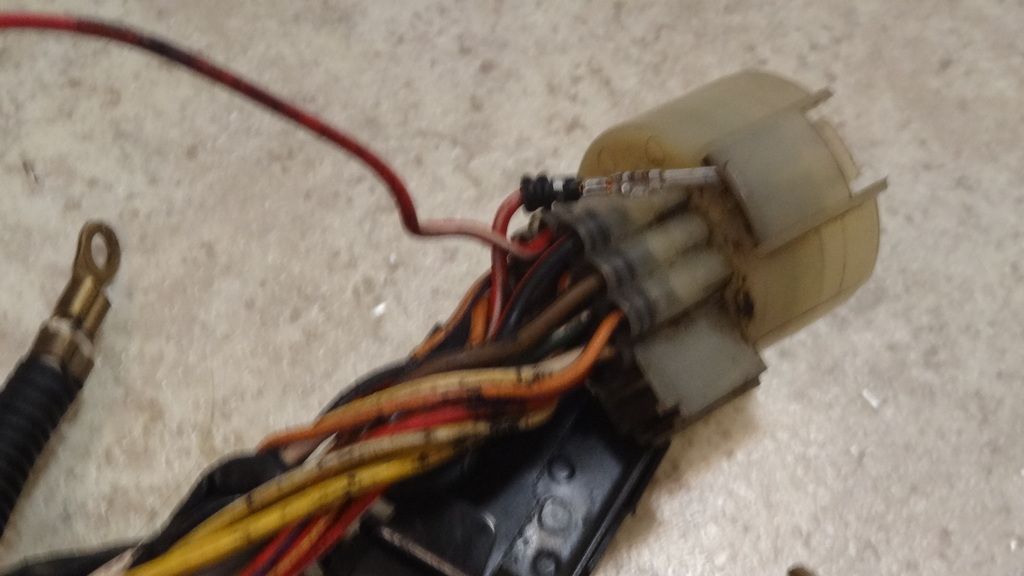
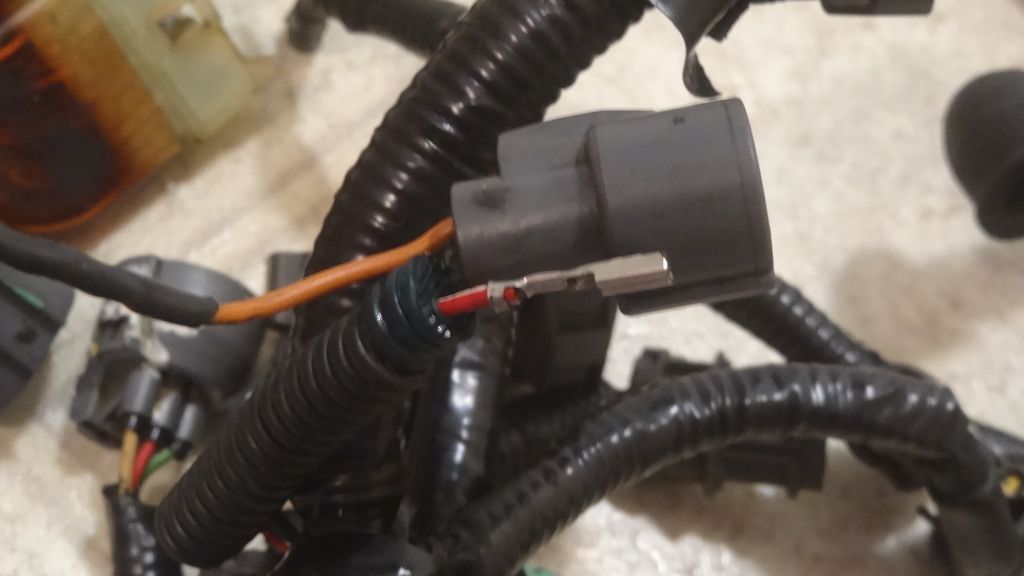
So now I had power to my coil, but it still wouldn't start. No spark. So I checked all the wires to the ECU pins by running power from the distributor plug and checking with a test light with a T pin (found in the sewing section at your local store) taped on it with electrical tape. The tip of the probe was too fat to fit into the ECU plugs and didn't feel like going through the back side of the plug. They were all right, then however I noticed that the wires didn't match up with the wires on the distributor plug! It is a retangular plug so I imagine I had it flipped when I looked at it to pin in my wires. It started! Sucess! But it ran really rough, and tons of black smoke out the tailpipe (running rich). One code on the ECU which was for the coolant temperature sensor, probably why it was running rich. Ran power from the shock tower to the ECU, tested with a test light and had power, ran power to the plug, specifically the pin for the TW sensor, at the shock tower for the engine wire harness. No power. I bypassed it with a TW wire I pulled from the wire harness of the D15B2 that used to be in it.

DSC05482_zpssv41c1yn.jpg

DSC05484_zpssbddqzem.jpgDSC05483_zpsck14cicv.jpg

Pulled the negative battery cable to clear the codes. No check engine codes on start up, jumped the Service Check Connector (SCC) and the check engine light came on? From what I read here that is normal and what is supposed to happen. If a CEL pops up when you turn the car on without jumping the SCC, then you actually have a code. Jumping the SCC will light up the CEL, however, it is only when it is blinking is when it has a code. I found that info here:


http://honda-tech.co...umpered-460808/


All right, so no codes now, still have to tear apart the wire harness and replace the wire, but it's still running rough. I do a vacuum test on one of the lines and there is no vacuum but it's running? It's the same vacuum line my Map sensor is hooked up to................oh, it's vacuum line between the EGR Control Solenoid and the EGR valve! Duh, it's only getting vacuum when the EGR valve kicks on! No wonder it was rich! I know I need to break out the timing light and when I do the timing is about 10 degrees past TDC and I can't get any more adjustment out of the distributor. I found a couple of  threads that said it had jumped a tooth. For me I had lined up the marks but when I tighted the idler pulley bolt that changed the mechanical timing. I moved it over a tooth and the distributor was finally firing where it should have with the timing light. It was still running rough and I could not get any more adjustment out of it. I questioned if I needed to go one more tooth over and then I found this:


http://honda-tech.co...timing-3213658/


So timing was right, it had fuel, but was still running rough. Still some black smoke out the tailpipe as well. So I did a power balance test. Pulling the plug on Cylinder 1 did nothing. I did a compression check with an extension on it (may lower the compression but not sure). Anyway compression was between 115 and 120 for all the other cylinders except #1 which had 80 lbs dry and 89 wet. Did a leak down test because I thought it might be the headgasket but it turned out to be the intake valves. Cylinder was at TDC and no valves were being pressed on. Bummer.


I did replace the head gasket and when I was cleaning the head mating surface up with laquer thinner I notice that some laquer thinner was leaking into the intake passage so I lapped the valves. The valve seats and valve lap surface had pitting in them, they were not rusty, just pitted. They were very difficult to lap because it took a lot of compound. Evidently cylinder #1 wasn't lapped or it's somehow got bent or was bent when I lapped it. Maybe I set it too hard on the bench? Who knows, so I'm getting another head rebuilt and I should be good! I'm very disapointed this happened, it's a JDM motor and they are supposed to test them before they send them out, also, it had a 1 year/unlimited mileage warranty. If I had installed this earlier I would have found this out and would have just warranted this out. Live and Learn. Next time I order a motor for a swap I will make sure that I am in a position I can run it before the warranty is up. I also decided to send the fuel injectors out to be cleaned to Pacific Fuel Injection. They clean them for between $15-$18 a piece, nice!


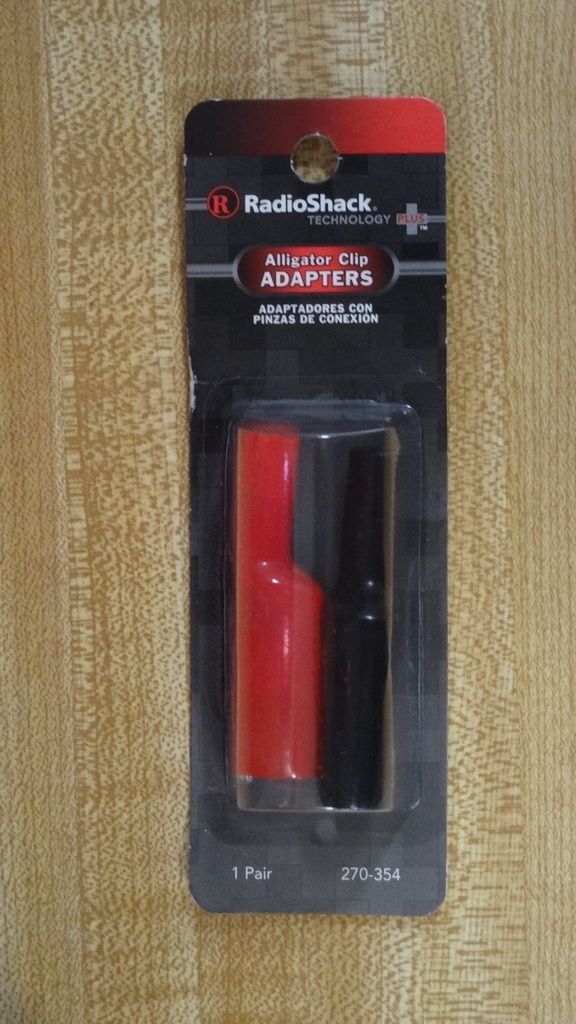
Anyway, if you are trying to trouble shoot electrical or build wire harnesses these alligator clips are invaluable! They go on the tips of your ohm meter and I think they are only $3 at radio shack!

DSC05452_zpsurbvyk4b.jpg


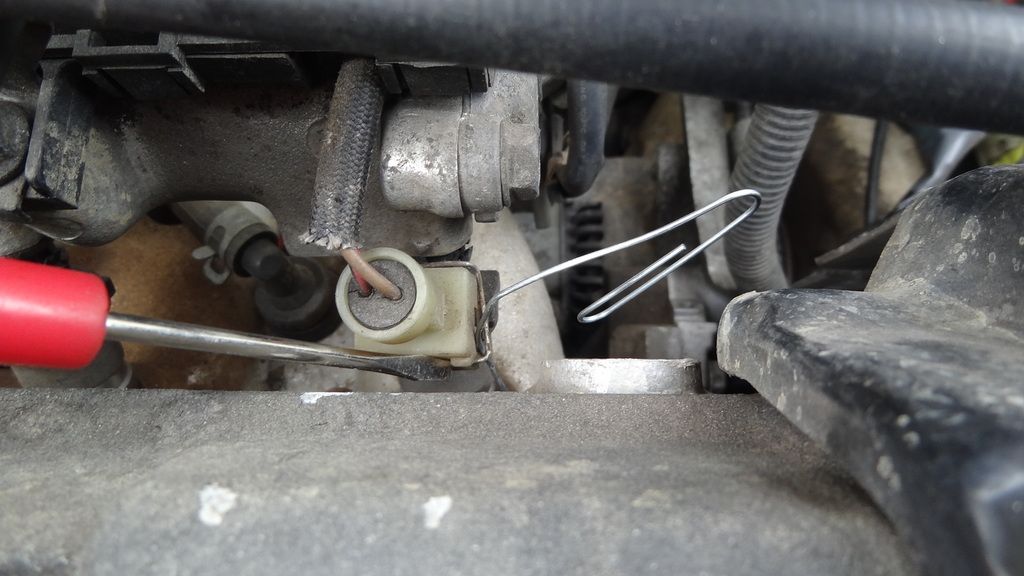
And I have always had trouble pulling the fuel injector clips but got a tip from a mechanic recently! I like using small zip ties the best, but here is a pic with a paper clip, you can really use anything though, even a chunk of wire would work. You just need a small screwdriver to pry it over and something like a ziptie or paper clip to hold it over. You probably only need to do one side and you can pry and pull the other side.

DSC05487_zpscrgp8rx6.jpg


Edit 2/3/16: Added stuff I forgot about the map sensor


#304
PuddleSkipper

  • Ecomodder/Hypermiler
  • PipPipPipPipPip
    • Group: 2014 Contributor
    • Drives: 87 Civic Si, 89 Civic LX, 00 Jeep Grand Cherokee, 84 Civic 1500S (R.I.P.), 85 Wagovan (R.I.P.), 84 Civic GL (R.I.P.)

Got my injectors cleaned, called around and most places were $25 an injector, one place was $30. Pacific Fuel Injection only charged $15-$18 depending on whether they had to replace the filter baskets and O-rings. So I took my injectors to Pacific Fuel Injection and had them cleaned. They said they had a hard time cleaning them up by just running cleaning solution through them and that they had to hit them with some ultra sonic to clean them the rest of the way up. They are the injectors that came on the JDM D15 VTEC-E. Total cost $67.68 which save me some $. They also said normally they replace the fuel injector pintles or maybe it was the pintle caps? but it was an odd size and they didn't have it in stock and I didn't have time to wait. That might be the difference between the CX/VX injectors (06164-P05-A02)and the SI/EX/DX/LX injectors (06164-P06-A02). They are supposed to flow the same according to this website:


http://www.hamotorsp...size-chart.html


Reflecting back to the intake valves, I did not get all the pits out of the valve face and valve seats (probably my first mistake), however, when I poured laquer thinner back into the bowls after I had seated them it looked like they were holding the laquer thinner. In the video link I posted above, I'll repost it, I found a better way to test them that I will do next time (I will also make sure all the pitting is removed). Oldskool Funk did it by using soapy water and blowing compressed air from the intake and exhaust ports.

EASY, HOW I LAPP & GRIND VALVES. THEY DONT TEACH THIS TRICK IN SCHOOL, ONLY OLDSKOOL.

https://www.youtube....h?v=o_a-qowOnHo


I also found a slightly different way to lap valves as well here (I'll never use the suction cup method again, it sucks!):

I H C ENGINE how to lap valves

https://www.youtube....h?v=Ov83xnTgaOY


The tool he is using looks like a modified version of this tool

http://www.goodson.c...e-Lapping-Tool/


Also I talked with the place that rebuilt my cylinder head and they said pitted exhaust seats are common, pitted intake valves seats are not common. When I did some researching I found a thread that refered to a coolant leak causing this


http://www.offshoreo...lves-seats.html


There was also another thread that talked about this on a volvo or bmw but I can't seem to find it. If you do a search for "pitting on valve seats coolant leak" quite a bit of stuff pops up.


#305
PuddleSkipper

  • Ecomodder/Hypermiler
  • PipPipPipPipPip
    • Group: 2014 Contributor
    • Drives: 87 Civic Si, 89 Civic LX, 00 Jeep Grand Cherokee, 84 Civic 1500S (R.I.P.), 85 Wagovan (R.I.P.), 84 Civic GL (R.I.P.)

Got it running last night and it runs good! Never had Vtec before but I think it kicked in? It felt like a little puff of air from behind that maybe moved me a bit quicker. :lol:  Alot quicker than my D15B2 anyway. I did pop a code for the O2 sensor. I suspect that running rich from the timing being off, the injectors being dirty, and cylinder #1 not completely firing probably made it pretty black. I looked on some stuff on how to clean an O2 sensor. There was one that used sandpaper and brake cleaner, kinda scary to me on a 5 wire O2 sensor ($200), and there was another one that said you need to soak it in gas over night and if there is anything left scrub it with a soft brush, so I'll do it that way. I am also going to ping the O2 wires just to make sure there is no short, just run 12 volt through them and look for voltage drop at the ECU plugs. If the wires are good, I will test the sheilding ground just to make sure I'm not getting interference. If I test the wires and they're good, and the O2 sensor cleans up fine, I will go through all the trouble shooting in the Helms manual. I saw it had a test harness to do these test, when I looked it up it was like $600 (cough, cough), um, I think I will make my own. An OBD1 ECU and 2 sets of OBD1 ECU pigtails and I should be good to go...........Another thought, I might want to clean the Catalytic converter as well. 

  How to Clean an Oxygen Sensor

http://www.doityours...oxygen-sensor#b


Another thing I ran into doing this which I thought was odd was that I could not find the vacuum hose for the PVC valve to the Intake manifold and a chunk of 3/8" vacuum line I used for the leak down test (for rings). I ended up going to 3 stores, finally Advanced Auto had what I needed. For the leak down test I found that it was easier for me to feel air on my cheek than on my calloused hands. Gates #27053 is the 3/8 vacuum line I used. I pulled the dipstick and slipped it over the dipstick tube and it's nice because it's right there in the front of the motor. For the PVC to Intake manifold hose I used Gates #27050 5/16" vacuum hose, fit perfect!


#306
PuddleSkipper

  • Ecomodder/Hypermiler
  • PipPipPipPipPip
    • Group: 2014 Contributor
    • Drives: 87 Civic Si, 89 Civic LX, 00 Jeep Grand Cherokee, 84 Civic 1500S (R.I.P.), 85 Wagovan (R.I.P.), 84 Civic GL (R.I.P.)

I checked the voltage from the O2 sensor plug to the ECU plugs or what the wires were tied into, realized there would be some loss, got +12 volts to all the ECU pins and other wires. The biggest voltage drop was from 12.29 to 12.16 volts to one of the ECU pins. I pulled the O2 sensor, it actually looked fairly clean? I did soak it in gas like the instructions and the next day there was a nice pile of carbon in the bottom of the jar. Once I installed it I drove it 40-45 mins back to my apt on the freeway and it did pop a code but it was 12 for the EGR valve(probably how I routed the vacuum lines), so SUCESS for cleaning the O2 sensor! So I wouldnt necessarily believe people like Eric the Car Guy when they say you shouldn't clean it, you should just replace it.


Man, reading codes for the ECU on OBD1 is alot different than OBD0, when I was first reading the code for the O2 sensor I actually thought it was a code 4 and a code 8 but didn't understand why one flashed slow and the other flashed quick with no pause in between. Definitely different than OBD0. Found this in one of the service manuals:

DSC05544_zpsmbrpunjv.jpg


And I also found in the service manual where it said the check engine light would come on, but not flash if there was no code present once the terminal was jumped.

DSC05543_zpstysgxxbz.jpg


Since this was the second time I put a head gasket on this motor, the first time I did it I was concerned I may have scratched or gouged the bottom of the head with the cylinder head dowel pins that were installed in the block. There wasn't really a way to line up the head visually that I could tell so it was a kinda guessing game. Not sure how others do it but this time I did it differently. I installed the cylinder head dowel pins first, laid the headgasket in place, the dowel pins kept it in the right spot. then I laid a couple sections of 1/2 oak dowel that I could place the Head on top of. This allowed me to move the head over the block without the head surface touching the cylinder head dowel pins. I then placed the two middle bolts in place, the front and the back one, turned them a couple times to grab some threads, then I lifted one side and pulled out the dowel, and did the same for the other side. This placed the head nearly perfect! Or at least very close.


DSC05494_zpsrkxun7tf.jpg


So I also noticed the oil smelled like gas, probably for all the reasons it was running rich and probably washing the cylinders.............so I changed to oil but left the oil filter alone. Also, I kept ending up with black spark plugs so next time I do this, instead of wasting money:

1) Going to just use the cheapest Walmart oil possible (in case I have to change it)

2) I would also run Walmart 10W40 in the tranny in case that has to get pulled out again

3) I'm either going to reuse antifreeze if I have some around that needs disposed of and change it out later (if it's winter time), or just use distilled water for the time being and when its all said and done with no issues, drain some of the water and add straight antifreeze.

4) Lastly I would recommend buying the Harbor Freight spark plug cleaner instead of buying new spark plugs. This motor does not like dirty plugs and I changed them 3X's. I bought one and it actually did a decent job. Just make sure you inspect the spark plugs and make sure there is no blasting media stuck between the porcelain and the metal jacket. I blew mine out with compressed air, then sprayed them off with brake cleaner and wiped them off with a blue shop towel.


Also forgot to mention that on the way home the car had a serious lack of power and acceleration. So it probably wasn't Vtec kicking in after all, probably just hard acceleration in a low gear. I need to ping the Vtec wires and the pressure switch with 12 volts just to make sure they are going to the right pins, but thinking it has more to do with the catalytic converter. I will test the catalytic converter with my Harbor Freight infrared temp gun on Monday and if it fails I'm taking a pipe to the catalytic converter and smashing out the honeycomb. Then I'll just run the EF catalytic converter instead of the test pipe I'm currently running.


#307
PuddleSkipper

  • Ecomodder/Hypermiler
  • PipPipPipPipPip
    • Group: 2014 Contributor
    • Drives: 87 Civic Si, 89 Civic LX, 00 Jeep Grand Cherokee, 84 Civic 1500S (R.I.P.), 85 Wagovan (R.I.P.), 84 Civic GL (R.I.P.)

Ok Tested the Catalytic converter. It was fine at idle, however, when I did a snap acceleration test (just pulled quick and hard on the throttle cable), it went beyond 10 psi which means it's bad. I was going to test it with my temp gun from harbor freight because I've read the temp differential from the inlet to the outlet can determine if it's bad, however, according to this  website the best way to test it is with a vacuum gauge which is why I did it that way. I used a Vibrant O2 Sensor Plug (#1195A), drilled it, tapped it for 1/4 NPT pipe threads and then installed a 1/4" adapter with the smallest barb I could find at Lowes to fit my vacuum gauge. I think it was Watts 3/16-in x 1/4-in Barb Fitting. So since my cat is bad I will be pulling it off and ramming a pipe through the honeycomb. I currently have a test pipe mounted where the EF catalytic converter used to be. Once I put the cat back on I want to use the test pipe to measure air/fuel ratios to see if it's consistent with stock readings. From what I read a/f ratios always needs to be done before the catalytic converter (unless your measuring the cat for efficiency), then I'll replace the test pipe with a cat again. I also did a fuel pressure test and tested the fuel pressure regulator as well. I found in the service manual that fuel pressure for an EG is between 40-47 psi with the vacuum hose removed and blocked off. Mine read 47 so it's good. I was debating on whether or not I should change to an OBD0 fuel pressure regulator but when I looked at the specs for the civic EF the fuel pressure is 36-41 psi. The reason I would have changed is the return line on the EG fpr is much smaller than the EF fpr and the EG fpr nipple points toward the firewall where as the EF fpr points toward the fenderwell. I made a temporary adapter to splice an EG fpr hose to the EF fpr hose but I guess I'll head back to lowes for some brass fittings to make something more permanent.

DSC05552_zpsdc8bvkw9.jpg

DSC05559_zpsnxlticy2.jpg


Catalytic Converter

http://www.aa1car.co...y/converter.htm


#308
PuddleSkipper

  • Ecomodder/Hypermiler
  • PipPipPipPipPip
    • Group: 2014 Contributor
    • Drives: 87 Civic Si, 89 Civic LX, 00 Jeep Grand Cherokee, 84 Civic 1500S (R.I.P.), 85 Wagovan (R.I.P.), 84 Civic GL (R.I.P.)

I posted the link where I got how to diagnose a bad catalytic converter above. Ironically yesterday I busted up 2 catalytic converters, in my daily driver (86 civic) one of the honeycombs busted loose and turned sideways, I found out in the 88-91 EF style catalytic converter there are actually 2 honeycombs in it with a space in between. I heard it rattling around and it would chink anytime I floored it. It wanted to die going up the hills though. CEL even came on, don't know what for, I never checked it, I never even cleared the code on the ECU, just busted out the honeycomb and replaced it and the code went away. On the catalytic converter for the 89 civic, D15Z1, it was dark out. When I shined a trouble light through it I could not see a thing. I made another tool, it probably wasn't necessary because I found a better way to do it. I put an air tool chuck on one of those O2 plugs. My idea was that I could rotate the motor so that all the exhaust valves were closed, plug the tail pipe, and hook it up to an air compressor set to a low setting looking and listening for air leaks in the exhaust. It would be easier done though with a smoker and a LED flashlight though.

DSC05618_zpsf1eh6dwz.jpg


I figured out a good way to tap an O2 sensor plug after a few tries or more, the problem I found is there is not really a way to grip it without messing up either the threads or the hex head. So start by drilling in it a drill press with the hex head in a drill press vice. Because the threads on pipe fittings are tapered you need to use a bigger drill bit than just sizing one up for end of the tap. If you just use a drill bit for the end of the tap your tap will bite off more than it can chew and you'll probably end up either wrecking the threads on you tap or breaking it off. I used 29/64". I think this is part way up on the taper.

DSC05621_zpsdomjb5tp.jpg

Once again, to get the tap straight I put the tap in the chuck of the drill bit, cranked the table up so that the tap put pressure on the O2 plug, then I had the key in the chuck which I held stationary while I slide the drill press vice counter clockwise. Tap from the hex side. I also have the O2 sensor plug in a weld on O2 sensor bung that allows me to wrench it in a vice without damaging the threads.

DSC05620_zpsfi1sd1kc.jpg

So once again I kept in in the O2 bung so I could vice it and cut the rest of the threads. It is a tapered tap so if you want your adapter to sit flush just run the tap in till the top of the cutting surfaces are level with the top of the hex head.

DSC05619_zps1xgqpjba.jpg

Here's something else I made, an emergency air compressor hose. I heard about one on CarTalk one time. The end that screws into the sparkplug hole is a sparkplug non fouler I believe. Disconnect the fuel pump relay and crank engine over to get the fuel out. Disconnect the ignition coil so you don't overheat it. Unscrew 1 spark plug. Blow out the part that fits into the spark plug hole so you don't get dirt in the combustion chamber and screw it in. Connect the hose. Clip the air chuck to the tire. Crank the engine over till you get the desired pressure. To keep the dirt out of it I store it in my car with aluminum foil over the spark plug non fouler and it connected to the bigger hose.

DSC05633_zpsrpc1rwtd.jpg

Also this is the fuel pressure regulator adapter I made from brass fittings at Lowes. I could have gone with an aftermarket fpr and I could have just changed the barb on the end to match what was on my car, however, this will be a DD, so being able to go to the parts store for a new fpr and getting it back on the road asap is a priority. I imagine I'll have to do the same thing to the 87 when I get around to it because I am sure it has the same bigger fuel pressure regulator hose that my EF has.

Fuel%20Pressure%20Regulator%20adapter%20

Fuel%20Pressure%20Regulator%20adapter%20


#309
windraver

  • Slowpoke
  • PipPip
    • Group: 2016 Contributor
    • Drives: '86 CRX si

Question! Since we both went with tucking our radiator filler necks, I recently discovered that the K-series actually fill their coolant via a filler neck that is attached to the head. I found that some aftermarket actually make this for the K-series and wondered if you've seen anything for the D-series


https://www.jhpusa.c...0&idcategory=98

84.jpg


In theory, we should be able to fabricate this ourselves if we needed to. This would basically remove the need to move our hood latch ever single time we need to fill the coolant. Thoughts?


Edit: Found an example of someone doing this for the D-Series:

https://imageshack.com/i/pmqRBoDSj


Edited by windraver, 23 March 2016 - 08:39 PM.


#310
PuddleSkipper

  • Ecomodder/Hypermiler
  • PipPipPipPipPip
    • Group: 2014 Contributor
    • Drives: 87 Civic Si, 89 Civic LX, 00 Jeep Grand Cherokee, 84 Civic 1500S (R.I.P.), 85 Wagovan (R.I.P.), 84 Civic GL (R.I.P.)

Nice! That's a great idea! Thanks for mentioning it! My idea was to turn a 92-00 civic half width radiator into the 1300/HF radiator by fabbing the mounts on the bottom and adding the filler neck to the radiator as well like the BeCool half width radiator. There are some Youtube videos on brazing aluminum, which can be done with a propane torch attached to some map sensor gas (burns hotter). It is almost welding. If you were to go this route shown above you could probably braze it as well. Due to the angle though I think I would start with the EF water neck though still since it is at a 90 degree to the block.


#311
anjin

  • redlinefever
  • PipPipPipPipPip
    • Group: 2014 Contributor
    • Location:Perth, Western Australia
    • Drives: 83 crx - kakaburra,83 gen1 Noir, 87 EF7 Glasstop crx, 83 gen 1 rebuild replica mugen racecar
    • Image Gallery
    Garage View Garage

That is a smart idea, particularly when you are supposed to check the radiator id full at the head anyway. I'll particularly like that on the kakaburra as I have an eg radiator in and it is a pain the check, being well under the radiator 'support'


anjin aka Ian

"I can't believe it - Ive just been passed by a sh!tbox"

#312
PuddleSkipper

  • Ecomodder/Hypermiler
  • PipPipPipPipPip
    • Group: 2014 Contributor
    • Drives: 87 Civic Si, 89 Civic LX, 00 Jeep Grand Cherokee, 84 Civic 1500S (R.I.P.), 85 Wagovan (R.I.P.), 84 Civic GL (R.I.P.)

I finally figured out why my car kept running rich and setting off the O2 sensor light. The JDM intake manifold uses the same TB as the the rest of the OBD1 D series motors (bigger) with the exception of the CX and VX. My ECU is the 49 state federal emissions wideband ecu. This means it was seeing a smaller TB because that's what it's programmed for but in reality it was much bigger. This was creating a lean condition which it was adding fuel and running rich to fix this lean condition. I didn't know how long it would take to mess up the cat, but I did know that it would burn it up so I ran it without one till I needed to pass. Some of the HC numbers were in the 500-600 ppm range without a cat. Once I replace the O2 sensor and ran a second cat I passed with a 16! The VX has a cat that bolts right up to the exhaust manifold like the old EW. Also worth noting is that if your going to buy a JDM VTEC-E (JDM D15Z1) you definitely need the VX manifold, or you could try to locate the JDM VTEC-E computer but that might be a longshot. As long as the 5 wire wideband ecu cannot be chipped and tuned, you'll never be able to get that intake manifold to work. I would rob the parts off of it you can like injectors, fuel rail, ect.. Basically whatever will bolt up to the VX manifold. A CX manifold is also a great place to get parts, but keep in mind that manifold doesn't have an EGR valve. Otherwise you'll just have to find a D15Z1 to rebuild.


Differences in TB's, bolt pattern, shape, and size

D15Z1 (L) JDM ® 

DSC05677_zpsnylp1kmc.jpg


Differences in Intake manifolds

DSC05841_zps0shzxf5r.jpg


The JDM manifold (L) does not have the vacume port or the screw hole for the purge control valve.

DSC05836_zpsk4oylxis.jpg


Also the Idle Air Control Valves have a different bolt pattern as well:


JDM

DSC05838_zpsmkxwonx5.jpg


D15Z1

DSC05839_zpsdo2onwhf.jpg


#313
PuddleSkipper

  • Ecomodder/Hypermiler
  • PipPipPipPipPip
    • Group: 2014 Contributor
    • Drives: 87 Civic Si, 89 Civic LX, 00 Jeep Grand Cherokee, 84 Civic 1500S (R.I.P.), 85 Wagovan (R.I.P.), 84 Civic GL (R.I.P.)

So after that I gave up on making the O2 sensor worked, I was on my second trip permit and if I didn't pass I would either have to tow my car through DEQ to get it there or wait a year to apply for another trip permit. Your only allowed 2 trip permits per 1 yr period (starting from the date of the first trip permit) I ordered a new one from BarMac on ebay. I found some threads that said the A09 wideband O2 sensor was the same as L1H1 O2 sensor. On the metal part that the wires connect to there should be a stamp.


L1H1

DSC05831_zps6aneyapw.jpg


LZ A09 (or just A09)

DSC05820_zpsfku2wplz.jpg


#314
PuddleSkipper

  • Ecomodder/Hypermiler
  • PipPipPipPipPip
    • Group: 2014 Contributor
    • Drives: 87 Civic Si, 89 Civic LX, 00 Jeep Grand Cherokee, 84 Civic 1500S (R.I.P.), 85 Wagovan (R.I.P.), 84 Civic GL (R.I.P.)

Took tons of pics so that you would know if your A09 replacement was authentic.

DSC05810_zpseamqx8xn.jpg

DSC05814_zpswjdb8xcf.jpgDSC05815_zpsgsrirlze.jpgDSC05816_zpstg0v358p.jpgDSC05817_zpseubjb8k1.jpgDSC05818_zpsvcaaj6nu.jpgDSC05821_zps2xivexca.jpgDSC05822_zpsmo2gdefz.jpgDSC05827_zps1akvappe.jpg


#315
PuddleSkipper

  • Ecomodder/Hypermiler
  • PipPipPipPipPip
    • Group: 2014 Contributor
    • Drives: 87 Civic Si, 89 Civic LX, 00 Jeep Grand Cherokee, 84 Civic 1500S (R.I.P.), 85 Wagovan (R.I.P.), 84 Civic GL (R.I.P.)

Finally got around to scanning a flattened Hatchbach SI Relay Bracket. The CRX SI and the CRX carbed relay bracket are pretty much the same. The SI and the carbed version for the hatchbach are different. And there is no relay bracket for the wagon and the sedan so I believe the 3G SI relay bracket should bolt into both the wagon and the sedan just fine. You should be able to just print this, cut it out and trace it on a piece of sheet metal. Once you cut it out from the sheetmetal you can throw a few bends in it and solder some nuts on the back and you should be good to go.

Relay%20Bracket%201_zpsgwc6qx9j.jpg


And for the bends here is what the original bracket looks like

DSC03189_zps78998e98.jpg