 Sign In
 Create Account
Damn 4 hours of reading. Looks very good. I'm very impressed with you fabrication skills. I wish I had the time and garage space to get this involved with my CRX project. It's going to be a shame to get that car dirty.

The Kakabox Build
Started by kakabox, Sep 23 2005 04:31 PM
2000 replies to this topic
#706
 Posted 27 January 2007 - 07:01 PM
-

- Honda Driver
-

- Group: Members
- Location:North Central, WV
-
Drives: 00 CRV AWD 5 SPD , 85 AE86 (Project)
 Back to top
#707
Posted 27 January 2007 - 10:59 PM
-

- www.morrobaycyclery.com
-
- Group: Members
- Location:CenCAL
-
Drives: '87 CRX Si, '90 Isuzu Impulse XS-Lotus Tuned, '94 Civic LX-EG8 (RIP 05 SEP 2009), '71 SL350-K1, '82 CM450E, '72 Yami LT2, '75 Yami DT400B, '02 cobra racing 50cc
-
Image Gallery
QUOTE (bigk3000 @ Jan 23 2006, 07:23 PM) <{POST_SNAPBACK}>
ah yeas Kroil.. my dad gets that from work.. its an aircraft lube, penetrates 1 millionth of an inch. works pretty good .. i've never used it for cleaning tho
wow thats intriging. im a machinist, the parts i manufacture have tolerance in the tenths of thousandths... .000X. what is the decimal representation of a millionth?? and that is so tight fitting, it would have to be pressed fit.
this project looks great! im inpressed with the work that you have put into it. now i look at my 215,000 miles oil grimed si and feel all ashamed i havent cleaned her yet.
QUOTE (bigk3000 @ Jan 31 2006, 04:54 PM) <{POST_SNAPBACK}>
40 foot burnouts put a baseball sized hole in the side of my d16 transmission.. LSD diffs dont like that
damn it! i was planning on putting a lsd in my crx. open diffs dont like to dog-leg but theyll go further that way than keeping both loose for the duration.
Edited by mordantly, 27 January 2007 - 11:05 PM.
MoRdAnTlY [Mr. Wolf '91 - '11]
1987 CRX SI D15A3 Goal: <12 Sec 1/4
1987 CRX SI D15A3 Goal: <12 Sec 1/4
QUOTE (cbstdscott)
There is no replacement for displacement... but dicking with the bottom end of a Honda is not very productive. Put your energy into the head, that is where power is made.
...Dicking with the vacuum lines is not how you adjust ignition timing. That requires loosening the three bolts that hold the distributor and twisting on it.
Scott
...Dicking with the vacuum lines is not how you adjust ignition timing. That requires loosening the three bolts that hold the distributor and twisting on it.
Scott
#708
Posted 03 February 2007 - 02:55 AM
-
- VOOM VOOM NO VTEC!!!!!!!!!
-
- Group: 2014 Contributor
- Location:SPRINGFELD,OREGON
-
Drives: 1987 civic sedan(sold) 1987 civic DX(sold) 1992 civic SI(sold) 1985 civic wagon 4wd(sold) 1986 civic std DD(Sold)1986 civic dx(sold)
-
Image Gallery

any up dates?
SACHR member be hate for who you are not loved for who your not.

Member in the Carburetion Nation
RIP GLEN
Member in the Carburetion Nation
RIP GLEN
#709
Posted 03 February 2007 - 03:18 AM
-
- Turd Polisher
-
- Group: 2012 Contributor
- Location:Seattle, WA 98115
-
Drives: from point 'A' to point 'B' daily.
-
Image Gallery
 View Garage
Shift Linkage Rebuild/Install
Rebuilding a crusty 'teg shifter linkage and installing the Kakashortshifter:
Typical crusty, broken down, exhaust heat baked, twenty + year old 'teg shift linkage ('86-'89 'teg for the D16A1 swap):

All the little rubber and plastic bits and pieces necessary to restore the shifter to factory fresh condition are still available from Honda:

Here's where I bought the parts: http://www.hondaauto...ry5=SHIFT LEVER ...relatively inexpensive and they came right to my door!
Here's all the parts to restore the shifter:

Here's the Kakashortshifter w/the .75" extension below the shift ball to shorten the throw:

Read about how I made the short shifter here: http://www.redpepper...e...st&p=208739
After rebuilding the shifter lever, I took a tad bit of slop out of the tranny end "u-joint" by squeezing the rivets in my vice:

Then I installed an ES urethane bushing in the tranny end of the stiffening rod...first I tried pressing it in w/my fingers:

...ah, nope, the old fingers just weren't up to the task, so, I squeezed the bastard in using my vice:

...that worked!

...continued...
Rebuilding a crusty 'teg shifter linkage and installing the Kakashortshifter:
Typical crusty, broken down, exhaust heat baked, twenty + year old 'teg shift linkage ('86-'89 'teg for the D16A1 swap):
All the little rubber and plastic bits and pieces necessary to restore the shifter to factory fresh condition are still available from Honda:
Here's where I bought the parts: http://www.hondaauto...ry5=SHIFT LEVER ...relatively inexpensive and they came right to my door!
Here's all the parts to restore the shifter:
Here's the Kakashortshifter w/the .75" extension below the shift ball to shorten the throw:
Read about how I made the short shifter here: http://www.redpepper...e...st&p=208739
After rebuilding the shifter lever, I took a tad bit of slop out of the tranny end "u-joint" by squeezing the rivets in my vice:
Then I installed an ES urethane bushing in the tranny end of the stiffening rod...first I tried pressing it in w/my fingers:
...ah, nope, the old fingers just weren't up to the task, so, I squeezed the bastard in using my vice:
...that worked!
...continued...

#710
Posted 03 February 2007 - 03:19 AM
-
- Turd Polisher
-
- Group: 2012 Contributor
- Location:Seattle, WA 98115
-
Drives: from point 'A' to point 'B' daily.
-
Image Gallery
View Garage
...Shifter & Linkage Install continued:
So, now the shifter and linkage was ready for install. I attached the shifter end first...

Then I brushed a little anti-seize on the infamous "bitch" pin (I used a new one here) to aid disassembly later. Using an appropriate sized pin punch and a 3 lb. mini sledge, I drove the sucker home!

Done!

The shift knob is an oem Bullitt Mustang one that I just happened to have in stock (gee, imagine that!). The shift pattern is the same as the Honda's. For the Mustang knob to fit, I cut the 'teg's shift lever, and welded in a bolt w/the same thread size/pitch as the knob:

...and just to be extra "Smurfy", I used the wiper blade hold down nuts to cover the shift linkage bolts that protruded into the interior:


Cheers!
So, now the shifter and linkage was ready for install. I attached the shifter end first...
Then I brushed a little anti-seize on the infamous "bitch" pin (I used a new one here) to aid disassembly later. Using an appropriate sized pin punch and a 3 lb. mini sledge, I drove the sucker home!
Done!
The shift knob is an oem Bullitt Mustang one that I just happened to have in stock (gee, imagine that!). The shift pattern is the same as the Honda's. For the Mustang knob to fit, I cut the 'teg's shift lever, and welded in a bolt w/the same thread size/pitch as the knob:
...and just to be extra "Smurfy", I used the wiper blade hold down nuts to cover the shift linkage bolts that protruded into the interior:
Cheers!
#711
Posted 03 February 2007 - 03:30 AM
-
- VOOM VOOM NO VTEC!!!!!!!!!
-
- Group: 2014 Contributor
- Location:SPRINGFELD,OREGON
-
Drives: 1987 civic sedan(sold) 1987 civic DX(sold) 1992 civic SI(sold) 1985 civic wagon 4wd(sold) 1986 civic std DD(Sold)1986 civic dx(sold)
-
Image Gallery
nice!!!!!!!!!!!! i kinda of like the shift knob but i think it should of been the RPR shift knob.
SACHR member be hate for who you are not loved for who your not.
Member in the Carburetion Nation
RIP GLEN
Member in the Carburetion Nation
RIP GLEN
#712
Posted 04 February 2007 - 12:55 AM
-
- Save the pepper, save the world.
-
- Group: 2013 Contributor
- Location:Tooele UT
-
Drives: 1985 CRX SI/2003 Frontier SC/2006 Jetta TDI/2014 Civic SI
-
Image Gallery
View Garage
this it propbly the best trend ever, I love your project keep up the swel work!!!

#713
Posted 04 February 2007 - 09:23 AM
-

- Slowpoke
-
- Group: Members
- Location:St Louis MO
-
Drives: 87 crx si
i have followed this thread since i joined and have read and re-read time and time again. i only wish i had a 10th of the ability you do. incredible build and super clean. you don't see too many of these cars that are put together with as much care and attention to detail
[/url]
#714
Posted 04 February 2007 - 09:50 AM
-

- Can't stay off the race track!
-
- Group: 2010 Contributing Member
- Location:Maine
-
Drives: 1993 Civic EX Track Car, 1987 Crx Si Ice Racer, 1990 CRX Si Track Car, 2004 Dodge Durango
That engine reminds me of mine when I put it in the race car. It was so sad to see it get dirtier and dirtier as time went by!
#715
Posted 04 February 2007 - 12:31 PM
-
- Turd Polisher
-
- Group: 2012 Contributor
- Location:Seattle, WA 98115
-
Drives: from point 'A' to point 'B' daily.
-
Image Gallery
View Garage
QUOTE (Maine_Honda_Racer @ Feb 4 2007, 06:50 AM) <{POST_SNAPBACK}>
That engine reminds me of mine when I put it in the race car. It was so sad to see it get dirtier and dirtier as time went by!
I bet you had fun getting it dirty though!

Thanks for the compliments guys.
#716
Posted 04 February 2007 - 08:31 PM
-
- Team Tach-Out MotorSports
-
- Group: Members
- Location:Fontana, Ca
-
Drives: 1986 honda crx hf/si and my 86 civic hatchback si
-
Image Gallery
sorry if i missed this part, but i also got rid of my brake booster what did you do to the vacuum on the intake?
#717
Posted 06 February 2007 - 12:17 AM
-
- Turd Polisher
-
- Group: 2012 Contributor
- Location:Seattle, WA 98115
-
Drives: from point 'A' to point 'B' daily.
-
Image Gallery
View Garage
QUOTE (DSK 86CRX @ Feb 4 2007, 05:31 PM) <{POST_SNAPBACK}>
sorry if i missed this part, but i also got rid of my brake booster what did you do to the vacuum on the intake?
I removed the brake booster's vacuum port from of the intake mani (twist and pull)...

...and installed a 1/4 NPT allen head plug:

I just brushed thread sealant on the plug and screwed it in...it cut it's own threads.
#718
Posted 06 February 2007 - 01:27 PM
-
- Speedy
-
- Group: Members
- Location:vancouver bc
-
Drives: 02 rsx type S . 91 civic
what was that vacuum port for? and this thread is awsome..what do you think the breaking will be like without the booster?
#719
Posted 06 February 2007 - 03:45 PM
-
- Turd Polisher
-
- Group: 2012 Contributor
- Location:Seattle, WA 98115
-
Drives: from point 'A' to point 'B' daily.
-
Image Gallery
View Garage
QUOTE (fritt @ Feb 6 2007, 10:27 AM) <{POST_SNAPBACK}>
what was that vacuum port for? and this thread is awsome..what do you think the breaking will be like without the booster?
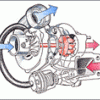
Port was for the brake booster vacuum line. The brakes will perform better than oem (due to the 'teg swap's larger front rotors) with a stiffer than oem pedal (w/more feel) requiring a little more leg effort than oem (due to lack of vacuum assist, i.e., no booster).
Thanks.
#720
Posted 06 February 2007 - 03:51 PM
-
- In the left lane
-
- Group: Members
- Location:muscle shoals, al
-
Drives: 2005 Subaru Legacy GT, 1986 civic si, 1990 civic wagon. 1979 civic 1200
have you considered swapping the 7/8" teg master cylinder for a G3teg 15/16" or 1"? my 7/8" is not in great shape, and I have been thinking about going up a size or two.
wes g.


Community Forum Software by IP.Board
Licensed to: Red Pepper Racing