 Sign In
 Create Account
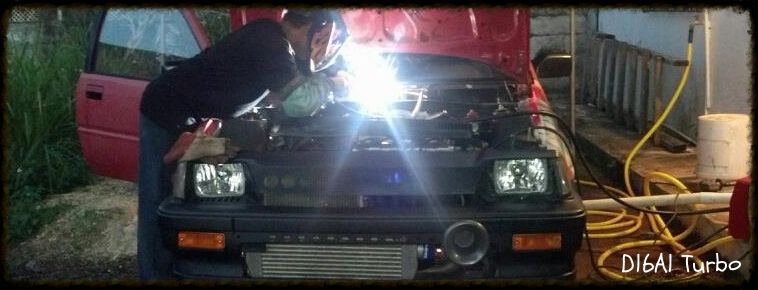
Those seats fit in nice. You've inspired me to go crazy with my Frankenstein build.

The Kakabox Build
Started by kakabox, Sep 23 2005 04:31 PM
2000 replies to this topic
#571
 Posted 22 October 2006 - 02:49 AM
-

- In the left lane
-

- Group: Contributing Member
- Location:Puerto Rico
-
Drives: 84' Honda CIvic HB, 93 Honda Accord EX Wagon
 View Garage
 Back to top
#572
Posted 22 October 2006 - 03:16 AM
-
- Turd Polisher
-
- Group: 2012 Contributor
- Location:Seattle, WA 98115
-
Drives: from point 'A' to point 'B' daily.
-
Image Gallery
View Garage
QUOTE (1gcvcb18 @ Oct 22 2006, 12:49 AM)
Those seats fit in nice. You've inspired me to go crazy with my Frankenstein build.
It's the right time of year to build a Frankenstein.


#573
Posted 22 October 2006 - 05:03 AM
-
- All work and no play makes LXNDR a dull boy. All work and no...
-
- Group: Members
- Location:Seattle, WA
-
Drives: like a maniac
-
Image Gallery
QUOTE (kakabox @ Oct 21 2006, 11:35 PM)
Ok, is it my imagination, or are two "dick heads" riding in the Kakabox?
All you need are some clear vinyl covers for "protection". I happen to know a guy that could make those for you, but you'd have to pay him extra because rubbing up against these seats could be hazardous.
Edited by lxndr, 22 October 2006 - 05:07 AM.
#574
Posted 25 October 2006 - 01:31 AM
-
- Speedy
-
- Group: Members
- Location:Victoriaz British Columbia
-
Drives: NZDM? 85' Civic Hatch LX- D16A1,92 Toyota Soarer Big Single and a Bunch of Other Stuff
what ever happened to being holed up in the garage for a week? uh uh. dont make me jump on the clipper and steal your car.
#575
Posted 25 October 2006 - 09:43 AM
-
- Turd Polisher
-
- Group: 2012 Contributor
- Location:Seattle, WA 98115
-
Drives: from point 'A' to point 'B' daily.
-
Image Gallery
View Garage
QUOTE (Richard @ Oct 24 2006, 11:31 PM)
what ever happened to being holed up in the garage for a week? uh uh. dont make me jump on the clipper and steal your car.
Dude, where have you been...that was 8+ weeks ago: been there, did that!
Life gets in the way of the build!
 No worries, daily progress (sometimes small, but progress all the same) continues to be made...it'll get done!
#576
Posted 26 October 2006 - 01:10 AM
-
- VOOM VOOM NO VTEC!!!!!!!!!
-
- Group: 2014 Contributor
- Location:SPRINGFELD,OREGON
-
Drives: 1987 civic sedan(sold) 1987 civic DX(sold) 1992 civic SI(sold) 1985 civic wagon 4wd(sold) 1986 civic std DD(Sold)1986 civic dx(sold)
-
Image Gallery

QUOTE (kakabox @ Oct 21 2006, 11:35 PM)


i like them
SACHR member be hate for who you are not loved for who your not.

Member in the Carburetion Nation
RIP GLEN
Member in the Carburetion Nation
RIP GLEN
#577
Posted 26 October 2006 - 11:05 PM
-

- Nothing's stock at this house . . .
-
- Group: Contributing Member
- Location:Kansas
-
Drives: 90 Civic Si, 89 Civic Si, 16 Pilot, 13 Ruckus
-
Image Gallery
QUOTE (CRXfanatic @ Oct 19 2006, 06:45 AM)
I'm not knocking the wheel tire package you have at all. You definitely have the right idea. I LOVE it and would love to have it for summer/ax use. I love Toyo for offering such a cool tire size. The Yok AVSi used to come in 195/55-14 which was sweet. A 195/45-14 is just too cool.
I second that. Toyo has always offered unusual sizes. They also offer the T1-R in a 225/40R14 that would be sweet on the right wheels.
KAKA-- any chance we could get a picture of your car a bit further away so we can see how the wheel/tire combo looks on the car? I know you don't have the suspension finished and all, but can we sneak a peek?
FWIW, this is without question the best build thread I've seen anywhere. Anywhere.
Awesome job!
Mike
No power . . . no weight
#578
Posted 02 November 2006 - 02:31 AM
-
- Turd Polisher
-
- Group: 2012 Contributor
- Location:Seattle, WA 98115
-
Drives: from point 'A' to point 'B' daily.
-
Image Gallery
View Garage
Two Steps Fwd, One Step Back...
Since the Kakabox will now be powered by a '88-'89 'teg blacktop (I purchased lxndr's blacktop D16 from his rex), all the wiring changes I did for the browntop I was going to install, are now undone (read about the brown-top wiring here: http://www.redpepper...ndpost&p=261830 )
As a result, the Kakabox is in the process of being wired for a blacktop (I'll do a write-up when it's done):


One of the requirements for running a blacktop is wiring in a Vehicle Speed Sensor (VSS). I did a search on "Vehicle Speed Sensor" and found this thread: http://www.redpepper...topic=28464&hl= ...which leads you to lxndr's VSS swap write up in his gallery: http://www.redpepper...ry/v/lxndr/vss/
...and this link to another good VSS install write-up:
http://rallybeater.c...r-gaugevss.html
From the VSS write-up: "The VSS tells the ECU how fast the vehicle is moving. The VSS sensor is built into the speedometer, and basically just converts the mechanical signal from the transmission into a digital pulse for the ECU."
The USDM 3g Si never came w/a VSS speedo, so, I had to either adapt a VSS to my existing speedo, or replace my speedo w/one that has VSS.
Well, it wasn't simple, or straight forward...
First of all, I needed a VSS speedo that had the same speedo face screw spacing as my 3g Si. After reading lxndr's VSS swap info and measuring the 3g Si's screw spacing, it looked like I needed a CRX HF VSS speedo. The HF VSS speedo has the same 0.85" face screw spacing, and the same "7 and 2 (o'clock)" spacing for mounting the speedo into housing as my 3g Si.
Here is a pic of a HF VSS speedo from lxndr's gallery showing the 0.85" screw spacing:

...and here's my 3g Si's face w/the same screw spacing...note the position of the trip meter reset pluger compared to the HF's above (more on that later):

Here's the back of the 3g Si speedo showing no VSS:

Thanks to lxndr's excellent inventory of VSS speedos, (he happened to have a HF VSS speedo in stock!) in twenty minutes I had one in my hands:

...the HF VSS speedo is on the right; the 3g Si on the left. You can see the VSS's two electrical "lugs" sticking out from the bottom of the speedo head, and you can see the common 7 & 2 spacing for the housing screws.
Remember the trip meter plunger? The HF has a pluger that doesn't stick out as far as the 3g Si's, so I couldn't use the HF speedo w/o modification because the pluger will not go thru the hole in the 3g Si's speedometer face.

...the HF is on the right...
The plugers had to be swapped:


...3g Si trip meter reset pluger now mounted to the HF VSS speedo.
...continued
Since the Kakabox will now be powered by a '88-'89 'teg blacktop (I purchased lxndr's blacktop D16 from his rex), all the wiring changes I did for the browntop I was going to install, are now undone (read about the brown-top wiring here: http://www.redpepper...ndpost&p=261830 )
As a result, the Kakabox is in the process of being wired for a blacktop (I'll do a write-up when it's done):
One of the requirements for running a blacktop is wiring in a Vehicle Speed Sensor (VSS). I did a search on "Vehicle Speed Sensor" and found this thread: http://www.redpepper...topic=28464&hl= ...which leads you to lxndr's VSS swap write up in his gallery: http://www.redpepper...ry/v/lxndr/vss/
...and this link to another good VSS install write-up:
http://rallybeater.c...r-gaugevss.html
From the VSS write-up: "The VSS tells the ECU how fast the vehicle is moving. The VSS sensor is built into the speedometer, and basically just converts the mechanical signal from the transmission into a digital pulse for the ECU."
The USDM 3g Si never came w/a VSS speedo, so, I had to either adapt a VSS to my existing speedo, or replace my speedo w/one that has VSS.
Well, it wasn't simple, or straight forward...
First of all, I needed a VSS speedo that had the same speedo face screw spacing as my 3g Si. After reading lxndr's VSS swap info and measuring the 3g Si's screw spacing, it looked like I needed a CRX HF VSS speedo. The HF VSS speedo has the same 0.85" face screw spacing, and the same "7 and 2 (o'clock)" spacing for mounting the speedo into housing as my 3g Si.
Here is a pic of a HF VSS speedo from lxndr's gallery showing the 0.85" screw spacing:
...and here's my 3g Si's face w/the same screw spacing...note the position of the trip meter reset pluger compared to the HF's above (more on that later):
Here's the back of the 3g Si speedo showing no VSS:
Thanks to lxndr's excellent inventory of VSS speedos, (he happened to have a HF VSS speedo in stock!) in twenty minutes I had one in my hands:
...the HF VSS speedo is on the right; the 3g Si on the left. You can see the VSS's two electrical "lugs" sticking out from the bottom of the speedo head, and you can see the common 7 & 2 spacing for the housing screws.
Remember the trip meter plunger? The HF has a pluger that doesn't stick out as far as the 3g Si's, so I couldn't use the HF speedo w/o modification because the pluger will not go thru the hole in the 3g Si's speedometer face.
...the HF is on the right...
The plugers had to be swapped:
...3g Si trip meter reset pluger now mounted to the HF VSS speedo.
...continued
#579
Posted 02 November 2006 - 02:32 AM
-
- Turd Polisher
-
- Group: 2012 Contributor
- Location:Seattle, WA 98115
-
Drives: from point 'A' to point 'B' daily.
-
Image Gallery
View Garage
Now the trip meter pluger will fit thru the face of the speedo...BUT, the HF VSS speedo will not fit in the 3g Si gauge housing because it was never designed for a VSS speedo...see, no holes for the two VSS wire terminals and the speedo housing is smaller:

Clearance "windows" were Dremeled out to provide clearance for the VSS wire lugs and the slightly wider speedo body:


After cutting out the "windows", the HF VSS speedo fits the housing perfectly and the two wires can be connected to the VSS:

One wire goes to ground. I used one of the factory grounds under the dash (the black wire):

...the other wire goes to the '88-'89 'teg ecu, pin B-16:

According to lxndr, it makes no difference which wire is grounded; he ran his car each way and reported that the switching the wires had no effect on the way the engine ran.
That's it, the Kakabox speedo now has VSS.
The rest of the wiring for the black top will be finished soon.
Cheers!
Clearance "windows" were Dremeled out to provide clearance for the VSS wire lugs and the slightly wider speedo body:
After cutting out the "windows", the HF VSS speedo fits the housing perfectly and the two wires can be connected to the VSS:
One wire goes to ground. I used one of the factory grounds under the dash (the black wire):
...the other wire goes to the '88-'89 'teg ecu, pin B-16:
According to lxndr, it makes no difference which wire is grounded; he ran his car each way and reported that the switching the wires had no effect on the way the engine ran.
That's it, the Kakabox speedo now has VSS.
The rest of the wiring for the black top will be finished soon.
Cheers!
#580
Posted 02 November 2006 - 09:10 AM
-
- Dual Mikunis Rule
-
- Group: 2011 Contributing Member
- Location:Utica, MI
-
Drives: 1987 CRX DX, 2001 Subaru 2.5RS, 2004 Accord EX, 1983 Honda VT500FT
-
Image Gallery
View Garage
That's good stuff. I had to do the same thing to my bud's 86 Si when we put a b16 in it. I used a vss from an 88-91 Civic...
I eagerly await your update on electronic advance wiring mods...
I eagerly await your update on electronic advance wiring mods...
"If Honda does not race there is no Honda." -Soichiro Honda

#581
Posted 02 November 2006 - 09:45 AM
-

- tinker, tinker....BOOOOOOM!!!! then I run around
-
- Group: Contributing Mod
- Location:Hurst, Texas
-
Drives: Don't, because they don't run and I am a crappy mechanic.
-
Image Gallery
View Garage
kakabox, I have to say, I really enjoy going through this thread. You are very complete with your writeup. This is what I enjoy, the fact that you are using and showing a lot of great things that someone who is doing a build can do portions at a time.
Great work.
Great work.
Honda, because it's hard to look baller in your mom's Volvo.
The entire tool selection at Sears or the contents of a Snap-On truck will do you no good if you do not know how to use them.
The entire tool selection at Sears or the contents of a Snap-On truck will do you no good if you do not know how to use them.
#582
Posted 02 November 2006 - 10:28 AM
-

- Slowpoke
-
- Group: Members
- Location:Boerne (San Antonio)
-
Drives: Mini cooper honda crx si
uh oh, just curious but is it not rusted in the spare tire well??????? I had a sunfroof problem where water sat back there and I took the carpet out only to find a bunch of rust...
edit: NVM I just saw how far you are and the inside looks amazing!
im curious, how did you get the fuzzy stuff out from the back?
edit: NVM I just saw how far you are and the inside looks amazing!
im curious, how did you get the fuzzy stuff out from the back?
Edited by justintime, 02 November 2006 - 10:34 AM.
#583
Posted 02 November 2006 - 11:03 AM
-
- Turd Polisher
-
- Group: 2012 Contributor
- Location:Seattle, WA 98115
-
Drives: from point 'A' to point 'B' daily.
-
Image Gallery
View Garage
QUOTE (justintime @ Nov 2 2006, 08:28 AM)
uh oh, just curious but is it not rusted in the spare tire well??????? I had a sunfroof problem where water sat back there and I took the carpet out only to find a bunch of rust...
edit: NVM I just saw how far you are and the inside looks amazing!
im curious, how did you get the fuzzy stuff out from the back?
edit: NVM I just saw how far you are and the inside looks amazing!
im curious, how did you get the fuzzy stuff out from the back?
No, no rust in the spare tire well.

One thing you can do is remove the rubber body plug that is underneath the spare. That plug is at the lowest point in the well and will drain out any standing water. Just leave that plug out and that will greatly reduce, if not completely eliminate the standing water. You might have to chip away the sound tar to get at the plug, however. Just use a cold chisel or steel putty knife.
If by "fuzzy stuff" you mean all the factory sound tar, I used a cold chisel and putty knife w/a hammer to chip it off. If you chisel "across" the floor you sometimes get lucky and large sheets of the tar will come off at once. It did take me a lot of time, however. Some people use dry ice to freeze the tar first before chiseling off...I did not.
After I had removed the sound tar, I spent about 10+ hrs sanding the floor pan smooth w/80 grit:

...I had no finger prints left after that!
#584
Posted 02 November 2006 - 11:14 AM
-
- Slowpoke
-
- Group: Members
- Location:Boerne (San Antonio)
-
Drives: Mini cooper honda crx si
thanks alot! thats very good to know =] that sound tar has been a pain to get off. that looks great btw!
i'm curious but what paint are you using? Ive been sanding and chipping away all day and am pretty close to finishing the inside =]
i'm curious but what paint are you using? Ive been sanding and chipping away all day and am pretty close to finishing the inside =]
#585
Posted 12 November 2006 - 03:22 AM
-
- Turd Polisher
-
- Group: 2012 Contributor
- Location:Seattle, WA 98115
-
Drives: from point 'A' to point 'B' daily.
-
Image Gallery
View Garage
QUOTE (justintime @ Nov 2 2006, 09:14 AM)
i'm curious but what paint are you using? Ive been sanding and chipping away all day and am pretty close to finishing the inside =]
One brush coat of Rustoleum Semi-Gloss Black (thinned w/acetone to make it flow better) followed by several spray coats of VHT Epoxy Paint (rattle can): Satin Black.


Community Forum Software by IP.Board
Licensed to: Red Pepper Racing