Jump to content


Final Bump Steer Correction Kit


  • You cannot reply to this topic
124 replies to this topic

#1
firstgencrx

  • This thing should fit!
  • PipPipPipPipPip
    • Group: 2013 Contributor
    • Location:opɐɹoloƆ 'suılloƆ ʇɹoℲ
I decided to make a new thread for this only because the old one was getting full.

After working on this for what seemed like forever, I finally came up with a kit that I'm happy with. It uses 5/8" heat-treated 4140 Chromoly tapered center studs, and 5/8" Chromoly rod ends. The washers, spacers, and rod end adapters are all machined from 300 series stainless steel. I also use slot nuts with cotter pins instead of nylocks. I tried to incorporate as many suggestions as I could from the original post.

The spacers allow for elevation adjustments in 0.045" increments. The kit comes with enough spacers to adjust to all possible elevation combinations derived from my bump steer data collection. The kit includes a specially made safety washer at the top to satisfy the sanctioned bodies who require it for all rod ends used in single shear.

The kit fits the 84-87 1G CRX and 3G CIVIC, and the 86-89 1G Integra. Oddly enough, it also fits the 79-89 Accord, the 73-83 CIVIC, and the 79-87 Prelude. Of course, my bump steer data collection is only good for the 1G/3G CRX/CIVIC and 1G Integra.

I'm hoping this bump steer kit will be useful to the group. Here are some picks.

The whole kit:


The bottom slot nut is 1/2-20, and the top slot nut is 5/8-18. Close-up of one side assembled:


I was able to find a pre-made Chromoly tapered stud that was close to what I wanted. I then re-machined the taper to fit the eyelet in the steering arm of the knuckle, cut the ends off to length (because they where too long), and cross drilled them for cotter pins. Here is the tapered stud with my modifications:


The rod end is threaded into the stainless adapter, and them made permanent (thanks to the TIG welder). It can not be removed. There was no room for a jam nut, so it had to "become one" with the adapter to be safe. Here is a close-up of the modified Chromoly rod end with it's stainless adapter:


Here is a shot with a new OEM rod end for comparison:


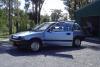
And mounted on the car:


I've decided to keep things simple and only offer the kit as you see it. My price at the moment is $139.00 plus ship. The price is to low, but I'll raise it later, so consider this an introductory price.

I built five sets. The set you see above in the pictures is mine (only because it has been banged around from fiddling with it), and one set is spoken for. At the moment, I only have three more sets that I can sell. If this seems like something people here would like, I can make more and keep them in stock. I only need to sell three or four sets every six months or so to make it worth my while.

If anyone is interested, just let me know.

Take care all,

David

P.S. Post #10 has a list of people who are interested in a kit. I'll keep it updated. Thanks everyone for your interest!!!
Sharing with others what I do for myself!

My H22 CRX Project

Posted Image

#2
1styearSI

  • first year SI
  • PipPipPipPip
    • Group: 2012 Contributor
    • Location:mooresville nc
    • Drives: 86 civic SI SOLDI, 92 accord ex SOLD,84 yamaha virago 95 FIREBIRD FORMULA RAM AIR,2014 civic lx
    • Image Gallery
    Garage View Garage
NICE WORK!! wink.gif

#3
keithg

  • Slowpoke
  • PipPip
    • Group: 2011 Contributing Member
    • Location:Phoenix, AZ
    • Drives: SCCA FP/GTL 1985 Honda CRX (EW)
Very nice, I will take a set!
Please email or PM me your preferred method of payment with shipping to 85040.
Thanks,
keith at hasport dot com
Keith Gillespie
Hasport Performance
www.hasport.com

#4
Madkore

  • Leadfoot
  • PipPipPipPipPip
    • Group: 2014 Contributor
    • Location:Los Angeles, California, USA
    • Drives: 1984 Honda Civic Si - For smiles and laughs, Original Owner, 1966 Ford Mustang - 5 speed trans, 4 wheel disks, 1968 Ford F250 - Big Ugly
    • Image Gallery
Once again, I am in awe.......

Nice Work as always David......

I'm good for a set.

Let me know your PP info.

MK
You're Mad!

Well thank God for that, 'cause if I wasn't, this would probably have never worked.

Captain Jack Sparrow

#5
fat_85_civic

  • In the left lane
  • PipPipPip
    • Group: 2012 Contributor
    • Location:Wollongong, Australia
    • Drives: 85 Civic 1500S - ZC converted
    • Image Gallery
    Garage View Garage
PM'ed

#6
DEIVIONCRX

  • Demon Of All Trades
  • PipPipPipPipPipPip
    • Group: 2013 Contributor
    • Location:Oklahoma
    • Drives: 87 Civic Si, 88 Civic DX, 90 CRX DX, 80 Trans Am, 10 Fit Sport
    • Image Gallery
    Garage View Garage
Dibs on one set.
Posted Image

#7
RETROCRX

  • I AM THE STIG!!!
  • PipPipPipPipPip
    • Group: Members
    • Location:Ontario Canada
    • Drives: 1987 CRX Si (with big flares and a ZC!) 2004 Civic SiR
    • Image Gallery
Crap, hope I'm not too late.....

Put my name on one set David!

Rob
Must.....go......racing.......


#8
Vicious

does one of those kits belong to me? remember my pm awhile back? just let me know

(\ /)
(O.o)
(> <)
This is Bunny. Copy Bunny into your signature to help him on his way to world domination.


Success is about standing out, not fitting in.


#9
ATXBoy

  • In the left lane
  • PipPipPip
    • Group: Contributing Member
    • Location:Austin, TX, United States
    • Drives: 1986 Honda Civic Si
    • Image Gallery
    Garage View Garage
looks absolutely marvelous David smile.gif I will be getting a set from you eventually smile.gif maybe i can do a sweet double order for a double adj. p/h/b aswell!

Fabian smile.gif

#10
firstgencrx

  • This thing should fit!
  • PipPipPipPipPip
    • Group: 2013 Contributor
    • Location:opɐɹoloƆ 'suılloƆ ʇɹoℲ
Thanks for the interest. I am selling a few more than the last three, so what I'll do is immediately start another short run of six more sets. I need to be careful how many I make only because the material costs for these are unusually high, and I don't want to be sitting on a whole bunch of them. If there are more people that would like to be a part of the second batch, let me know as soon as you can before I order parts on Monday afternoon. If a couple more people jump in, I can make more than six sets for this second run. I should have the small second run of these done in about a week, only because it takes that long to get my rod ends.

So far, these are the people I have that want a bump steer kit:

1. David (me, firstgencrx)
2. Marcos (Vicious) Paid and Shipped *
3. Keith (keithg) Paid and Shipped *
4. Luke (fat_85_civic) Paid and Shipped *
5. Bill (Madkore) Paid and Shipped *

A second run I can start immediately:
6. Rob (RETROCRX) Paid and Shipped *
7. Jay (jsgprod) Paid and Shipped *
8. J. (kakabox) Paid and Shipped *
9. Colin (ef91) Paid and Shipped *
10. Julian (87MugenProCR-X) Paid and Shipped *
11. Erwin (toxicshit) Paid and Shipped *
12. Buford (Buford) X 2 Paid and Shipped *
13. Tony (RexKrazy)
14. Franky (cahitapower) Paid and Shipped *
15. TribalHatch Paid and Shipped *
16. -TJ Paid and Shipped *
17. Andrew (ANHB)
18. rolandinacrx Paid and Shipped *
19. John (supertwins)

There is always a chance that someone at the last minute will need to wait. If that happens then the next person on the list will get a set instead.

David
Sharing with others what I do for myself!

My H22 CRX Project

Posted Image

#11
Greg Gauper

  • Leadfoot
  • PipPipPipPipPip
    • Group: Members
    • Location:Hubertus, Wisconsin
    • Drives: '84 Civic (SCCA G-Prod, moved to H-Prod in 2008
Looks great!
You say you have to TIG the rod end into the adapter because there is no room for the jam nut...
Did you consider using a 'thin' jam nut like one of these:
http://www.pegasusau...p?Product=AN316
They are about 1/2 the thickness of a regular jam nut.

I assume that since rod end is TIG'd to the adapter you have to throw them both away when they where out or get damaged...

Could the adapter be set up so that the rod end bottoms out prior to hitting the shoulder of the rod end? I would think a combination of bottoming out plus red Loctite would keep it from going anywhere, but would still permit field replacement of the rod end, and it would save a welding step.

Lastly, did you consider using Metric female rod ends to eliminate the adapter, and just machining a bushing to to handle the difference between the shaft diameter and the ID of the rod end? http://www.aurorabea...le/default.html

Edited by Greg Gauper, 27 June 2009 - 11:35 AM.

2011 SCCA H-Production National Champion

#12
firstgencrx

  • This thing should fit!
  • PipPipPipPipPip
    • Group: 2013 Contributor
    • Location:opɐɹoloƆ 'suılloƆ ʇɹoℲ
Thanks Greg,

I can understand why you are making these suggestions. Believe me, I had all of the same thoughts. Then as I got into this, each was shot down, one at a time. I also understand that your motivation for even bringing up these ideas is to help me make things simpler. Simple is always good! tongue.gif

The main reason developing this kit took so long is the fact that these little cars just don't lend themselves to a bump steer kit. It's probably why you don't see any. I haven't anyway. I will try and address your thoughts as I go:

QUOTE (Greg Gauper @ Jun 27 2009, 10:34 AM) <{POST_SNAPBACK}>
Looks great!
You say you have to TIG the rod end into the adapter because there is no room for the jam nut...
Did you consider using a 'thin' jam nut like one of these:
http://www.pegasusau...p?Product=AN316
They are about 1/2 the thickness of a regular jam nut.


I would have loved to use a jam nut, but there is just no room. The arm on the steering rack is so long, it eliminates any real length on the threaded end of the rod end. The absolute longest thread length on the end of the rod end that I can have that works with a stock steering rack arm is only one diameter. The threaded end of the rod end is cut down to one diameter of thread length before being threaded into the adapter. Even a thin jam jut would leave too little thread engagement of the rod end. The one diameter I do get is almost twice the strength of the steering rack arm, so no concerns on strength.

QUOTE (Greg Gauper @ Jun 27 2009, 10:34 AM) <{POST_SNAPBACK}>
I assume that since rod end is TIG'd to the adapter you have to throw them both away when they where out or get damaged...

Could the adapter be set up so that the rod end bottoms out prior to hitting the shoulder of the rod end? I would think a combination of bottoming out plus red Loctite would keep it from going anywhere, but would still permit field replacement of the rod end, and it would save a welding step.


The rod end is very tightly bottomed out into the adapter. I also considered using the Red Loctite, but my concern was with heat. I know that the Red Loctite is rated to 300 degrees before it releases, but the welding is a sure thing. There are a couple of folks here that run pretty hot, and because I have no control over how people use this thing, I felt I needed to do what I could to help insure their safety.

QUOTE (Greg Gauper @ Jun 27 2009, 10:34 AM) <{POST_SNAPBACK}>
Lastly, did you consider using Metric female rod ends to eliminate the adapter, and just machining a bushing to to handle the difference between the shaft diameter and the ID of the rod end? http://www.aurorabea...le/default.html


I did look at several ways to use a female rod end. The tapered Chromoly center stud does a lot of work in single shear. The 5/8" stud is more than strong enough to do the job. I considered using a 1/2" stud, but after looking harder at it, the strength was just not there. The 12mm is even smaller, so no way. If I could buy a 12mm x 1.25 female threaded rod end with a 5/8" hole in the ball, I would be all over it. In a nutshell, the 1/2" or 12mm stud would never be strong enough. I did consider using a female 5/8" Chromoly rod end and making a thread reducer, but I still would have needed to cut the threaded end down due to the long steering rack arm. Both methods where about the same amount of work.

I spent a lot of time figuring this out. This kit is truly custom and not friendly from a manufacturing standpoint. I'm sure in the past, others have tried to develop something like this, and quickly found out it was just not practical. You could make it a little simpler by using a 5/8" bolt and drilling out the eyelet on the steering arm. But you still need to deal with the rod end and adapter. Most of the challenge in creating this kit was in figuring out the rod end and its adapter.

I would have loved to create something simple that used off the shelf parts that can be easily replaced. But hey, if that was possible, there would be kits out there already.

David
Sharing with others what I do for myself!

My H22 CRX Project

Posted Image

#13
DEIVIONCRX

  • Demon Of All Trades
  • PipPipPipPipPipPip
    • Group: 2013 Contributor
    • Location:Oklahoma
    • Drives: 87 Civic Si, 88 Civic DX, 90 CRX DX, 80 Trans Am, 10 Fit Sport
    • Image Gallery
    Garage View Garage
"Custom doesnt come in a box"
Posted Image

#14
flashmatrix

  • Leadfoot
  • PipPipPipPipPip
    • Group: 2010 Contributing Member
    • Location:Central FL.
    • Drives: Lexus GS300
Thats a great price for something of that caliber. Im intrested if theres gonna be another run after the 2nd.

"Your arms are too short to box with GOD."


#15
jsgprod

  • The Beach....The only place where salt LOWERS your blood pressur
  • PipPipPipPipPip
    • Group: 2009 Contributing Member
    • Location:Florida
    • Drives: 2017 Camaro 1LE and 2001 F250 SD
    • Image Gallery
QUOTE (firstgencrx @ Jun 27 2009, 12:27 PM) <{POST_SNAPBACK}>
There is always a chance that someone at the last minute will need to wait. If that happens then the next person on the list will get a set instead.

Thanks again. I'll start to contact the folks above. I should get to most of you today.

I need to get downstairs to the shop.....

David


Uhh, YEAH! You know I would like a set of these David.

I would have been all over this yesterday but I JUST got home from spending the last 29 hours in the hospital with my son. Seventeen of which had him on the operating table. Fixing to head back over there in a few minutes. He'll be fine but he's got a LOT of rehab ahead of him sad.gif .

Jay

If you love the Elise, drive a Se7en - Caterham or whatever...
It has even less content than the Elise, is less graceful looking
...and changes direction like a ping pong ball whacked by Thor.

scull+gif+1.gif

jsgprods Gallery